
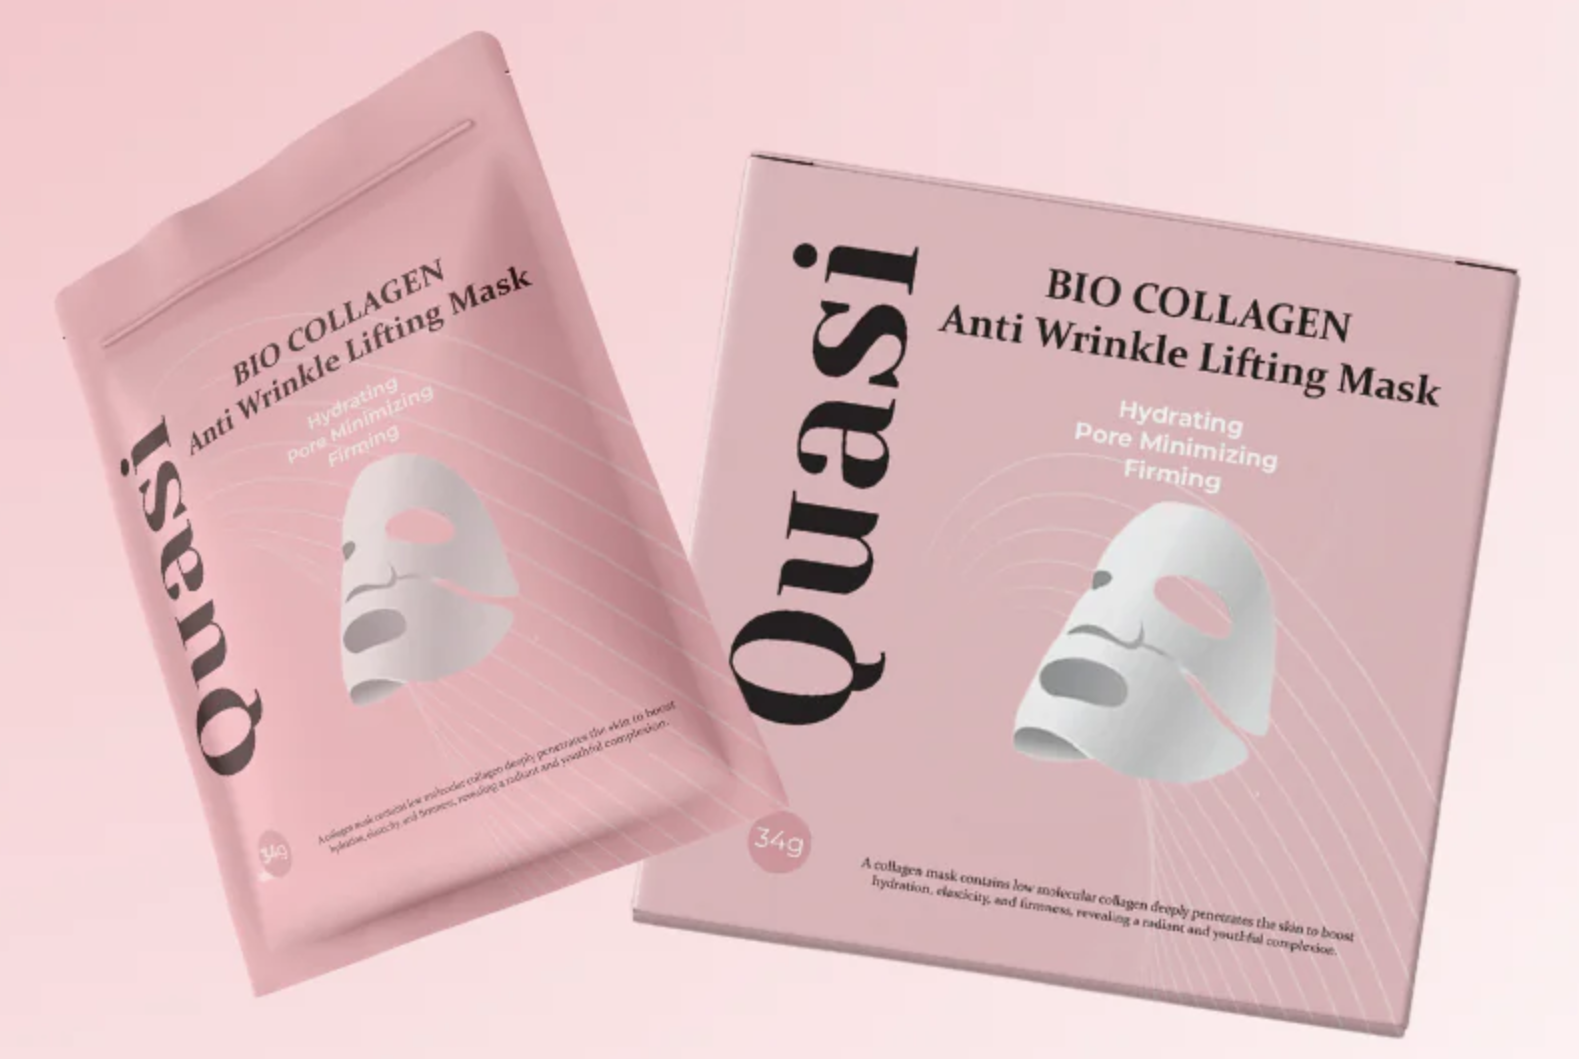
Biodance vs Quasi Bio Collagen Face Mask: Which is better?
Biodance and Quasi Bio Collagen Face Mask are overnight collagen face masks that promise to boost hydration, reduce the appearance of fine lines, and make your face look all dewy. But do they both work? And which one is better?
The Biodance Bio Collagen Face Mask and Official Quasi Bio Collagen Face Mask are overnight collagen face masks that promise to boost hydration, reduce the appearance of fine lines, and make your face look all dewy.
But do they both work? And which one is better?
I definitely have my own opinion on this, but today I’m looking at the science behind the face masks to work out which one is actually more effective.
Note: There are some affiliate links in this post. Clicking on them won’t cost you anything extra, it just helps me keep the site running :)

How hydrolysed collagen works
The Biodance Bio Collagen Mask and Quasi Bio Collagen Mask both use hydrolysed collagen, which is collagen that has been broken down into small peptides that are easy to mix into water-based products, like sheet masks.
These peptides primarily act as humectants that form a thin, hydrating film on the skin’s surface, and they’re pretty powerful.
Humectant: They are excellent at binding water to the very top layer of your skin.
Film-Former: They leave a thin, flexible, invisible layer on your skin.
This film, combined with the occlusive environment of the mask itself (the physical barrier that locks everything in), creates a hydration lockdown. This stops water from evaporating out of your skin.
The result? The top layer of your skin swells up with moisture, making it look instantly smoother, plumper, and bouncier. That satisfying firming effect you feel is incredible hydration.
| Feature | Biodance Bio-Collagen Real Deep Mask | Quasi Bio-Collagen Mask | Comparative summary |
|---|---|---|---|
| Key hydration technology | Hydrogel mask designed to solidify and turn transparent as ingredients are absorbed (can be worn up to 8 hours/overnight). | Hydrogel mask with similar long-wear technology, also designed to turn transparent as essence is absorbed. | Identical occlusion: both masks use the same core hydrogel delivery method, which is key to any long-term moisture benefit. |
| Collagen type | Ultra-low molecular weight collagen (as small as 243 Daltons). | Ultra-low molecular weight collagen. | Penetration advantage (claimed): Biodance publicly claims a smaller molecular size (243 Da), suggesting a slight edge in getting peptides into the upper epidermis. |
| Main hydrating agent | Oligo-hyaluronic acid (ultra-low molecular weight). | Oligo-hyaluronic acid (ultra-low molecular weight). | Identical efficacy: both use the most advanced, small-particle HA designed for deeper epidermal absorption. |
| Barrier-building ingredients | Galactomyces ferment filtrate, probiotics, niacinamide. | Galactomyces ferment filtrate, probiotics, niacinamide. | Identical long-term benefit: both formulas contain the same proven, gold-standard ingredients for skin brightening, barrier repair, and elasticity. |
| Specific clinical metrics | Publicly cited: 166% moisture increase after 150 hours. | No publicly cited metrics: marketing focuses on ingredients (collagen, niacinamide, ferments) and the hydrogel's visual transformation. | Key difference: Biodance offers specific, published (though proprietary) numbers, giving consumers a quantifiable reason to believe the mask's effects are long-lasting. |
How effective is hydrolysed collagen?
Hydrolysed collagen is a powerful moisturising agent, but it’s not a long-term solution.
It’s not a restorative product that rebuilds structural collagen deeper in the dermis. That’s because the collagen sits on the skin, rather than penetrating it.
Hydrolysed collagen actually only increases hydration for about two to four hours — the effect fades as the film breaks down.
By comparison, hyaluronic acid and ceramides work within the stratum corneum — the outer layer of the skin — to hold water and strengthen the lipid barrier. Their effects can last six to eight hours or longer, depending on concentration and delivery method.
Debunking claims
The Biodance Bio Collagen Mask specifically markets its formula as being superior in absorption due to the size of its key molecules:
Ultra-Low Molecular Weight Collagen: Biodance claims to use collagen peptides with a very small size (as low as 243 Daltons). The idea is that the smaller the molecule, the better it can penetrate the stratum corneum (the outermost layer of the skin). While topical collagen doesn't reach the deeper dermis to rebuild natural collagen, smaller peptides can theoretically penetrate the upper layers of the epidermis more effectively than larger ones, enhancing surface hydration and plumping.
Oligo-Hyaluronic Acid: Similarly, Biodance uses ultra-low molecular weight hyaluronic acid, which is designed to penetrate deeper into the epidermis compared to high molecular weight hyaluronic acid, providing moisture across multiple surface layers.
There is limited research about Quasi, but those masks also use the advanced, occlusive hydrogel technology that presses the essence against the skin for hours. This prolonged contact time greatly enhances the absorption of all its ingredients, which include similar high-efficacy components like niacinamide and ferments.
Biodance has a specific molecular advantage, but both masks deliver powerful ingredients through the common advantage of prolonged hydrogel application.
Mask adhesion and wear
Both use bio-cellulose or a similar material that is prized for its excellent adhesion and close fit. The mask starts thick and slowly dissolves into the skin over several hours (three or four hours, or overnight).
This unique process is highly effective at delivering intense moisture.


Lasting hydration
Based on their ingredient lists, both masks offer high levels of hydration and are effective at smoothing and calming the skin.
Biodance emphasises its precise low-molecular-weight ingredients, which the brand's own studies claim result in moisture effects that last for over 150 hours.
Quasi relies heavily on the proven benefits of its galactomyces and niacinamide blend for brightening and barrier strength, alongside its collagen.
Which mask is more effective?
Both the Biodance Bio Collagen Mask and the Official Quasi Bio Collagen Mask use high-quality, similar formulations and hydrogel technology.
The Biodance mask delivers excellent surface moisture and smoothing benefits through its collagen content, which provides a temporary plumping effect.
The Quasi mask, like Biodance, uses a blend of collagen, galactomyces ferment filtrate, and niacinamide to support hydration and the skin barrier.
Because both products share core barrier-repairing and hydrating ingredients, both masks are effective for intense surface hydration and barrier support during long wear.
Which one is better value?
Collagen face masks are not long-term fixes for aging skin, but that doesn’t mean they’re not a quality addition to your skincare routine. The hydration and dewy glow they provide is almost unparalleled, even if it is only a short-term solution.
Topical hyaluronic acid is also a short-term solution, but I wouldn’t stop using that.
At the end of the day, Quasi and Biodance are very similar.
The key differences are cost and marketing claims. Biodance has more scientific data to back claims, while Quasi only really has claims.
At the time of writing, Biodance cost $19 for four masks, while Quasi cost $21.99 for eight masks.
Personally, I preferred Quasi because the sheet mask itself was thicker and more durable than the Biodance mask. But that was just my experience.
My recommendation? Pick whichever one is on sale.
Which one is your favourite? Let me know in the comments below!
You Might Also Like…

How to get thicker hair and increase density with one lifestyle change
Is it possible to get thicker hair, naturally? Yes, and you don’t need any hair thickening products to make it work. This method is designed to give you thicker hair, permanently.
Is it possible to get thicker hair, naturally? Yes, and you don’t even need hair thickening products to make it work.
There are so many products promising to give you thick hair—shampoos, conditioners, ointments, laser treatments, red lights—you name it. Some of them probably work, some of them probably don’t, but these are like band-aids to the problem.
None of them will solve your hair problems forever because they don’t address the underlying issue. And that’s what we want, right? We want to thicken hair strands and increase hair density for glossier, hydrated, and fast-growing locks, and we want to maintain it forever.
I’m going to tell you what I did to solve this problem.
Please note, this can work for men and women but male pattern baldness is a separate issue with very different treatment options. I recommend seeing a specialist to address that particular concern.
Before
I used to spend 30 minutes in the shower detangling my hair with my fingers and a tangle teaser. For half an hour every wash day, and I’d pull clumps of hair out of my brush. I washed my hair every three or so days, and not because it was greasy, because it was so tangled that it looked awful. If I left it longer than that between washes, the detangling process could take 40 minutes.
It was exhausting and disheartening to see so much in my brush every time. I wanted long hair, but I couldn’t maintain it—the ends were like barbed wire, brittle and split, and I could only use really thick conditioners that were actually too heavy for my fine hair, but my hair wouldn’t detangle with anything lighter. The result was over-conditioned hair that was flat, but somehow very tangled after a few days.


How I fixed thin, brittle, tangled hair
I ate loads more protein.
When I say loads, I mean about 60g more protein in one day than I had been eating.
That’s literally it, that’s the big secret. Your hair is basically just protein, so it needs a source of protein to grow properly.
I upped my protein intake so much that my body initially had no idea what hit it. I went from about 30g of protein a day to more than 80g. It was a big change, my stomach felt weird, and I felt so full I didn’t know if I’d ever be hungry again.
That initial shock to the system lasted a week or two, but after that I felt great.
I started back at the gym after a break and, due to increased protein levels, I managed to avoid muscle pain. I slept better and I had more energy. It was about a month before I really noticed a difference in my hair.
For the first few weeks, I kept using thick protein-filled conditioners, because that’s what I assumed my hair would always need. But after a while, my hair started to reject them. I’d wash my hair and let it air dry, and it felt sticky and brittle. It was horrible, I didn’t understand what was going on.
Until one day. I was sick of trying all my different protein-infused masks, so I grabbed a small bottle of conditioner I once swiped from a hotel room and slathered it on.
My hair instantly detangled—the whole conditioning and detangling process took about five minutes. I let it air dry, like I normally would, and almost cried at the result. It was shiny, glossy, and it felt so thick and full. I realised I probably didn’t need the thick conditioning masks anymore. My hair suddenly had enough protein to grow properly and detangle itself, putting more on resulted in protein overload.
I went from losing piles of hair to hardly any at all, and my conditioning and detangling routine went from 30 minutes down to five. All it took was adding more protein to my diet.

After
I’m still figuring out the best ways to incorporate more protein into my diet—90g is a lot for someone who doesn’t eat meat. My hair isn’t as thick as it was when I was really going for the protein, but it hasn’t lost it either. I still spend less than ten minutes conditioning and detangling my hair. Sometimes I use protein masks, but rarely. Most of the time, I can get away with lighter and more generic products that don’t have strengthening or lengthening properties. If I’m really in a bind and I’m away from home, I can use hotel conditioner and my hair is easy to detangle and looks great.
I was also able to stop using leave in conditioners and curl creams altogether. My hair started curling great on its own.
How much protein should you eat?
I am not a doctor or a health care professional of any kind. Before you make health and lifestyle changes, you should always speak to a professional. This is what worked for me :)
The protein recommendation is 2g per 1kg of lean body mass.
To figure this out, weigh yourself first thing in the morning, before you eat anything. Determine your body weight percentage and reduce your weight by your body fat. There are a few ways to determine your body fat percentage—either use the charts below, or you can take your measurements and use a calculator like this one.


If you weigh 60kg and your body fat is 25 per cent, the equation would be: 60 x 0.25 = 15.
60 -15 = . Your lean body mass would be 45kg.
If you need 2g of protein per kg of lean body mass, the final equation would be: 45 x 2 = 90.
So, someone who weighs 60kg with 25 per cent body fat would need to eat about 90g of protein per day.
How to increase your protein intake
Protein intake is very individual and will depend on your specific circumstance. Vegans will probably find they have to eat a lot more food in general to meet the protein requirements, but it’s still very attainable no matter what your diet is.
Personally, I had no idea my protein levels were so low and I found it difficult to incorporate so much more into my diet. When I went to the supermarket, I found a lot of yogurts and cereals and fortified with protein. I also incorporated dehydrated vegetable proteins into meals and generally started paying more attention to the nutrition charts on food packaging.
It took about a month to see real results, but I was completely blown away once I realised it was working.
Have you tried this out, or do you swear by another method? Let me know in the comments below!
Like it? Pin it!

You might also like…

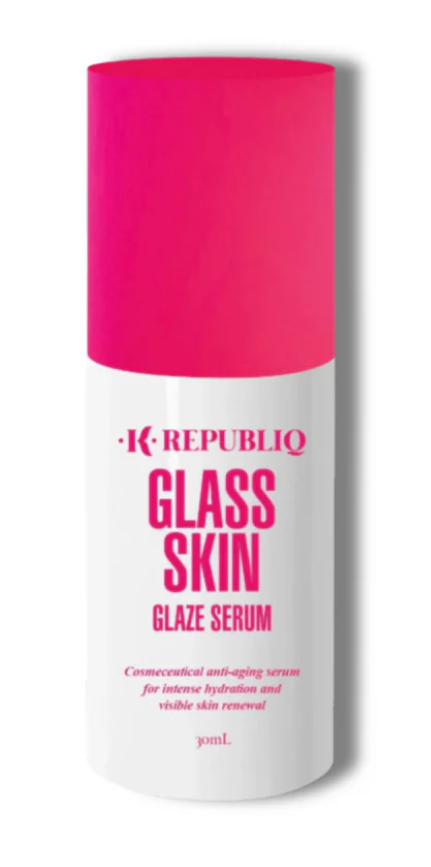
Does K Republiq Glass Skin Really Work: A Review
As with a lot of products on this site, I came across K Republic Glass Skin on social media and decided I had to try it out. I’m always so curious to see if new products and fads work — at the moment, it feels like every second ad on Instagram is for a new product promising to give me Korean-style glass skin. Does it really work? This is what happened.
Does K Republiq Glass Skin actually reduce the size of your pores and create a smooth complexion? I tried it out so you don’t have to.
As with a lot of products on this site, I came across K Republic Glass Skin on social media and decided I had to try it out. I’m always so curious to see if new products and fads work — at the moment, it feels like every second ad on Instagram is for a new product promising to give me Korean-style glass skin.
I decided to splash out on K Republiq because the products were created with extreme hydration in mind, which is what ultimately gives you that glass-like look. It’s basically advertised as a glass skin routine. The ingredients list is packed with polyglutamic acid which holds ten times more moisture in your skin than hyaluronic acid.
Bakuchiol helps reduce fine lines without drying your skin like retinol, niacinamide helps smooth pores, and vitamin C and squalene help illuminate and plump the skin. I was basically using all these products anyway, but now they’d be concentrated in single product line.
The ads feature women age 20 to 60 with pretty convincing before and after photos. Usually, models for these products are in their 20s with flawless skin, which doesn’t really show how well the products work for everyone. I’m in my 30s, which isn’t old, but my skin isn’t like it was in my 20s. I’m pasty pale, I live in a hot climate, I am very photosensitive, I have sun damage, mild rosacea, and fine lines. The product is marketed for people of for all ages and apparently it’s ten times more moisturising than hyaluronic acid.


K Republiq Glass Skin: A Review
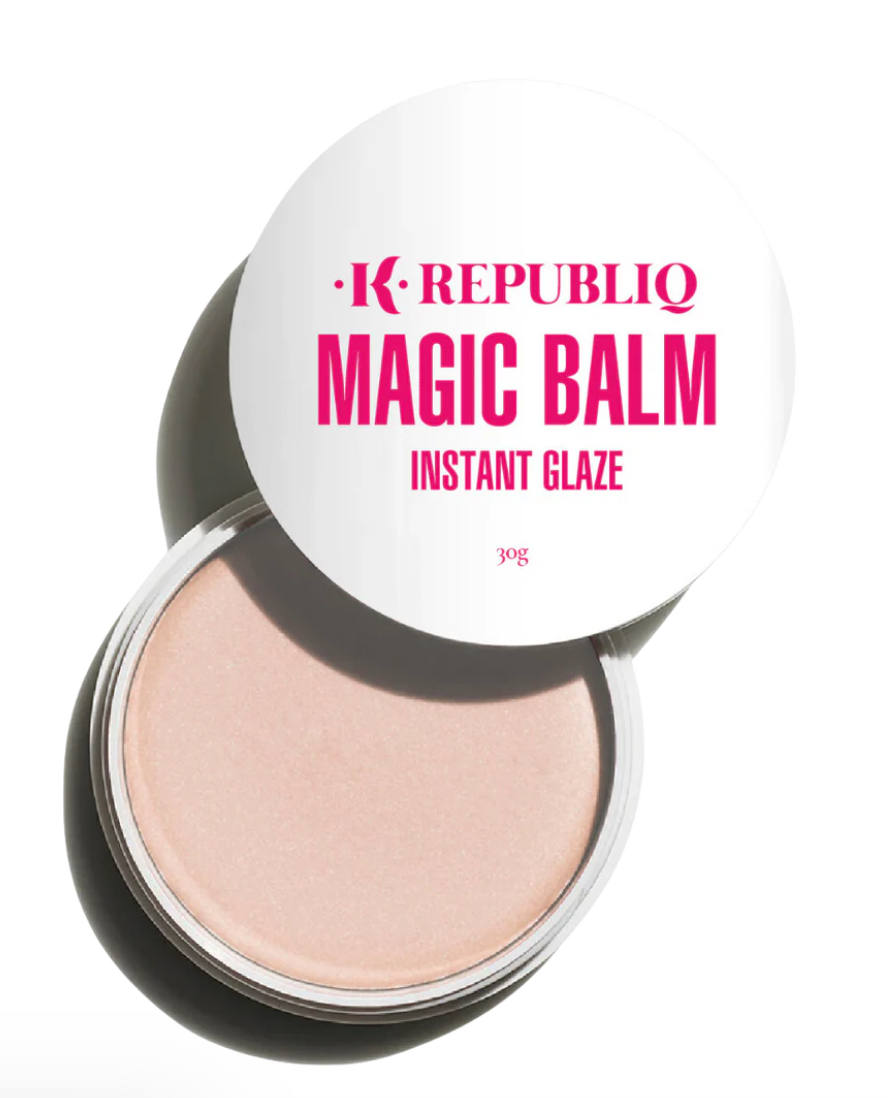
I bought a kit with three pieces: Glass Skin Glazing Essence, Glass Skin Serum and Glass Skin Finishing Glaze.
Shipping was super fast and I had my kit within about three days. It also came with a free Gua Sha. I was happy to find the bottles were large and full to the top with product. They’re pink, bulky and hard to lose. The essence is a spray, the serum is a pump bottle, and the glaze is in an airless pump vacuum bottle — you push the lid down and product comes out the top.
I was going out one the evening I got the package so immediately washed my makeup off so I could use my new products underneath. Deep down, I was kind of hoping my skin would immediately transform into youthful radiance like it seemed to in the ads. Obviously that didn’t happen, but I think it did look a bit shinier…sort of glass-like, you could say.
According to the website, you’re supposed to spritz your face with essence and let it sink in before using about two pumps of the finishing glaze. My skin did feel a bit smoother with the glaze — it felt kind of tight on my face, but not in an uncomfortable way. Make up went smoothly over the top.
I was ready for the night routine when I got home. I washed the make up off, used the essence and a pump of the serum. The serum was pearly-white and went on very easily with my fingers. It dried pretty quickly before I used the glaze. Again, the glaze had the tight-ish feeling on my skin.
What happened
I repeated this routine for weeks, replacing all my products — hyaluronic acid, niacinamide, lactic acid, retinol, and agrilene — with K Republiq. I used the essence and glaze morning and night, adding the serum only in the evening. My skin felt noticeably smoother on the first day and the feeling never went away. Months later, my skin still feels really smooth.
By the end of the month, I was running low and decided to make the most of Black Friday sales. This time, I bought two kits which included the Magic Balm.
The mask is a very thick, pearly pink wax-like product that is very thick and melts in your fingers. I put way too much on the first time. A little goes a long way, it even says that on the packaging, but I can’t stress that enough — a little goes a long way. I put it on at night instead of the glaze, because it’s way too thick to go under makeup, and my skin is super smooth by morning.
Pros
Three products replace about seven, the products are packed with moisturizing and hydrating ingredients, and they’re vegan. When I asked my partner if the difference was visible, he said it did. My pores were smaller, mild redness had lessened, and it had a dewy glow about it. My skin didn’t get sick of it, I didn’t develop an allergy or intolerance to it, and I have noticed fine lines aren’t as visible.
Cons
The products are expensive. They’re large bottles that last a while, and you can also get some pretty decent deals on the site, but it’s still significantly more than The Ordinary, which costs about $12 a bottle. I initially paid $99 for the Glass Skin Glazing Essence, the Glass Skin Serum and the Glass Skin Finishing Glaze. I didn’t have to get the pack of three, but the finishing glaze on its own costs about $79, so it was better value to get the pack. I also decided the only way to find out whether the products really worked was to buy the whole routine. I went back about a month later to check out the Black Friday specials and the price was jacked to $119…go figure.
One thing I really didn’t like was the airless pump vacuum bottle the glaze comes in — it pumps well the first few times and then it’s impossible to get anything out of it. The jar does unscrew really easily so you can get every last bit of product out, but you shouldn’t have to do that. The pump function is as much to do with ease as it to do with portion control. The jar instructs you to use two pumps morning and night, and that’s not possible when the pump function doesn’t work. It’s a small problem, but worth mentioning.
Verdict
Krebuliq products really do work and I bought them again. Do I have flawless and glass-like skin? No. Do I still feel the need to wear makeup when I leave the house? Yes. It did not completely even out my skin tone, nor did it fix rosacea. I do not look like the women in the ads, even the ones who are twice my age. But it did help with my skin problems and I do feel as though it’s good for my skin. It looks healthy and vibrant, and it feels great.
Want me to review something else? Let me know in the comments below!
Like it? Pin it!

You Might Also Like…
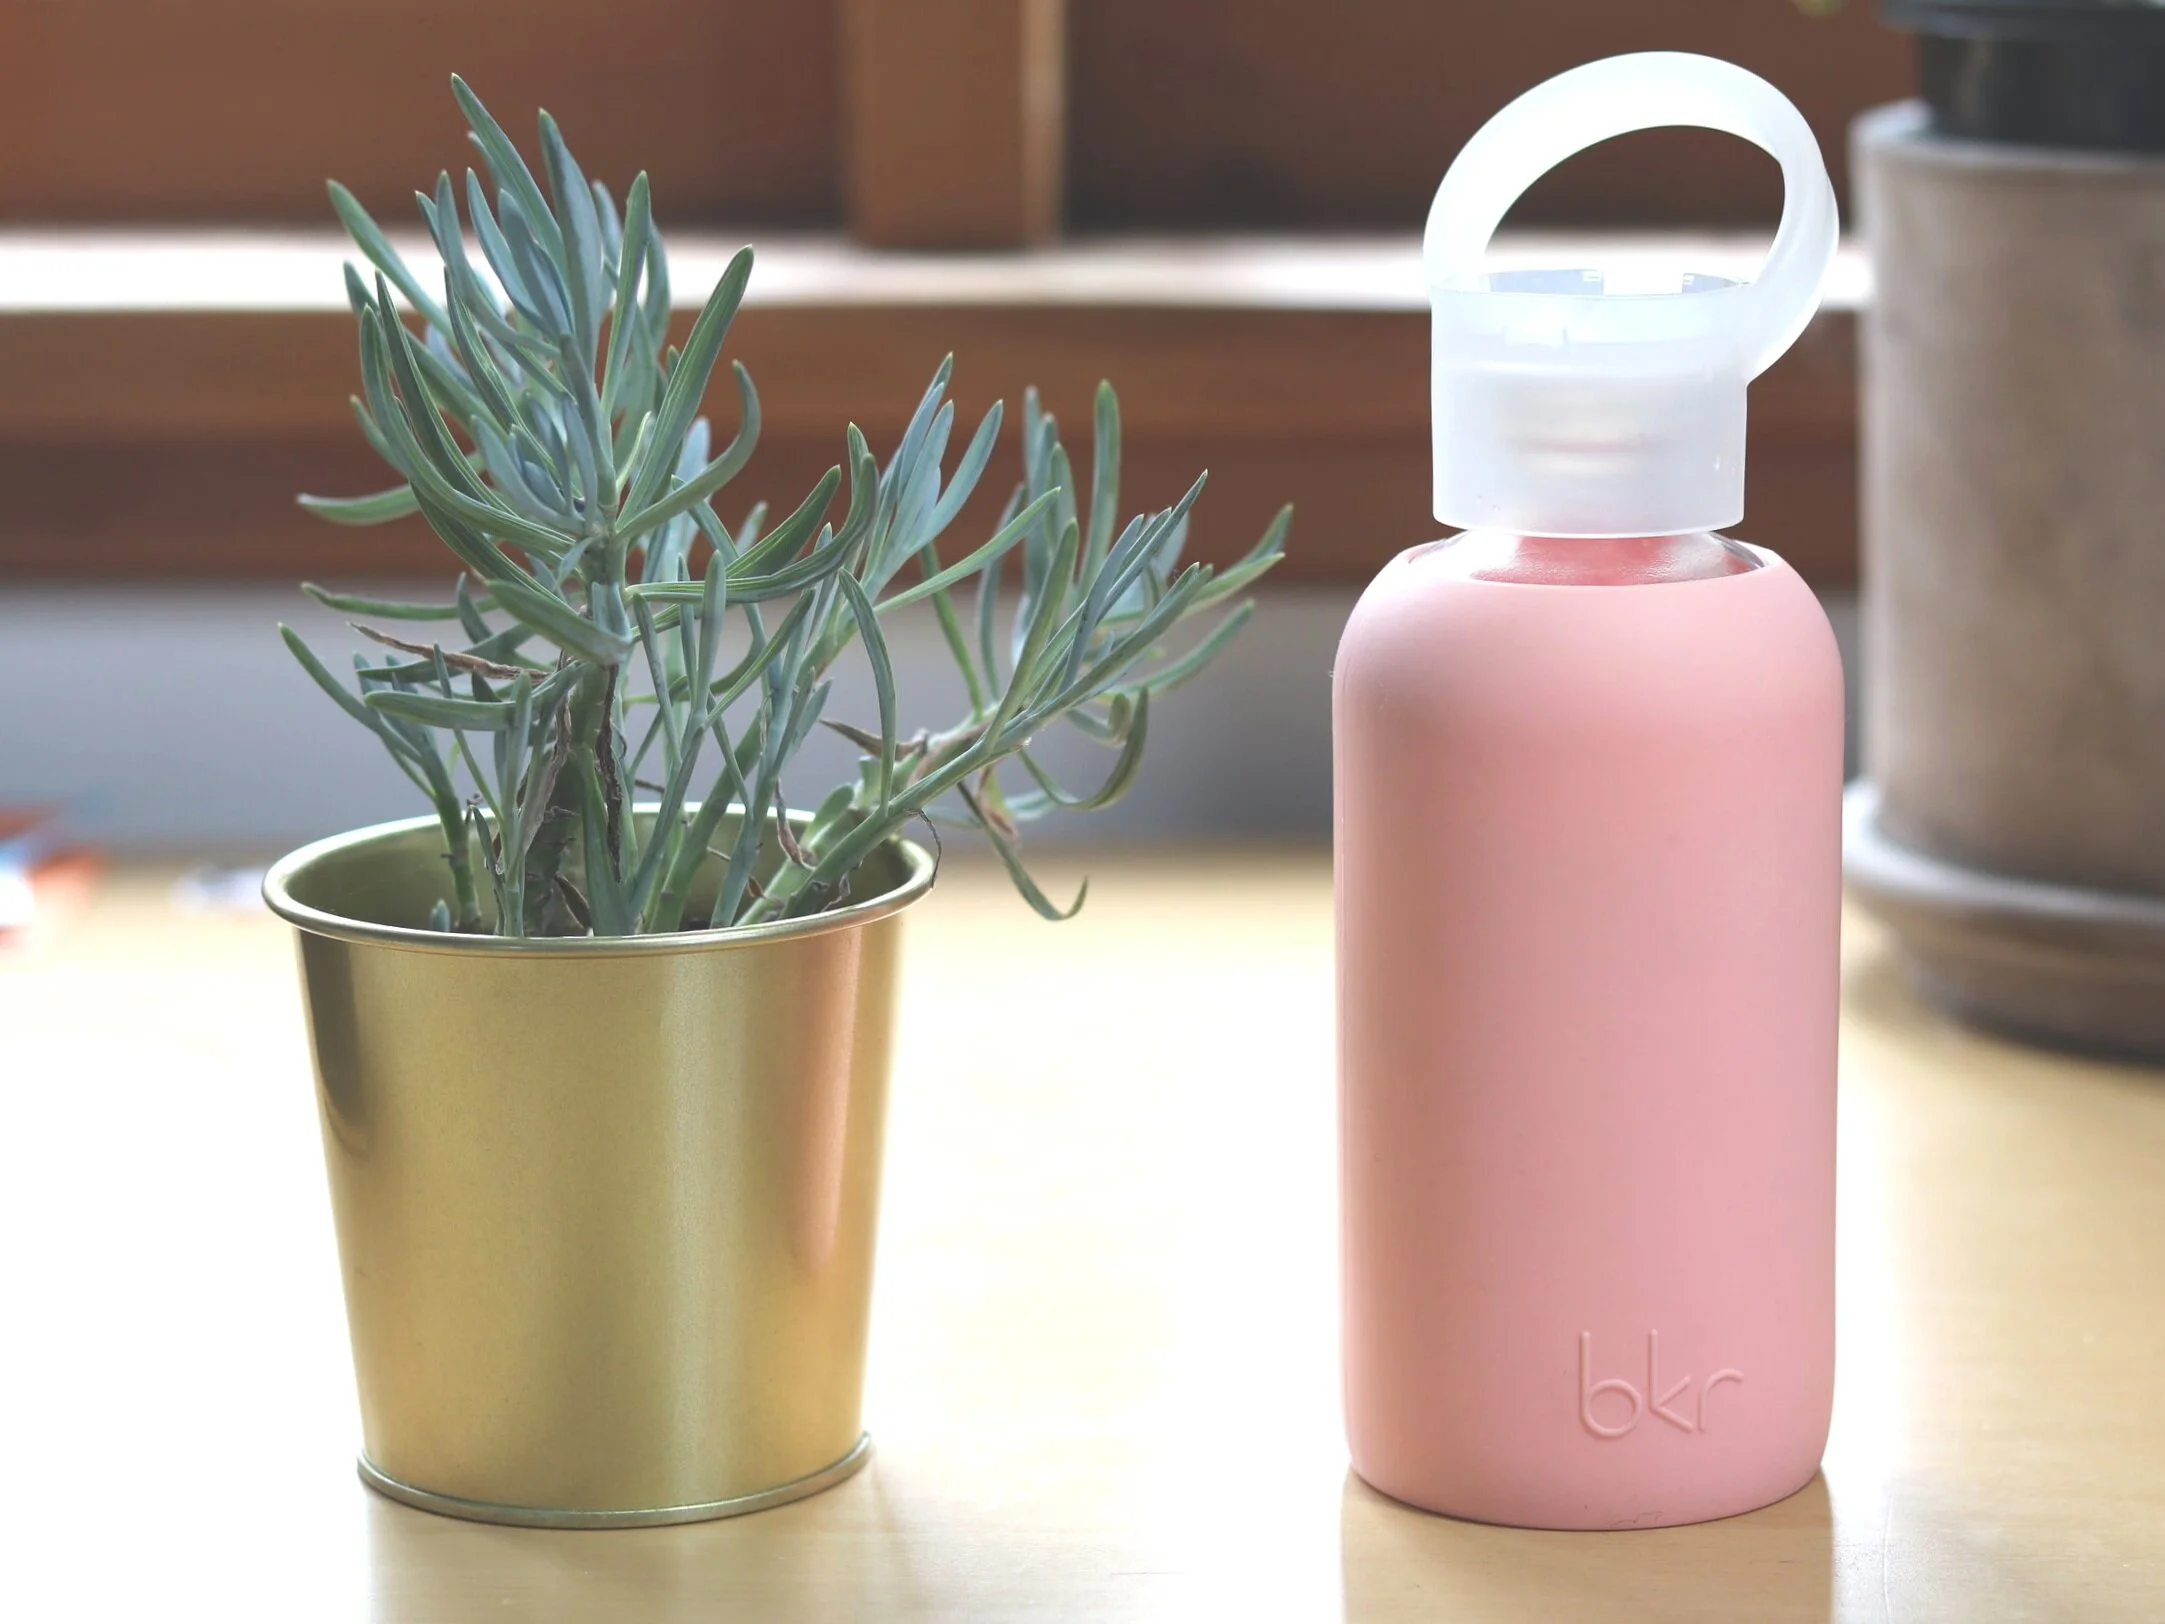
Are Bkr Water Bottles Worth It?
Looking for a durable and reusable glass water bottle that won’t leak? A Bkr water bottle is the answer. I have had my pink Bkr bottle for about five years now, which means I got it before it became a designer bottle. Yes, you read that correctly - ‘designer’ water receptacle. But having had one for so long, I can absolutely see why they became so popular.
Looking for a durable and reusable glass water bottle that won’t leak? A Bkr water bottle is the answer.
I have had my pink Bkr bottle for about five years now, which means I got it before it became a designer bottle. Yes, you read that correctly - ‘designer’ water receptacle. But having had one for so long, I can absolutely see why they became so popular. They don’t leak or break, the mouthpiece is the size a mouthpiece should be and not one of those ridiculously large ones that slosh water all over your face, and they look great. If anything happened to mine, I would literally spent the cash to get another. Here’s why.
The lid is a revelation
The lid screws on tight in one rotation. One rotation! And it doesn’t leak, ever. I have had so many water bottles leak in my bag it’s ridiculous, so the fact that this doesn’t leak and screws up really easily is a big plus for me. It’s also designed to be carried with a ring, so you could tie it to your bag if you wanted, or just loop it around your finger and off you go.
A weird design feature Bkr came up with within the last five years is a lid that fits a (vegan) lip balm in it. Of course, it specifically fits the Bkr Water Balm which, at $35, is more expensive than the lid itself, but I guess it would look nifty with the balm clipped in.
It (probably) won’t break
The bottle is smooth grass wrapped in a silicone cover that’s reinforced at the bottom, which adds a layer of protection if you’re a bit clumsy like me and drop things.
I have dropped mine a couple of times, but the worst was when it fell top-down and the lid cracked where the loop is. That’s not a design flaw - I don’t think anything could have survived that. The lid is made of quite a thick plastic and is not easy to break. It still functioned normally and I was able to close it without any trouble, but the glass has remained unbroken. You can buy replacement lids separately, so that is what I did.
Handy Sizes
Bkr comes in three sizes - one litre, 500ml and 250ml. I have the smaller one because I don’t carry around huge bags and I like to be able to slip it in a handbag while traipse to the supermarket or around the world, but there are definitely times where I’ve seen the benefits of a larger one, like when I’m working out.
Having said that, the litre bottle would probably be quite heavy. The bottle is made of glass, which adds to the weight, so keep that in mind when choosing.

Easy Cleaning
A few reviews say the Bkr bottle is hard to clean, but I’ve never really found that - you can put the whole thing in the dishwasher, or take the silicone slip off and wash that separately. The only thing to watch out for is don’t take the small silicone ring wedged inside the lid out - it’s what stops the bottle from leaking. I took it out once to clean it thinking I was being thorough, and it never really fit back in properly and it was a pain, and I’m kind of glad the lid broke so I could get a new one. That was not a design fault, that was just me taking things apart when I shouldn’t have.
Change the colour to match your outfit
The coloured silicone sleeves are also sold separately and are interchangeable, so you get a different colour for every day of the week. Not strictly essential, but a pretty cool feature nonetheless that makes this brand stand out. You can also get different kinds of sleeves, like spiky ones and smooth ones in different colours to suit your vibe.

Water tastes better from glass
I know that sounds subjective, but it’s true - the water tastes fresher and cleaner than out of a plastic bottle. Once you start drinking from glass, it’s really hard to go back to plastic. Chemicals from plastics also leak into your water bottle over time, which means you’re ingesting a hell of a lot more than water at the end of the day, which is kind of terrifying when you think about it. Whether you get a Bkr bottle or not, plastic bottles should be a thing of the past.

vegan and cruelty-free
It seems odd for a water bottle to be vegan, but animal products make their way into the strangest things so it’s definitely worth noting. I make an effort to promote companies that are clean and ethical, and Bkr definitely fits that category - even the lip balm is vegan. Winner!
Cons
The one con I can think of is that you can’t fit ice into the bottle. That’s not a huge problem for me but, from what I understand, people from the US love having ice in their drinks and, unless you have an ice tray that makes tiny cubes, the Bkr bottle doesn’t cater for that. You would think ice would be more of a deal in hot Australia, buuuuut it’s not ¯\_(ツ)_/¯
What’s your favourite glass bottle? Let me know in the comments below!
Like it? Pin it!

You might also like…
Why Function of Beauty Are Amazing Curly Girl Method Products: A Review
If you’ve googled hair care products within the last year, you’ve probably come across Function of Beauty - the customizable shampoo and conditioner range that claims to help your hair live its best life. But is it worth it?
If you’ve Googled hair care products within the last couple of years, you’ve probably come across Function of Beauty - the customizable shampoo and conditioner range that claims to help your hair live its best life. But is it worth it?
If you don’t know what I’m talking about, Function of Beauty offer shampoos and conditioners that are formulated to suit your unique locks. You jump online, take a two-minute quiz about your hair and your hair goals and out pops hair care products designed for your head alone. It’s even got your name on it.
It stood out to me because, along with being vegan and cruelty-free, the products are free of sulfates (which curly hair tends to hate) and parabens, and everyone under the sun seemed to be talking about how amazing the products are.
(Click here to read my Function of Beauty skin care review!)
Initially, it sounded gimmicky. How could a company mass produce that much product while formulating each bottle for every customer, based on a short multiple choice questionnaire? It sounded a bit like a scam.
I was also skeptical because, when I first looked into it, silicones were included in the conditioners and that’s just one giant ‘no’ for anyone with curly hair. I even reached out to Function of Beauty to ask whether they offered any options without silicones and the response I got back was all about how silicones are actually good for your hair, etc, etc. To their credit, it was a personalised response written by a human that addressed my specific questions, and not an automated bot response. But even so, it remained a giant ‘no’ for a while longer for that reason.
I remained skeptical until Function of Beauty offered a conditioner without silicones.
I decided to give it a shot and, in a dramatic and unforseen turn of events, they became my favourite curly girl method products. Here’s how it went down.
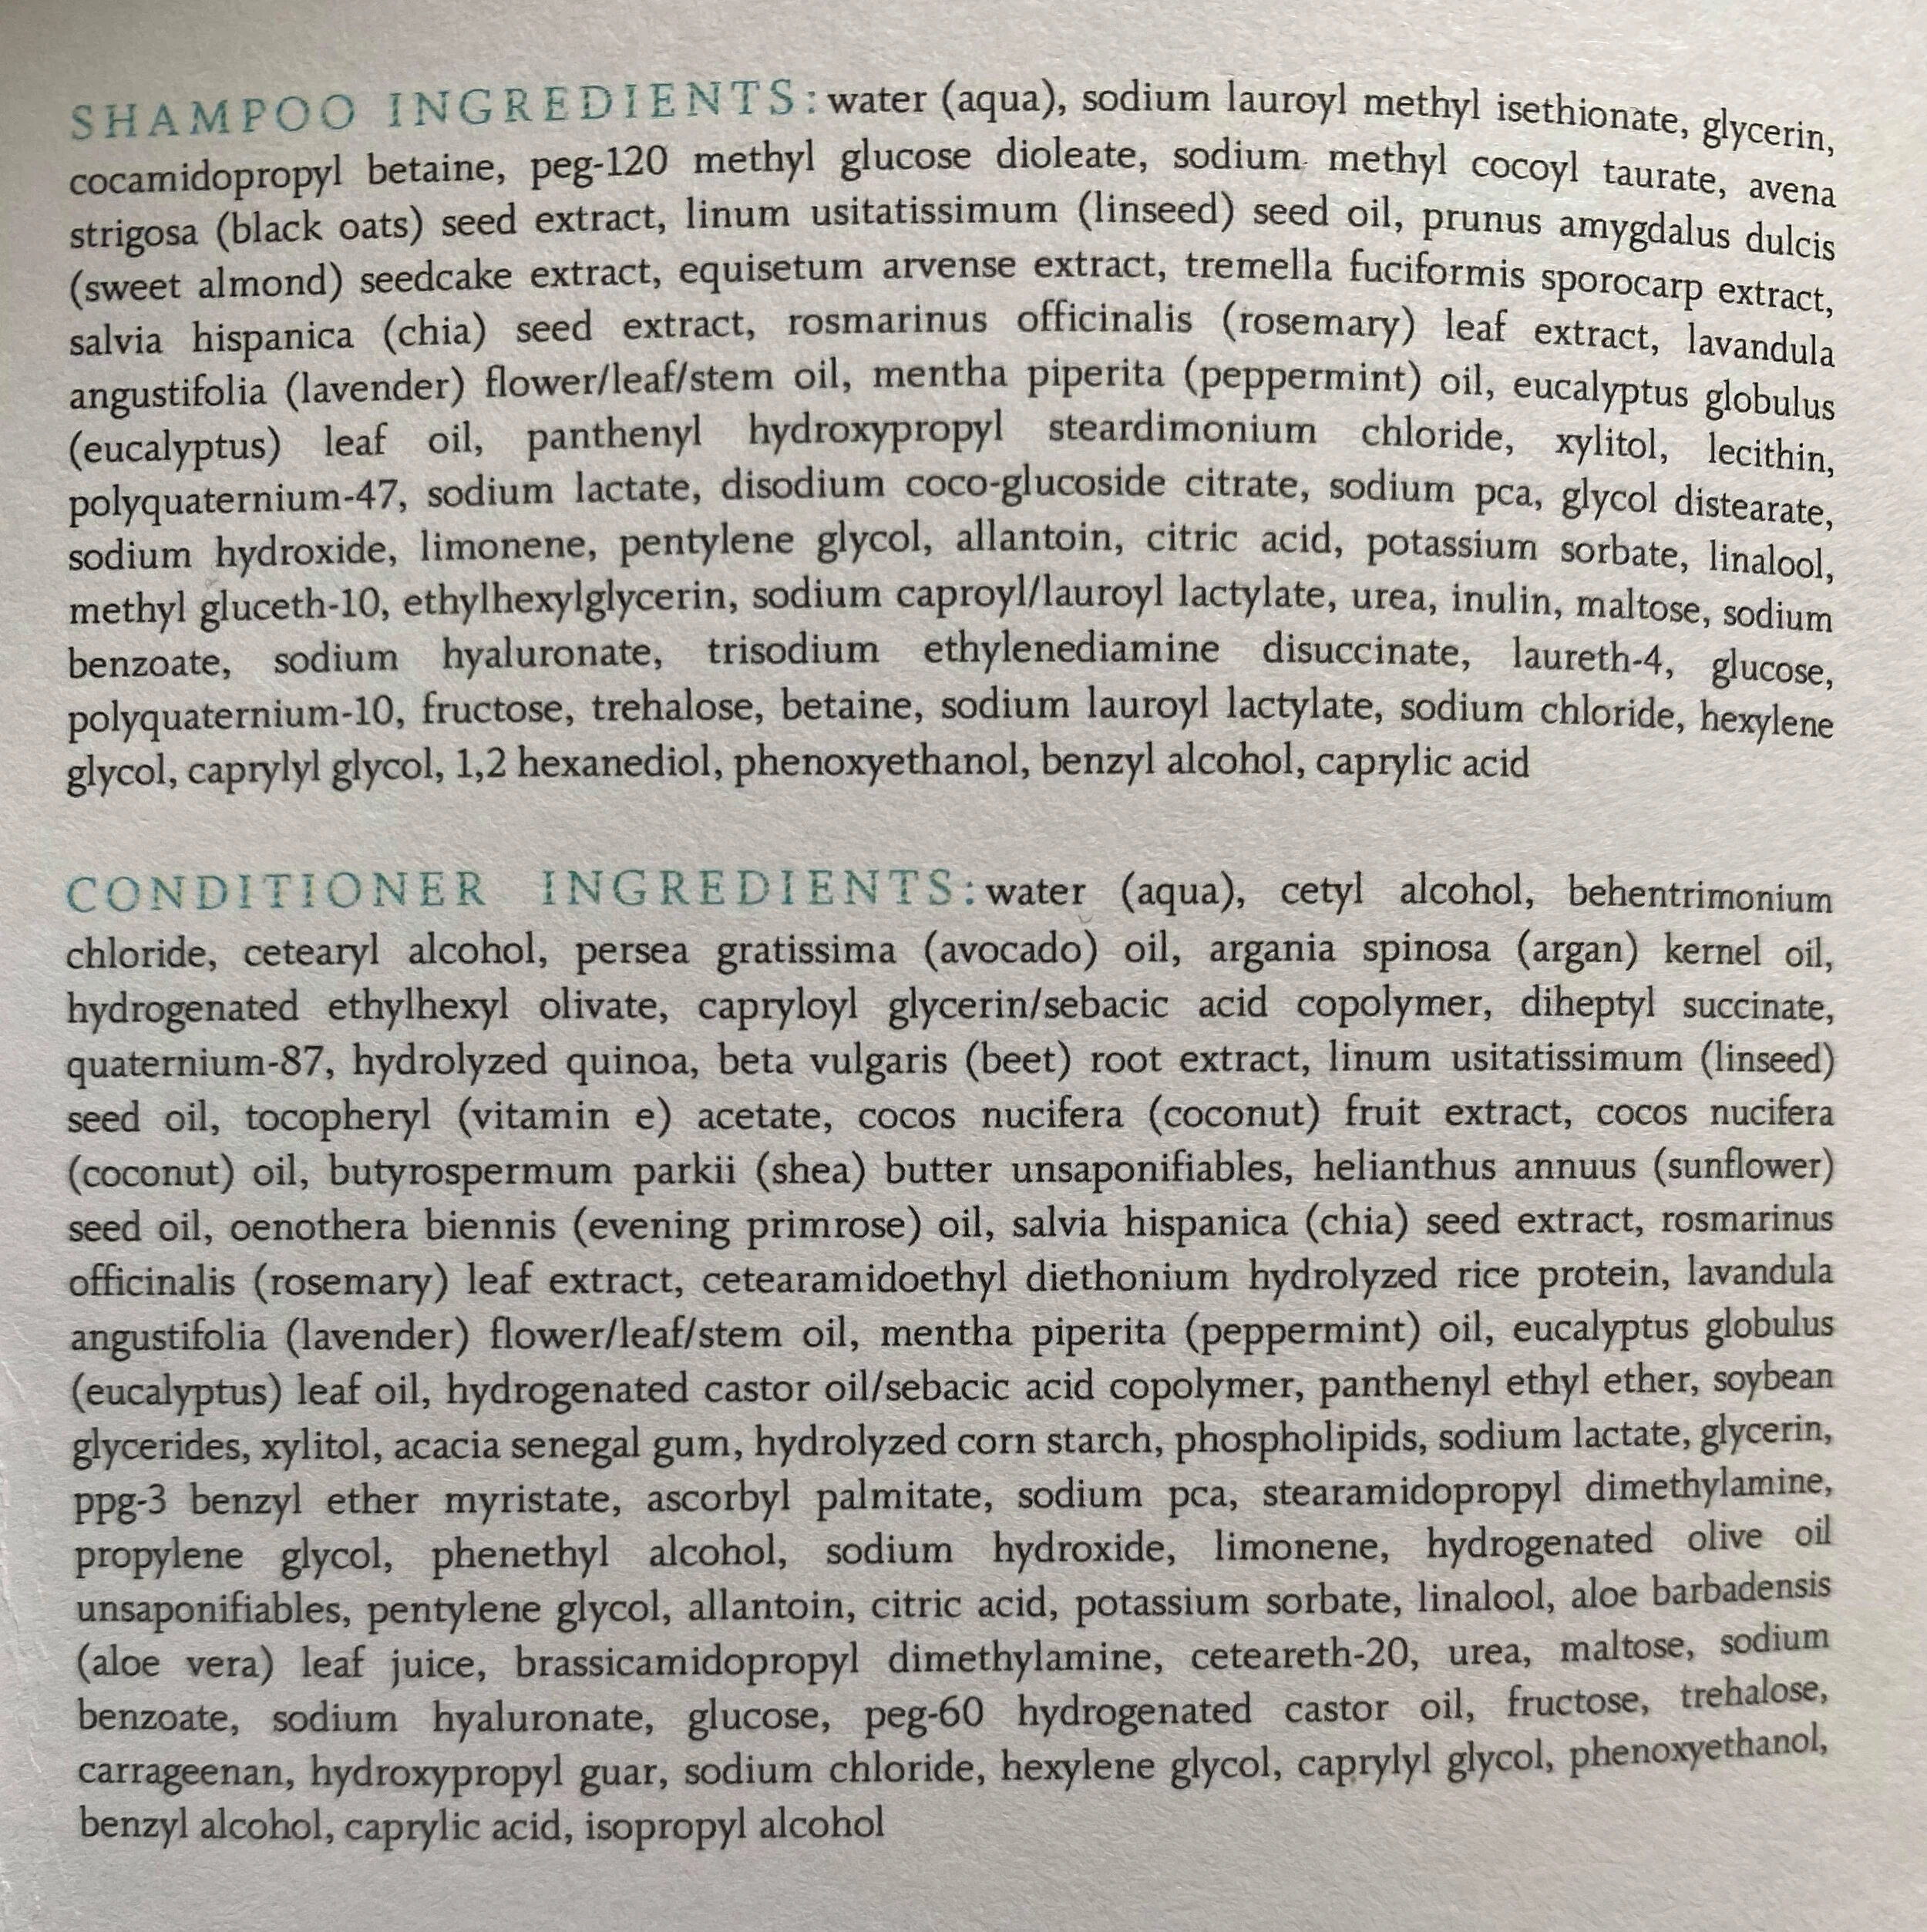
Note: I’ve included a photo of the ingredients list below, but keep in mind it’s specifically for the selections I made. The ingredients will be different for you, depending on what selections you make.
Before
Before using Function of Beauty, I had been using curly girl-friendly Bondi Boost shampoo, and alternating between Shea Moisture Black Castor Oil deep conditioner and Garnier Hair Food deep conditioner. I liked the Bondi Boost shampoo because it seemed to clean my hair in a way that a lot of other sulfate-free shampoos didn’t, but I did feel like it was drying my hair out a bit.
I alternated between the two deep conditioners in place of regular conditioner because the Bondi Boost conditioner was nowhere near hydrating enough and my hair would tangle up again really easily. While both deep conditioners did an okay job, I wasn’t overwhelmingly impressed with either. I had to use relatively large scoops of each to properly detangle my hair, and I alternated between them because each one would periodically make my hair dry, and I was at the point where neither product was doing a wonderful job.
Cue: Function of Beauty.
Function of Beauty: A Review
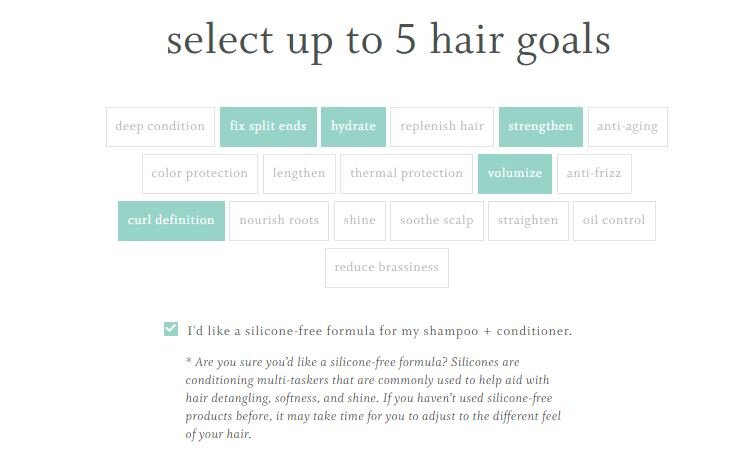
Upon heading to the Function of Beauty website and hitting ‘Take The Quiz’, I was met with three questions asking me all about my hair type and structure, complete with visual aids to help me understand what the questions were asking.
I have fine, curly hair that errs on the side of dry, so that’s what I selected.
On the next page I was asked what my ‘hair goals’ were. Because my hair is dry, it’s very prone to splitting, so I opted to fix split ends, hydrate and strengthen. I also like more volume in my hair with defined curls, so I chose those options. I clicked ‘no silicones’ and was hit with a warning asking me if that’s really what I wanted. I found that pretty strange - it read as though they were trying to convince me I needed silicones, but I’ve had really bad experiences with them in the past, along with basically everyone else with curly hair, so I ignored it and continued on with my hair journey.


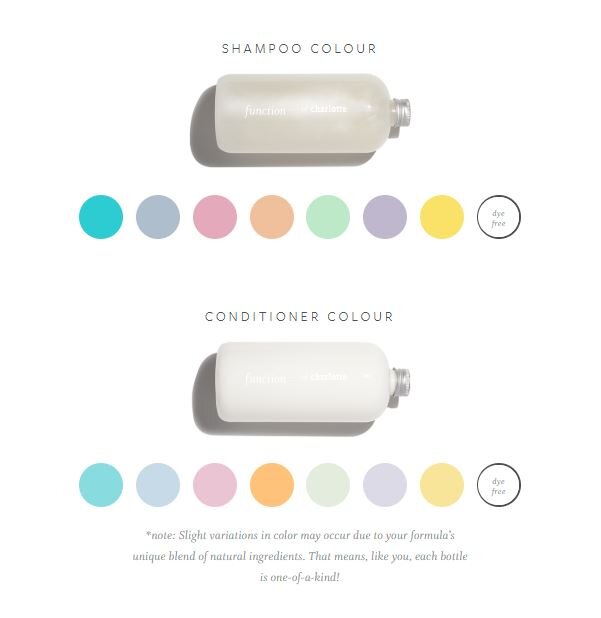
The next step was all about how I wanted the shampoo and conditioner to look and smell. There are a bunch of fun smells and colours to choose from, but when it comes down to it, keeping things as natural as possible keeps your hair and scalp looking it’s very best. It didn’t say whether the dyes were derived from natural ingredients, and scents are a huge cause of scalp irritation for people in general, so I opted for no dyes and the eucalyptus scent because it says that one is 100% natural. Lavender is the other natural scent, or you can choose the fragrance-free option.
You can also choose the strength of your fragrance, so I guess the option to smell like a full-blown eucalyptus tree or lavender bush is available for willing participants, however, I chose the ‘light’ option.
Finally, I got to whack my name on the bottle. Another fun part is that you don’t necessarily have to put down your name. You could choose to have it say ‘function of - sexy beast’ if you so desired ;)
I then chose the size of the bottles I wanted and had the option to add hair masks and such. I opted for the smallest bottles and no hair masks since I’d never tried it before and, at $69 for both, omgosh it’s expensive.
I felt confident with my selections throughout the process because the site is so visual, and at no point was I confused.
Because I live in Australia it took about a month to arrive, but shipping was only $5 soooo I can’t really complain.
The Products
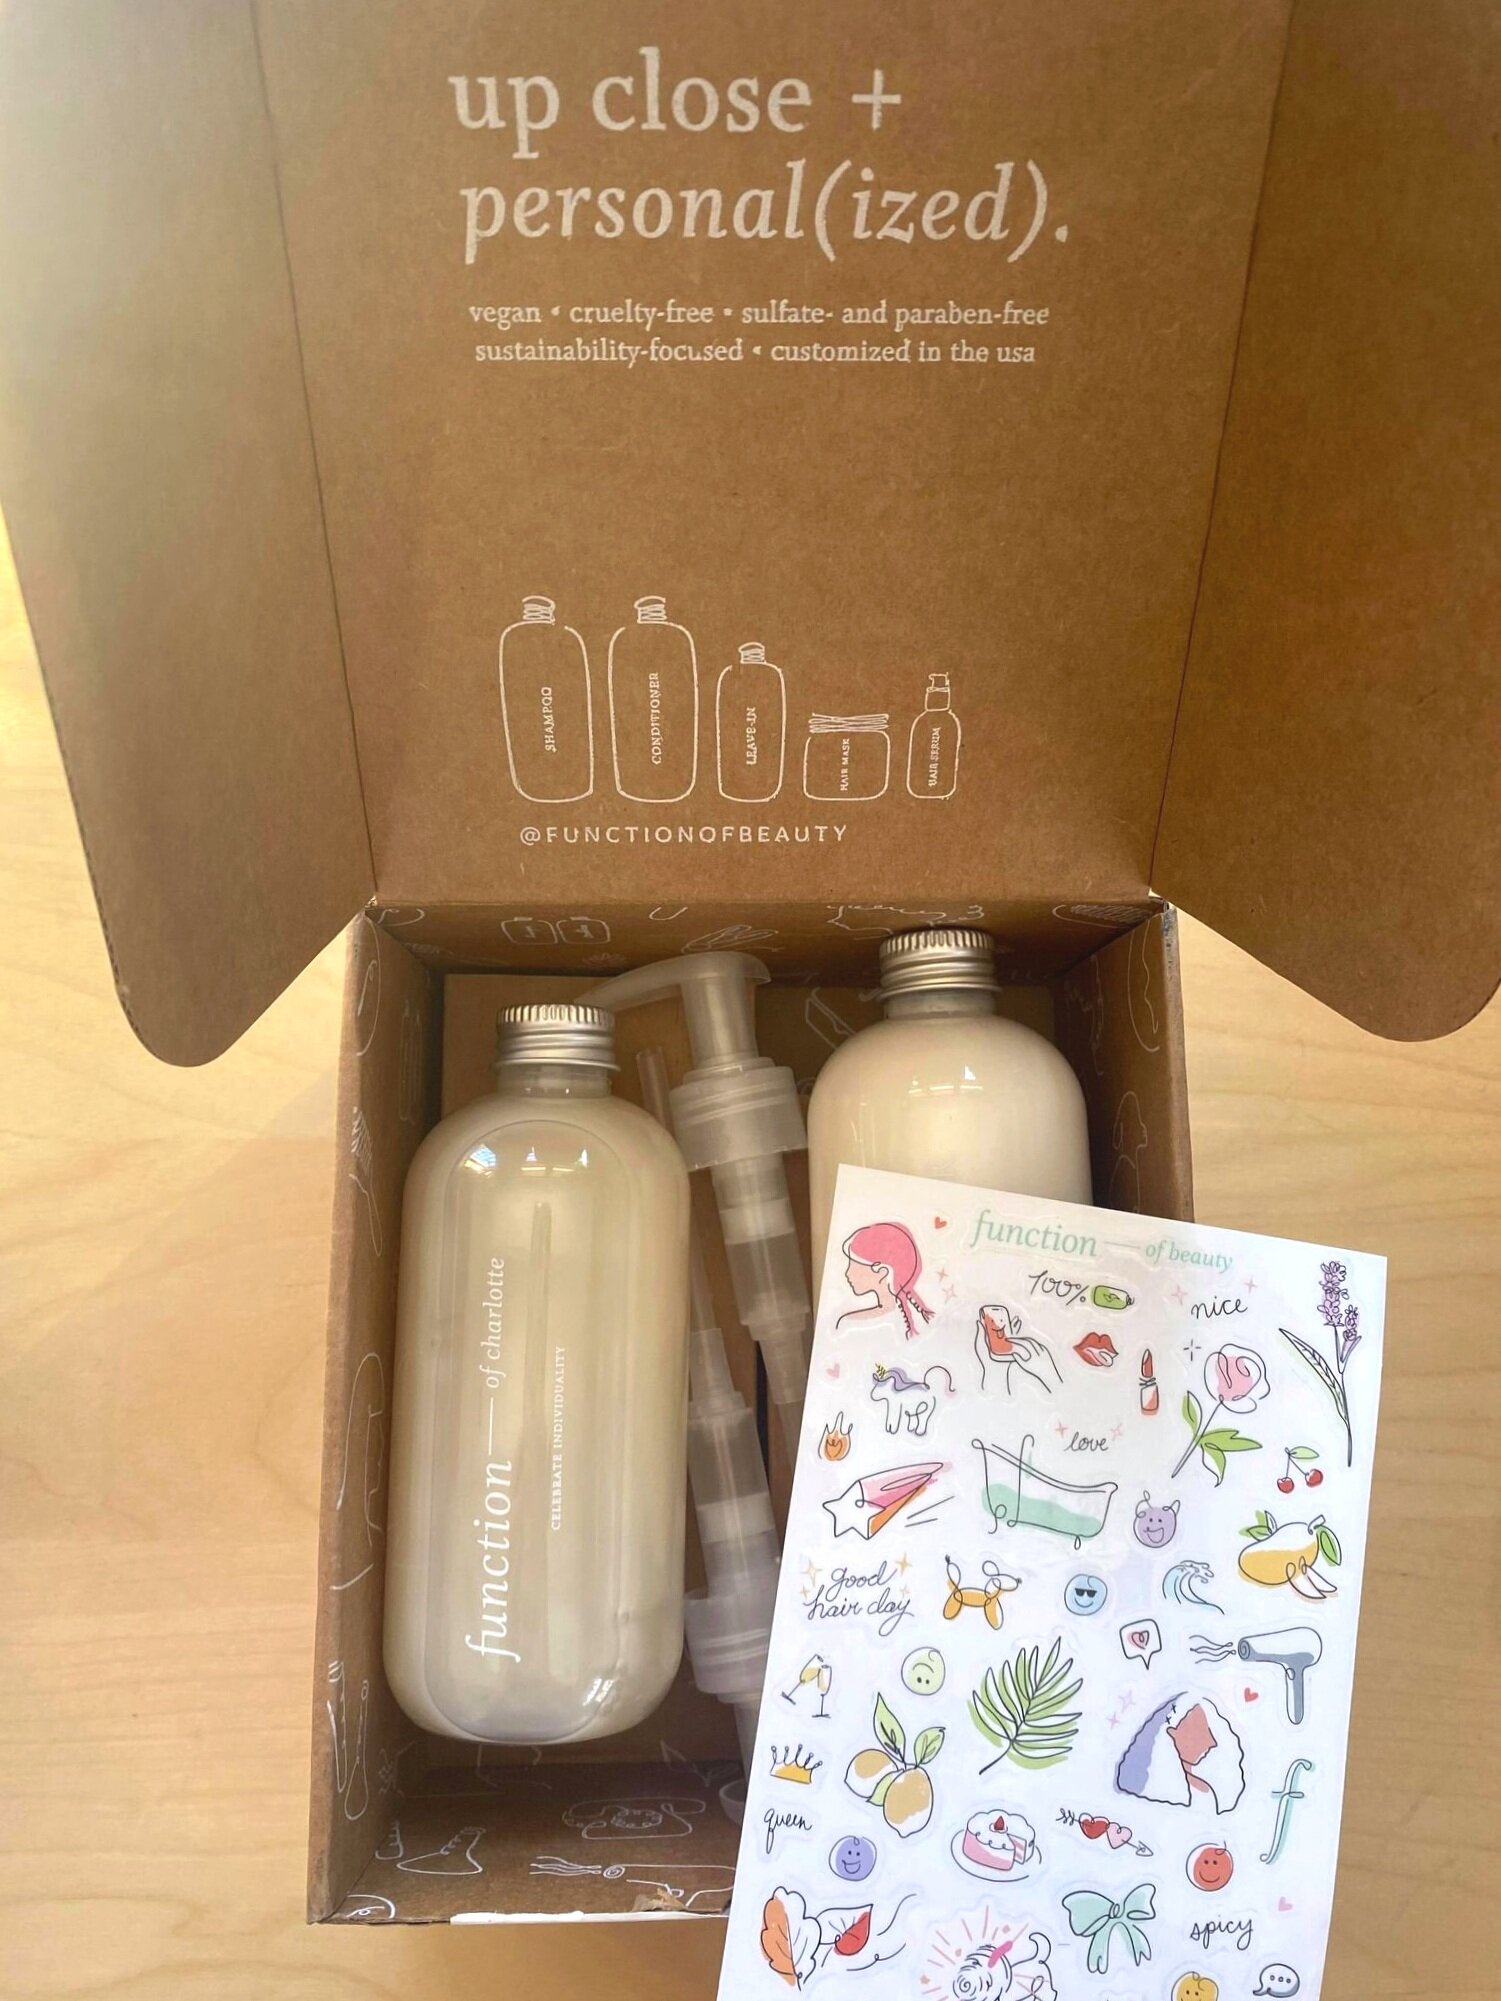
The shampoo and conditioner bottles came packed in a personalised box that had my name on it. It also came with a info pamphlet which also contained the product ingredients - something that isn’t available on the site. Each bottle was sealed to prevent leakage, and the pump lids were included separately in the box. It also came with some stickers that I think you can use to decorate the bottles with.
Because I chose no colour, the products were both a nice pearly shade of white and they did indeed smell like eucalyptus, but not like a whole tree. Winner.
I was a little surprised at how small the bottles were. I chose 8 oz, but we measure things in litres on my side of the planet so I didn’t know how much I was selecting. It’s really quite small for the price and, given that my hair often needs more conditioner than the average human, I wondered how far it would all actually go.
Wash
The directions are pretty basic and I did nothing different or fancy before piling it in my hair. It had been about four or five days since my last wash and it was tangled as all hell.
When my hair was completely saturated under the shower, I used one pump of the shampoo and used it on my roots. Since the product has no sulfates in it, I didn’t think it would lather properly and expected to have to use more of the product to work it through my hair, but that’s not what happened at all.
It foamed like crazy. One pump was almost enough to cover my entire scalp.
Quick note - I only ever wash my roots with shampoo and let it sink through the length when I rinse it out. I’ve always found it to be an effective washing method that still leaves my hair feeling fresh and clean, and that’s what I did with the Function of Beauty shampoo.
After washing it out, I moved on to the conditioner. Function of Beauty suggest starting with the conditioner on your roots and moving down through the length. I never put conditioner up past my ears because I find my hair goes really flat on top and doesn’t sit right when it’s dry, so I didn’t put it on my roots here either.
Again, I expected to have to use more product because my hair can be so dry and hard to detangle.
Wrong.
With one pump of the Function of Beauty conditioner, I began to detangle the length with my fingers and managed to do most of it using that small amount. I grabbed a little more to squish into the ends. I was super surprised at how little I needed to use. When I couldn’t detangle any more with my fingers, I used one of those detangling brushes to do that rest. Again, it was really, really easy to do.
The instructions say to leave the conditioner in for a few minutes before rinsing it out, so that’s what I did.
Drying
Once all the conditioner was out, I tipped my head upside down, brushed it again (gently), scrunched the excess water out with my hands to create curls and put it up with a microfibre towel for 20 mins.
Then I took it out, scrunched the excess water out again, parted it and let it air dry.
The result
The first thing I noticed was how soft my hair felt. It didn’t tangle up easily, it felt stronger and smoother, and the volume was 100% more impressive than any other curly girl-friendly products I’d used.
The second thing I noticed was that my curly were basically gone. It was voluminous and healthy and shiny, buuuuut the ‘curl definition’ selection I’d chosen in my hair goals didn’t seem to do anything.
I know I said Function of Beauty is an amazing curly girl method product - sit tight - I’m getting to it.
Having said that, I don’t really put products in my hair to keep it curly, and my hair felt so good after using Function of Beauty that I thought I’d try out a new product to see if I could get some curls back post-wash.
Wash, Take 2
I washed and conditioned my hair the exact same way about five days later, but instead of putting it up in a towel once I was done brushing it in the shower, I scrunched Not Your Mother’s Kinky Moves Curl Defining Hair Cream through the ends. I put it up in a microfibre towel again, left it for 20 mins, took it out, scrunched with the towel a couple of times, then parted it and let it air dry.
Result, take 2
Curls for days!
I was so, so impressed at how curly using a small amount of Not Your Mother’s made my hair. I’m usually a bit wary of leave-in products because my hair is really sensitive to too much moisture. It doesn’t really absorb products unless it’s wet, and often it just goes stringy.
Not this time.
The combination of Function of Beauty shampoo and conditioners and Not Your Mother’s Kinky Moves Curl Defining Hair Cream made my curls defined, hydrated, and knot-free.
Pros
I used to really struggle detangling my hair in the shower - even though my hair is fine, it took me a really long time to get all the knots out without breaking the ends off. After using Function of Beauty, I literally wash my hair every five days, even though I workout every day, and it’s about 80% less tangled. The amount of hair that falls with each wash has also significantly reduced.
Cons
No matter how you look at it, the products are expensive. One of my main concerns was that the small bottles would empty really quickly, based on the amount of product I’m used to using, but I honestly only use about one pump of each with every wash. Given that I wash my hair about once every five days, it should last quite a long time.
From the bizarre caution I got when opting not to use silicones to the lack of ingredients on the website, it’s pretty clear that Function of Beauty isn’t really designed for people who follow the curly girl method, but they are still amazing curly girl method-friendly products by default.
The Verdict
Even though my hair wasn’t curly just using Function of Beauty products, it moisturised and strengthened my hair more than anything else ever has. Since it’s not specifically a curly hair company, I don’t mind that my hair wasn’t curly without using additional products - it’s so hydrated and healthy-feeling that I do feel it’s worth it.
My hair feels smoother and less tangled for about double the time it used to and I’m losing far less hair than I was before. I also have a moderately sensitive scalp, but I haven’t had any adverse reaction to this one.
Function of Beauty is very pricey, but I also think it’s a fair price considering the company are genuinely formulating each bottle to order. Not only that, but it works. That’s pretty impressive. If you have the cash to spare, I would say it’s definitely worth trying it out.
Have you tried Function of Beauty? Let me know in the comments below!
Like it? Pin it!

you might also like…
Shea Moisture Shampoo Review: Does it work?
Is Shea Moisture shampoo and conditioner worth the hype? I tested it out so you don’t have to.
Is Shea Moisture shampoo and conditioner worth the hype? I tested it out so you don’t have to.
As someone who travels a lot, my hair has been through some things I kind of wish it hadn’t. Chlorinated water, being washed in countries with undrinkable tap water, extreme heat and humidity, snow and frost, extreme amounts of sunshine, and all the things I did to it in between, like bleach, box dyes, and heat tools – you name it! So when I discovered DevaCurl, I thought I’d found the answer to all my curly hair problems. My hair was detangled, shiny, and curlier than ever before – why buy anything else?
That is, until it stopped working.
You know when you find a new moisturiser or cleanser and your skin feels the best it has ever felt and you think ‘hells yes I’ll use this forever’, and then it seems to stop working and your skin looks less than average again? That’s what happened to my hair with DevaCurl.
The search for something new resumed.
I’d heard about Shea Moisture, but I have fine hair that gets weighed down really easily, so I figured anything with shea butter in it would be too heavy. If you’ve ever held a block of raw shea butter, you’ll understand. It’s dense. It wasn’t until I tried Maui Moisture for a few weeks and my hair dried out like sand on a hot day that I realised I needed something else.
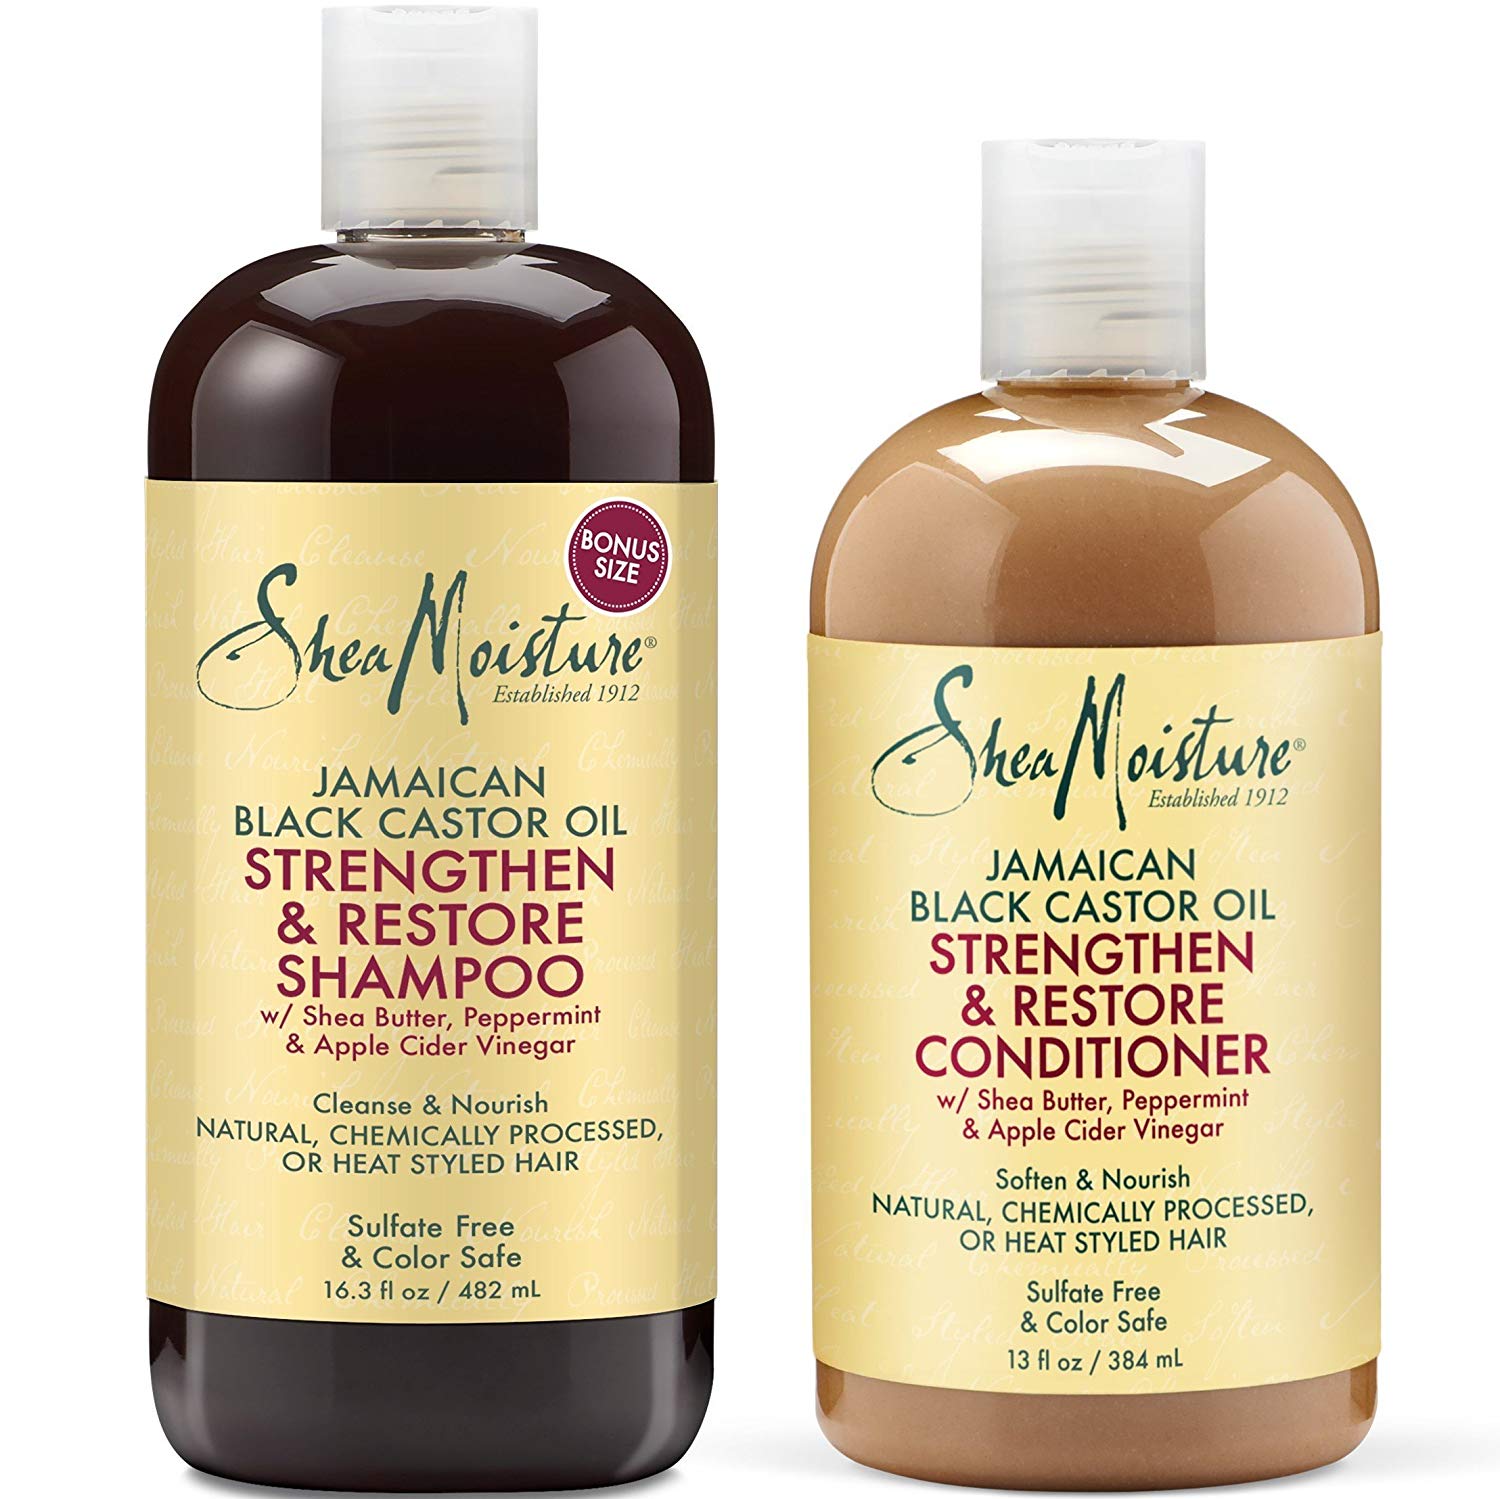
So my dry, tangled hair and I wandered into Priceline, found Shea Moisture Jamaican Black Castor Oil shampoo and conditioner on special, and found myself at the checkout, debit card in-hand. Long-story-short, Shea Moisture was the bomb. I was actually shocked, and wondered how and why I avoided this product for so long.
On another note, it’s also cruelty-free, vegan, curly girl-friendly, and Jamaican black castor oil promotes hair growth. Win!


Shea Moisture: A Review
First of all, the shampoo looks, smells feels really unappealing. It’s a dark shade of brown – kind of like lice shampoo, without the really acrid smell – and feels thin. A far cry from the thick, white and creamy consistency of DevaCurl. Having said that, a core ingredient is Jamaican black castor oil so, you know, the colour and consistency is to be expected.
On my head it went. It does foam a bit, but it’s not like anything with sulfate in it – just enough so that you feel like your head will be clean. I also didn’t need to use too much – two pumps, each around the size of a bottle top.
I should mention the instructions basically say to douse all your hair in it – from roots to ends – but that seemed a little extreme for me so I only went scalp, and everything was fine.
It washed out easily, and I moved on to the conditioner. Unlike the shampoo, the Shea Moisture Jamaican Black Castor Oil conditioner is thick, creamy, and a light caramel colour. After using around two pumps to start with, I raked it through my hair to see how easily it detangled.
It didn’t make my hair feel silky as soon as I used it like some other products do, so I was surprised at how easily the knots came out. It wasn’t a miracle product by any means - my hair didn’t magically fall flat and knot-free on my shoulders, but it was easier than usual to rake it through.
I washed it out, wrapped it in a microfibre towel for 20 minutes, styled with a bit of DevaCurl Wave Maker and let it air dry.
The Result
After it dried, I noticed the difference.
As much as I loved DevaCurl, it did weigh my hair down and took quite a lot of fluffing to bring the volume back. With Shea Moisture, it barely took any effort at all.
I was pretty concerned the mixture of shea butter and black castor oil would make my hair feel oily, stringy, and heavy, but it was nothing like that. My hair felt lighter, the curls were bouncier, and only once it dried could I feel how soft the conditioner made my hair.
I’ve now been using it for a few months and I’m still really happy with it. It also never irritates my skin, doesn’t leave a weird smell in my hair, and when it is feeling dryer because of external factors like weather and humidity, I use the DevaCurl Deep Sea Repair and it fixes it right up.
The Verdict
Shea Moisture doesn’t give you that huge boost of moisture you get with DevaCurl so it might not be great for people with high-porosity hair, thick or course hair that requires a heap and heaps of moisture, but it is a really good alternative a lot of other products out there (like Maui Moisture, for example – do not recommend. At all.), and they do have a few deep conditioners that are apparently worth a try! I haven’t tried them because it’s serious overkill for my hair - way too heavy - but I’ve only heard good things.
They also have a huge range for you to choose from that’s suited to all kind of hair types, which is something DevaCurl doesn’t really have, so it would be easy to shop around and figure out what works best for your hair.
Shea Moisture is also a great option if you’re finding DevaCurl too expensive. It’s priced comparatively well, so it’s easier to justify buying spending the money on it before you know whether it’s going to work for you.
All in all, I’ve had great results with Shea Moisture so I absolutely recommend it to anyone.
Do you have a miracle hair product that’s done wonders for your hair? Let me know in the comments below!
Like it? Pin it!

You Might Also Like…

Review: The Ordinary skincare changed my routine forever. This is how.
If you’ve been here for a while, you’ll know I absolutely swore by three skincare products for the longest time — my facial cleansing bar, coconut oil and sunscreen. That was literally all I used. It’s been three years since I said that and, my oh my, how things have changed. Cue, The Ordinary.
The Ordinary skincare range has quite seriously changed my life. If you’ve been here for a while, you’ll know I absolutely swore by three skincare products for the longest time — my facial cleansing bar, coconut oil and sunscreen. That was literally all I used. It’s been three years since I said that and, my oh my, how things have changed.
Until about three years ago, I didn’t think anything in my skincare regimen needed to change. I had a cleanser, I used coconut oil as a moisturiser at night and sunscreen in the morning and my skin felt great. But, at 31, I my skin didn’t look great. It was starting to dull, I could see more fine lines than ever before, I suddenly had blemishes, and I’d look at my skin in the elevator (albeit under harsh lights) when leaving work at the end of the day and…gasp. And sure, collagen production does decrease after your mid-20s and your skin does to start to look a touch dull, but I just didn’t believe I had to resign myself to this new life with dull skin.
By sheer coincidence, I had been listening to a financial podcast called She’s On The Money while commuting to work each morning. The girls from Adore Beauty were guests on the podcast and they were talking about how much they love facial serums, a brand called The Ordinary, and something called ‘retinol’. It was my understanding that expensive eye creams, for example, were a bit of a hoax and did next to nothing for undereye shadows and bags. Prior to listening to the podcast that morning, I believed all facial serums with that same brush.
Well…I was wrong.
One of the girls on the podcast said she had her skin mapped/scanned before and after using serums with retinol. Her skin had marked improvements post-retinol. Turns out, serums can actually penetrate your skin and change the speed at which your skin ages. I had seen The Ordinary products in a few stores but I had no idea what they were or why anyone would get them. When I got home from work that day, I bought three brand-spanking-new bottles and never looked back.
Note: The links throughout this post are for readers in Australia and New Zealand. I collect a small commission from sales, it doesn’t increase the price for you and all views expressed are my own. Scroll to the end for an international option :)
What is The Ordinary and why is it so cheap?
The Ordinary is a hair and skincare brand which does not spend heaps of money on fancy packaging or marketing. Each product is highly-concentrated, which means there’s no filler — the ingredients you see on the front of the bottle is what you get. This means they can afford to sell each product for about $10 - $15. The same products from other brands can cost between $70 and about $250. The company has made quality skincare products that are very affordable.
My favourite products by the ordinary
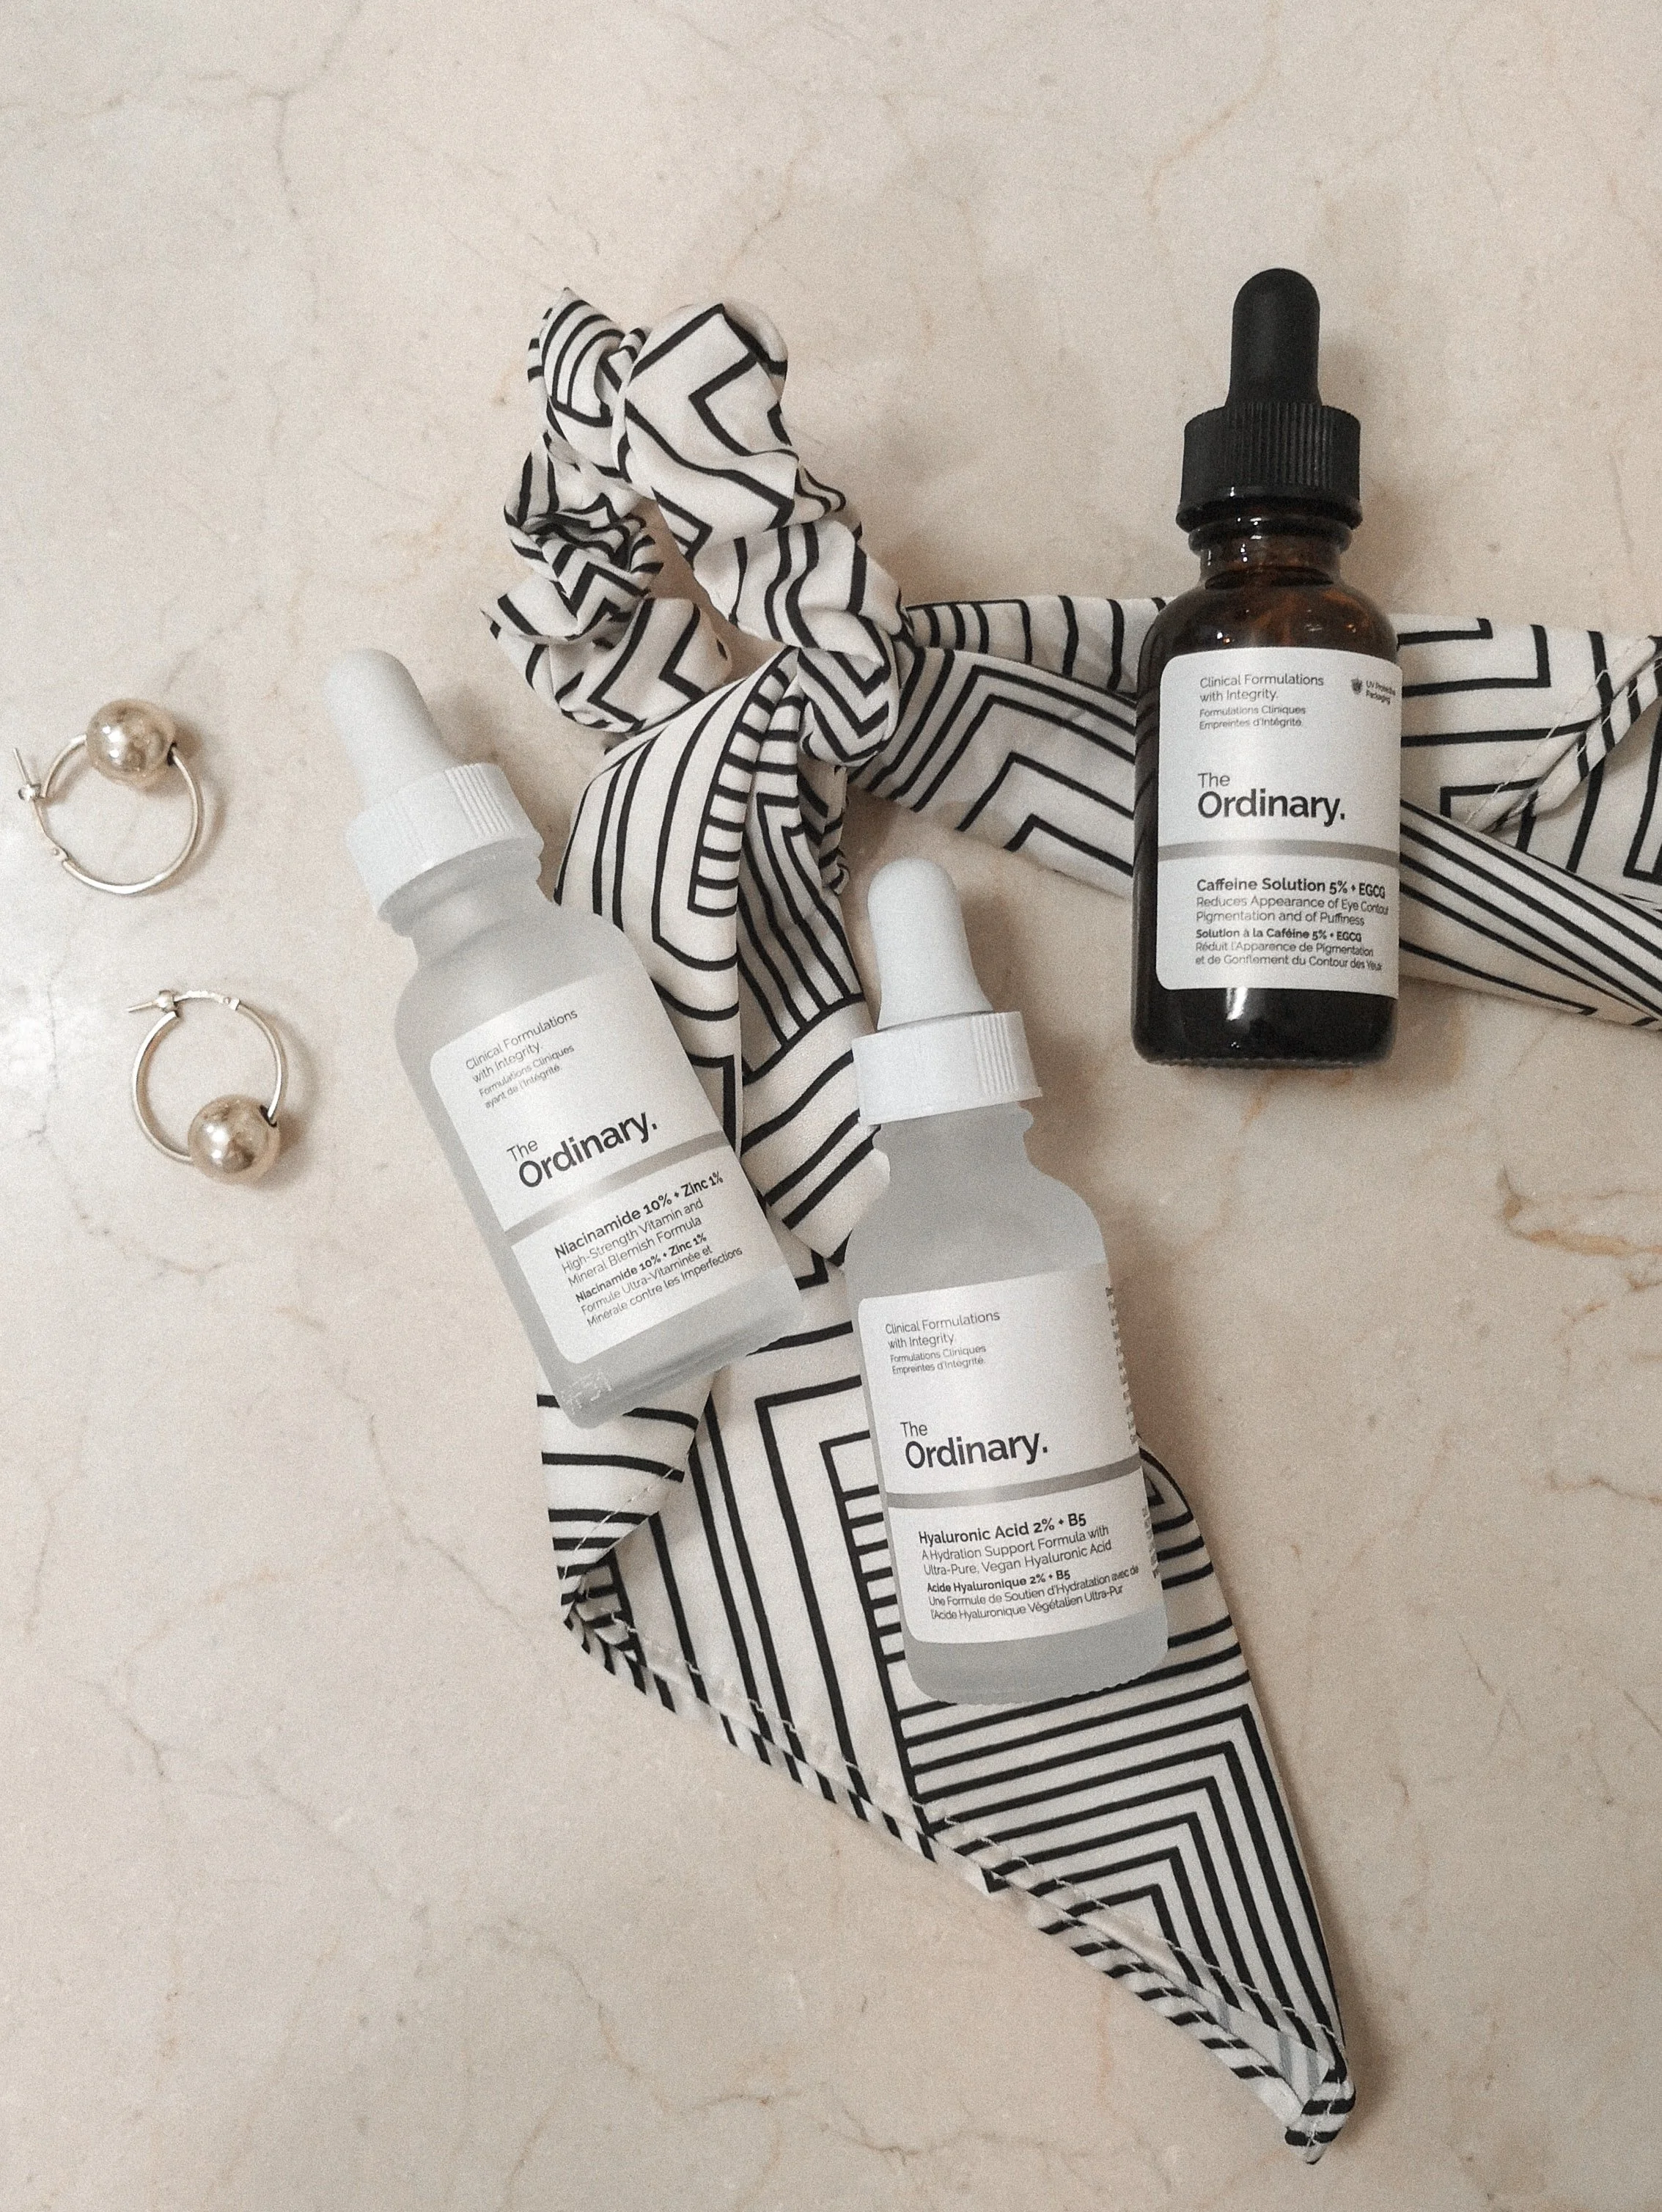
Hyaluronic Acid 2% + B5: A natural substance found in your skin, eyes, and joints. When used topically, it rehydrates the skin, increases its capacity to retain water and reduces the appearance of fine lines and wrinkles.
I LOVE hyaluronic acid. It’s the first product I grab after rinsing my face. My skin has never felt so smooth and hydrated.
Niacinimide 10% + Zinc 1%: Also known as Vitamin B3, niacinimide reduces the size of pores over time, improves epidermal barrier function, decreases skin hyperpigmentation, moisturises, and generally brightens skin. It feels very similar to hyaluronic acid on your skin — super hydrating. I use this every day.
Vitamin C: Helps slow early skin aging, prevents sun damage, and improve the appearance of wrinkles, dark spots, and acne. It has inflammatory agents, soothes skin and reduces puffiness — basically, it gives you a nice glow.
I was using The Ordinary Vitamin C cream with silicone, but I really didn’t like it. It kind of burned when I put it on my face, and apparently that’s normal, but I really hated it. The silicone also meant my makeup didn’t sit right on my face. I am currently using another Vitamin C serum, but I recently found out it’s not vegan so I’m not going to promote it. However, I do recommend you use a good Vitamin C serum — it makes a really big difference to your overall complexion.
Lactic Acid 10% + HA 2%: Increases cell turnover and helps eliminate accumulated dead skin cells on the top layer of skin — kind of like microdermabrasion, but to a lesser extent. This leaves your skin feeling super smooth, brightens your complexion, and it can thicken the skin — smoothing out wrinkles, and reducing blemishes over time.
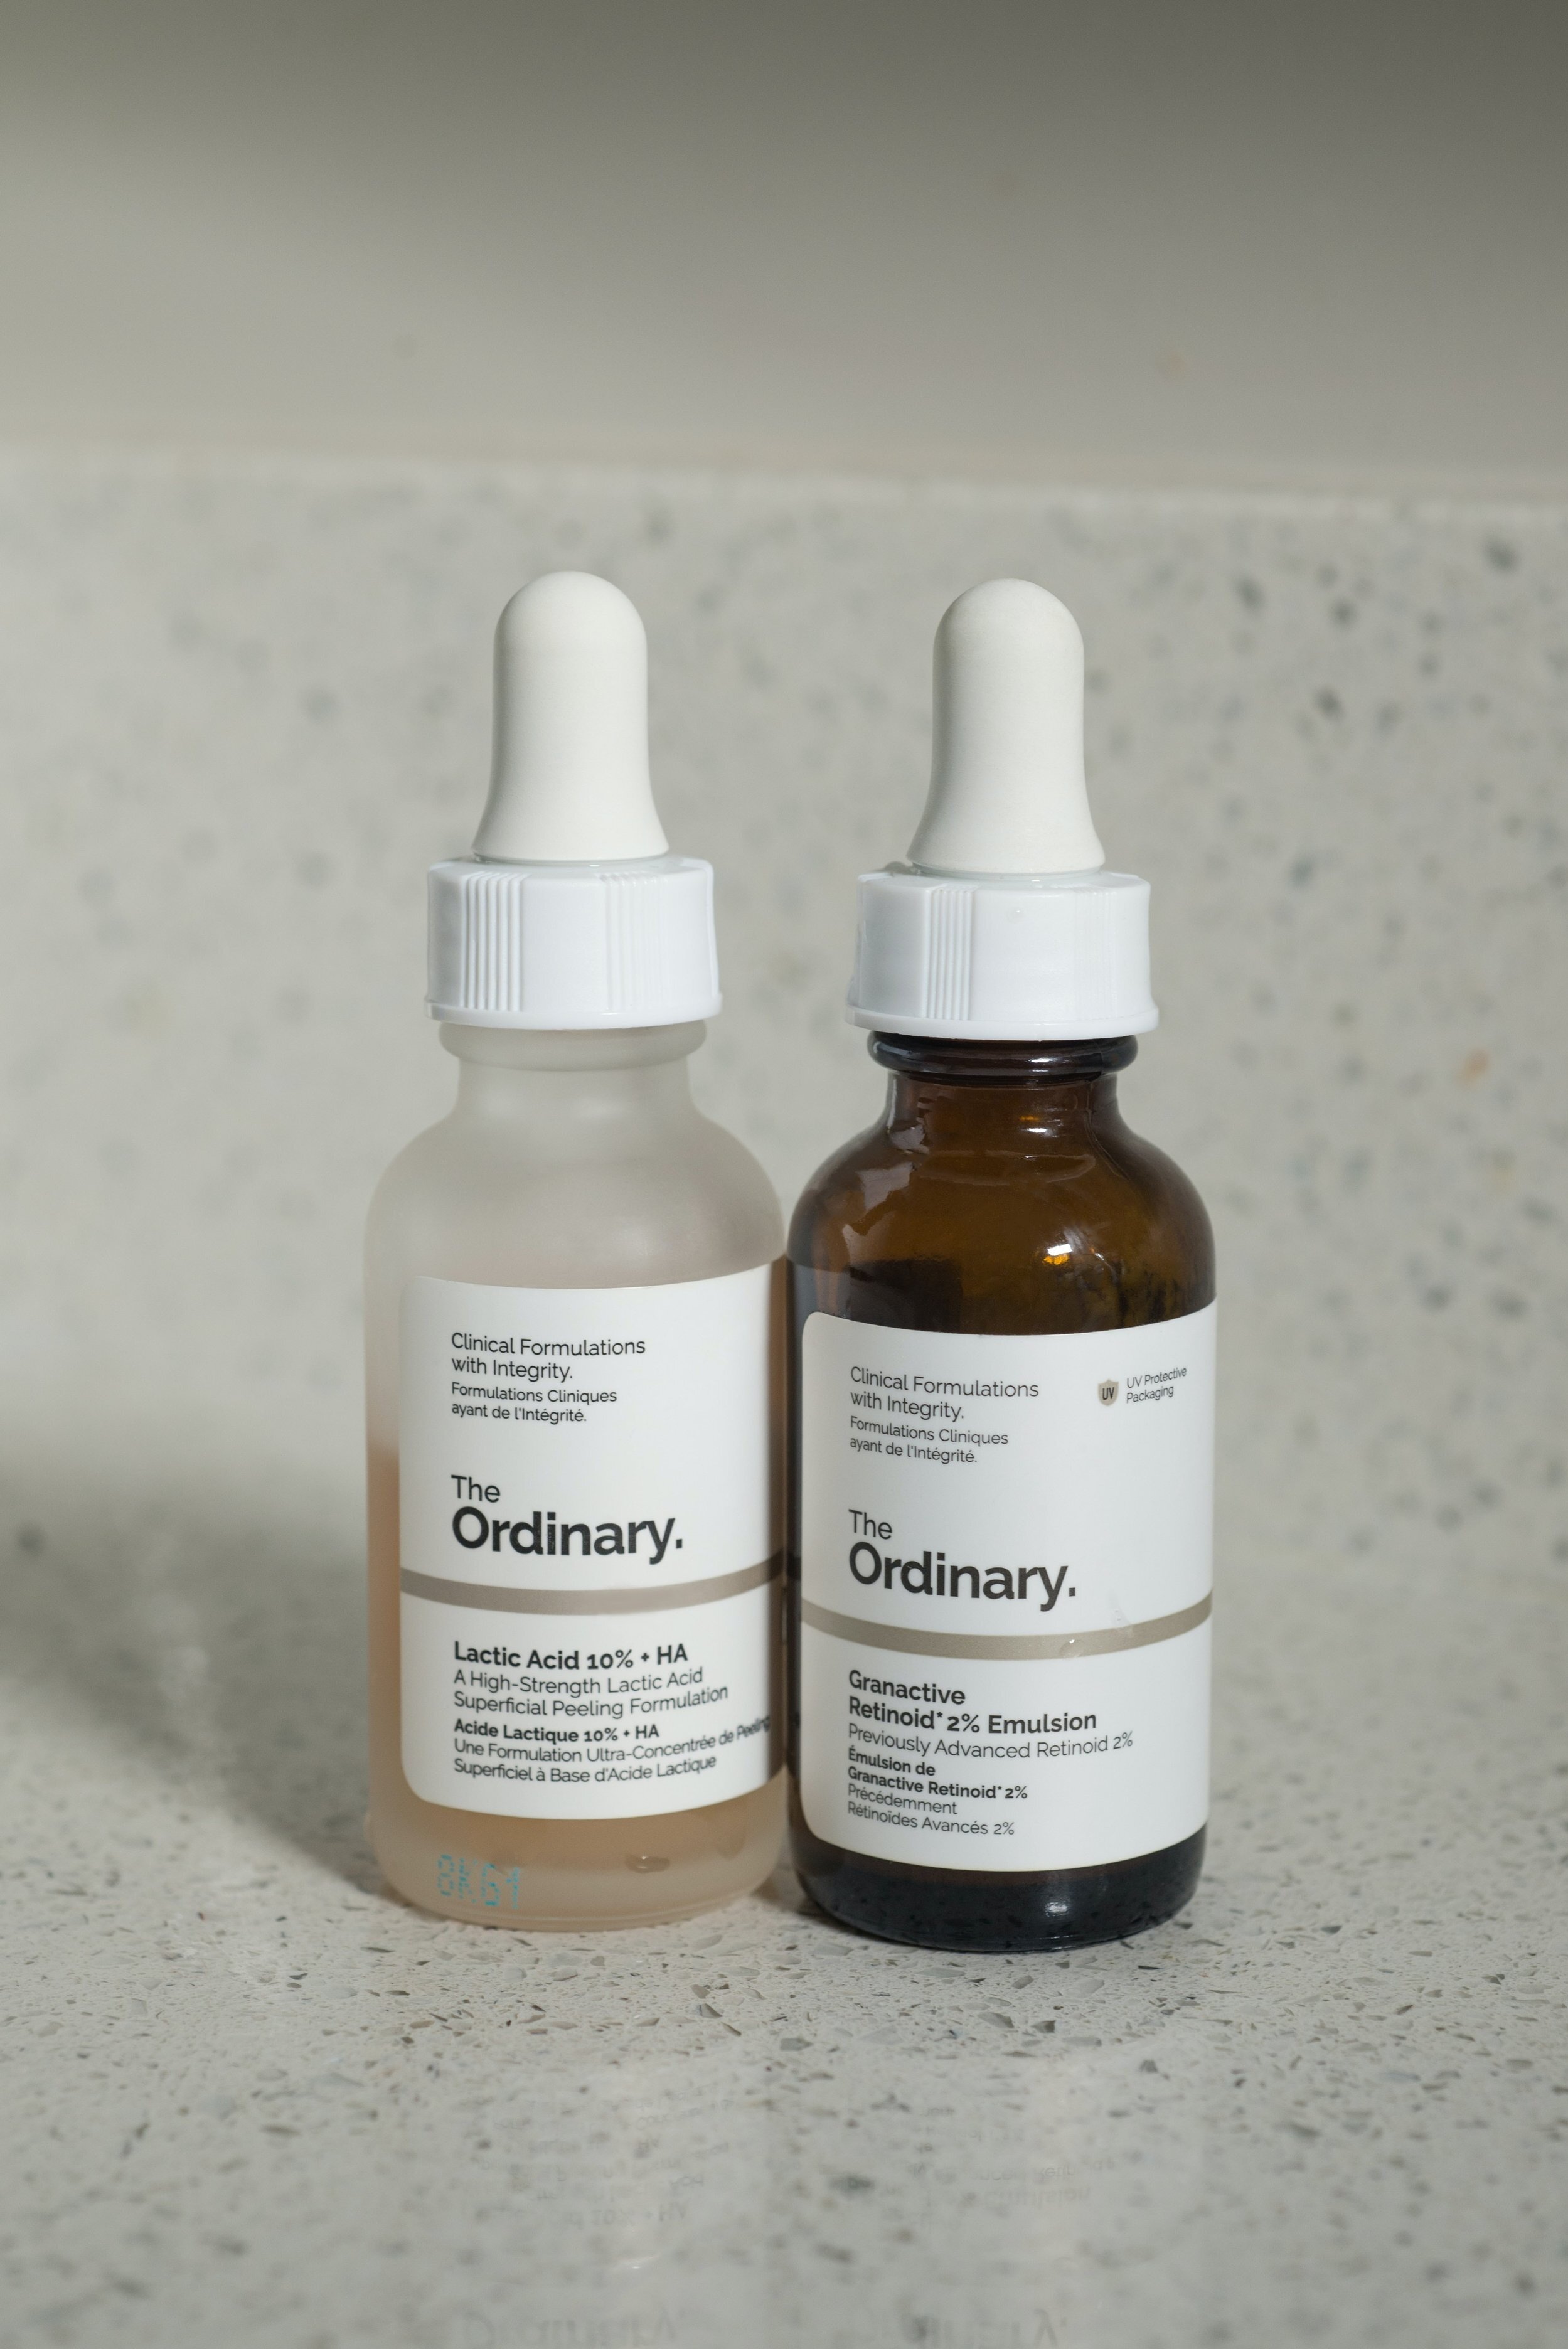
Granactive Retinoid 2% Emulsion: A really powerful ingredient derived from vitamin A, which increases collagen production and reduces wrinkles over time. It also stimulates the production of new blood vessels in the skin, which improves skin tone and fades age spots.
It’s touted as a miracle product, and it very well could be, but I only use a 2% concentration every second day. You can definitely go overboard with retinoid — too much and it can burn you. It also makes your skin more sensitive to the sun, which is why I use it at night.
If you’re wondering why I use retinoid, not retinol: Basically, retinoid is more powerful — it’s the pharmacy-grade solution, whereas retinol is a product of retinoid. It’s a watered-down version.
Resveratrol 3% + Ferulic Acid 3%: A natural antioxidant which occurs naturally in the skin of some fruits, like grapes and olives, and dark chocolate. It boosts antioxidant levels so your skin can repair and defend itself, improves skin firmness, and reduces the appearance of wrinkles. It also calms any irritation and is really good for sensitive skin.
I use this with retinoid because it helps the product penetrate deeper into my skin.
Moroccan Argan Oil: Rich in Vitamin E, super moisturizing, hydrating, can prevent sun damage, and reduces the appearance of fine lines. I may not use coconut oil anymore, but I still love using oils on my skin.
Morning skincare routine
When you start using serums, the thing to remember is what products you can and can’t mix. I use Vitamin C in the morning and retinoid at night because they can cause irritation when their powers are combined. Lactic acid and retinoid can be used in the same routine…but can also cause irritation. It depends on your skin. Given that you should really only be putting about three serums on your face per session, I like to alternate them.
Step 1:
After rinsing my face in the shower, I’ll dry my skin about 90% and immediately put a few drops of hyaluronic acid on my face. Enough to cover it completely. I do this because hyaluronic acid is attracted to water, so it grabs the moisture on your face and pulls it into your skin. It works just fine if your face is completely dry, but I feel as though it does more if my face is a little damp. After putting the acid on, it dries really quickly.
Step 2:
When that’s all dry, I’ll do exactly the same thing with niacinamide — coat my face in it and wait a few seconds until it’s dry.
Step 3:
I follow niacinimide up with a few drops of Vitamin C — just enough for a thin coat on my face. It’s a powerful ingredient and too much can be damaging, and can make your skin quite sensitive to the sun. I use it in the morning and follow it up with sunscreen (my fav at the moment is Skinstitute) and primer with an SPF filter.
Evening skincare routine
Step 1:
I remove my makeup using ASAP Daily Facial Cleanser. I like this one because it removes makeup pretty easily, it doesn’t leave my skin feeling tight and dry, and I never have breakouts with it.
Step 2:
Like the morning, I’ll coat my face in hyaluronic acid when my skin in about 90% dry.
Step 3:
I alternate products in this step every second day.
On day one, I’ll follow hyaluronic acid with lactic acid. Just enough for a thin layer on my face is enough to leave it silky-smooth.
On day two, I’ll use just enough retinoid to coat my skin. It may be a miracle product, but you can definitely go overboard with it. Once that’s dry, I go in with resveratrol. It’s quite thick and oily so I don’t use too much. I’ll then wait at least 30 mins until it sinks into my skin before using moisturiser.
Step 4:
If I’ve used lactic acid, I’ll moisturize with argan oil. It’s quite thick so there’s no need to use too much — you don’t really want a pile of oil on your face and clog your pores. Your skin will feel silky-smooth the following morning.
If I’ve used retinoid, I’ll moisturise with ASAP Advanced Hydrating Moisturiser. It smells like orange peels, leaves my skin feeling hydrated and is supposed to heal sun-damaged skin and reduce fine lines.
That’s it!
I’ve come a long way from only using coconut oil and, while I still do believe it’s a great moisturiser, it wasn’t doing anything for my skin except moisturising it. Why stop at one benefit when you can boost collagen production and repair your skin from the inside out?
I’m not going to have the skin of a 20-year-old again, but since starting this new skin regime I have noticed my skin is brighter, I have fewer blemishes and fine lines, and my skin feels amazing.
Do you use The Ordinary? Tell me about your favourite products below!
Like it? Pin it!

You Might also Like…

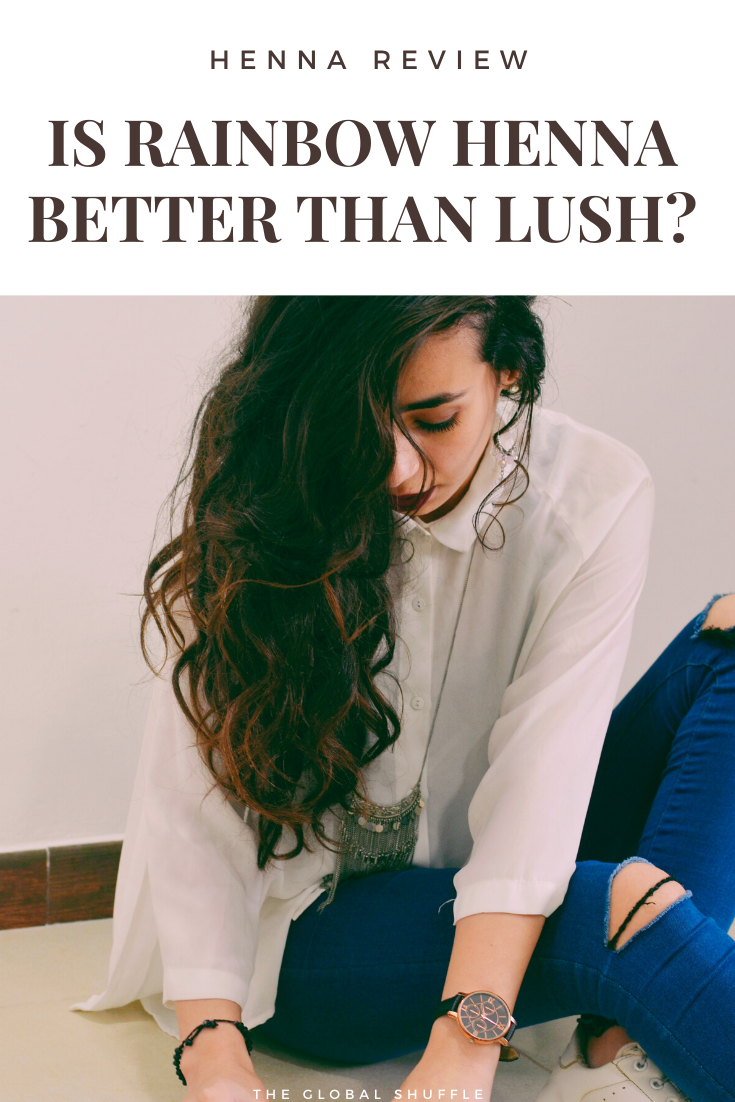
I Tried Lush Henna and Rainbow Henna. Here's What Happened.
Lush Henna and Rainbow Henna are probably the most popular natural dyes on the market. They both come in a few colours, they’re widely available and promise to have your hair looking amazing after use. I put both to the test. Here’s what happened.
I put Lush Henna and Rainbow Henna to the test. Here’s what happened.
Lush Henna and Rainbow Henna are probably the most popular natural dyes on the market. They both come in a few colours, they’re widely available and promise to have your hair looking amazing after use.
As I said in my Lush Henna review, I was blessed with grey hair from the ripe old age of 24, my hair is naturally very dark, and have been looking for a natural alternative to cover it up because my hair hates chemicals.
The problem is, henna isn’t really designed for hair that has different shades. It’s more of a natural stain that colours the hair in the same way that beetroot stains your skin when you touch it, but henna is more permanent.
Grey strands stain lighter than dark strands, so we’re looking for the one with the best coverage.
If you haven’t read my Lush Henna review, check it out!
(For a full list of pros and cons, scroll right to the end)
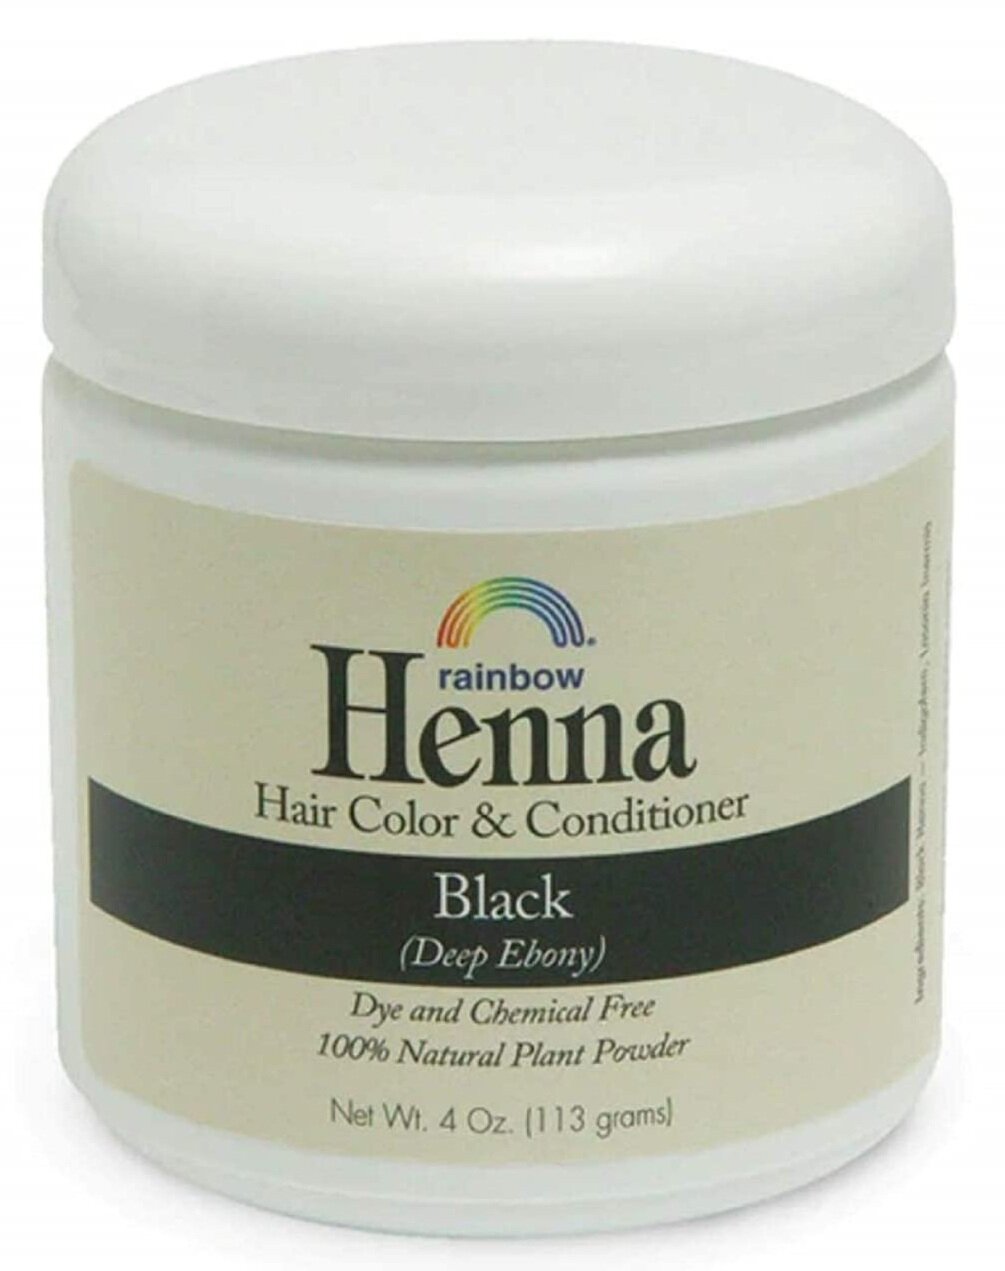
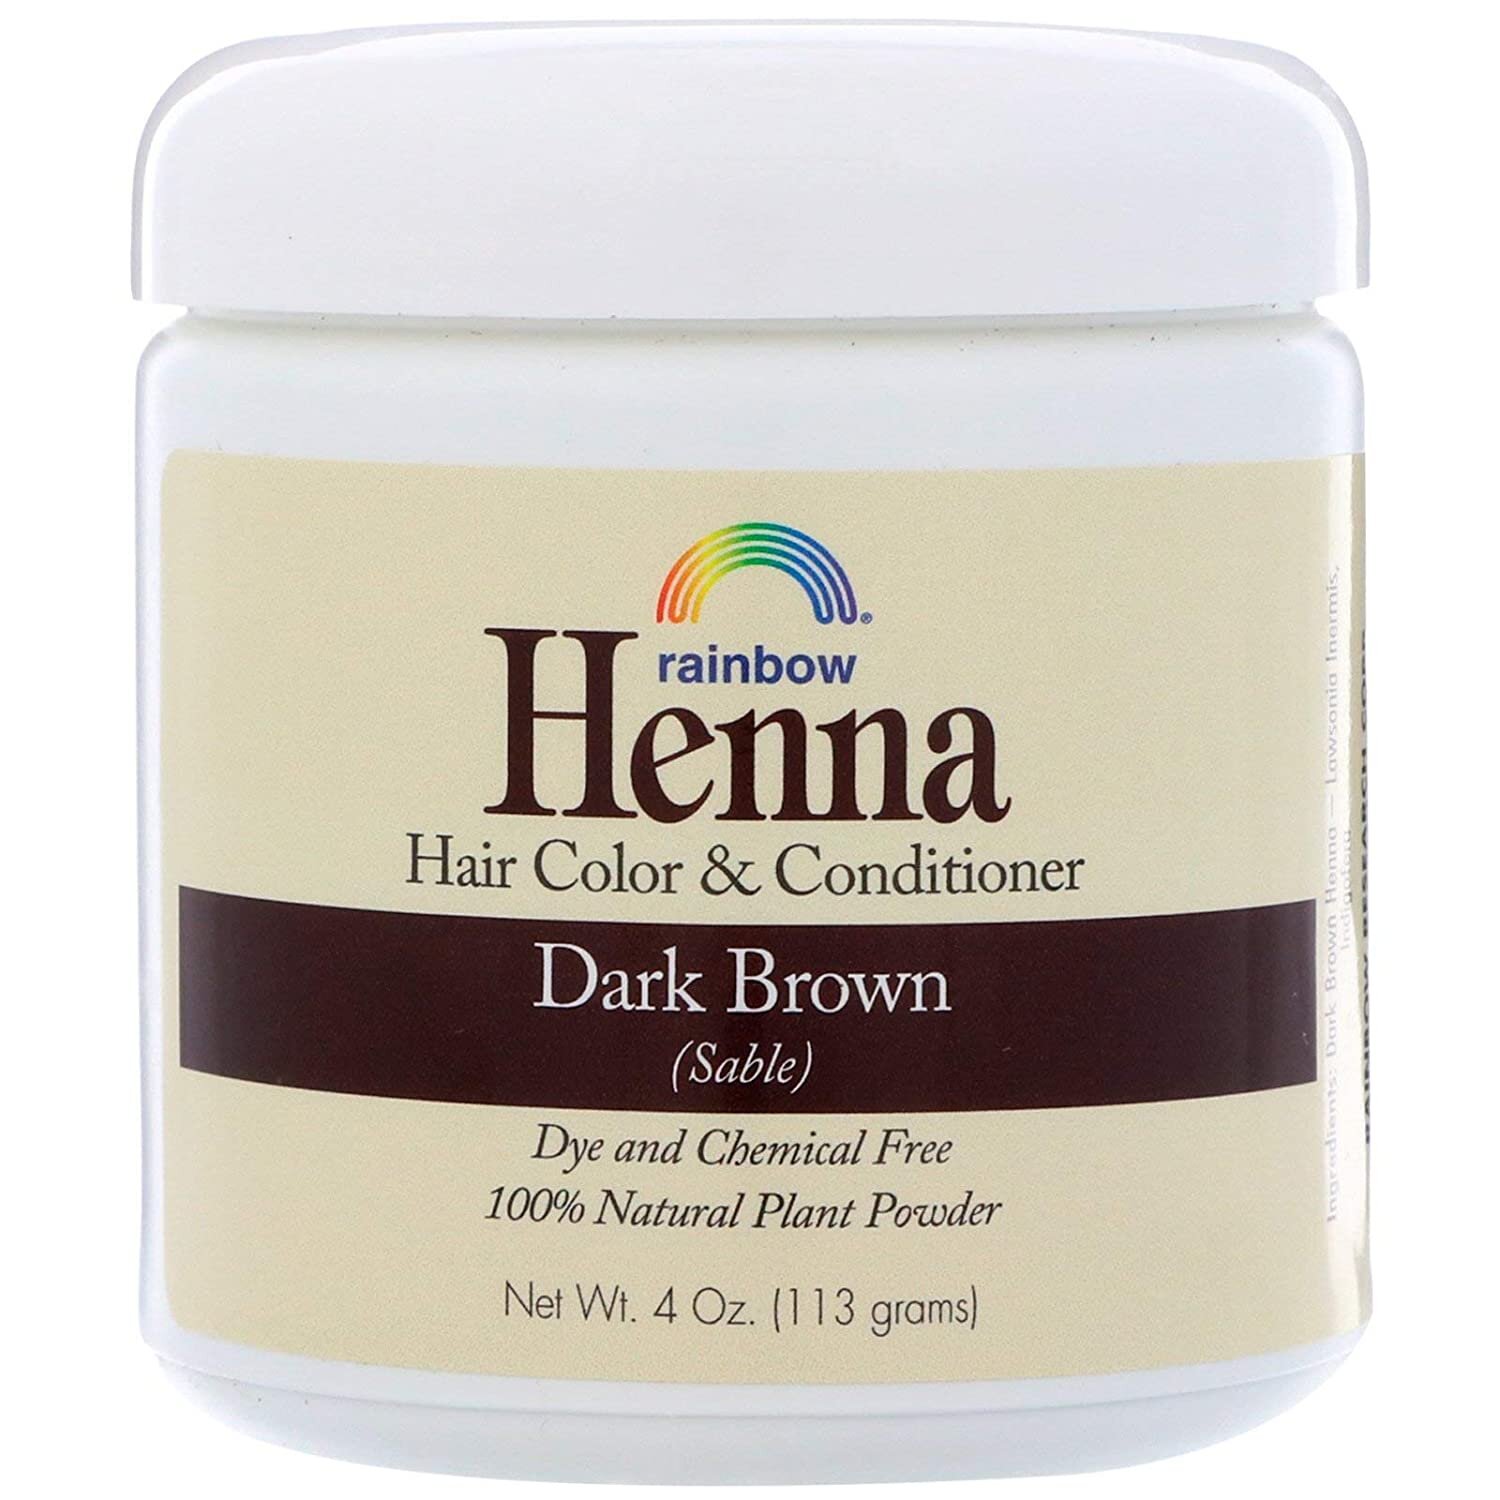
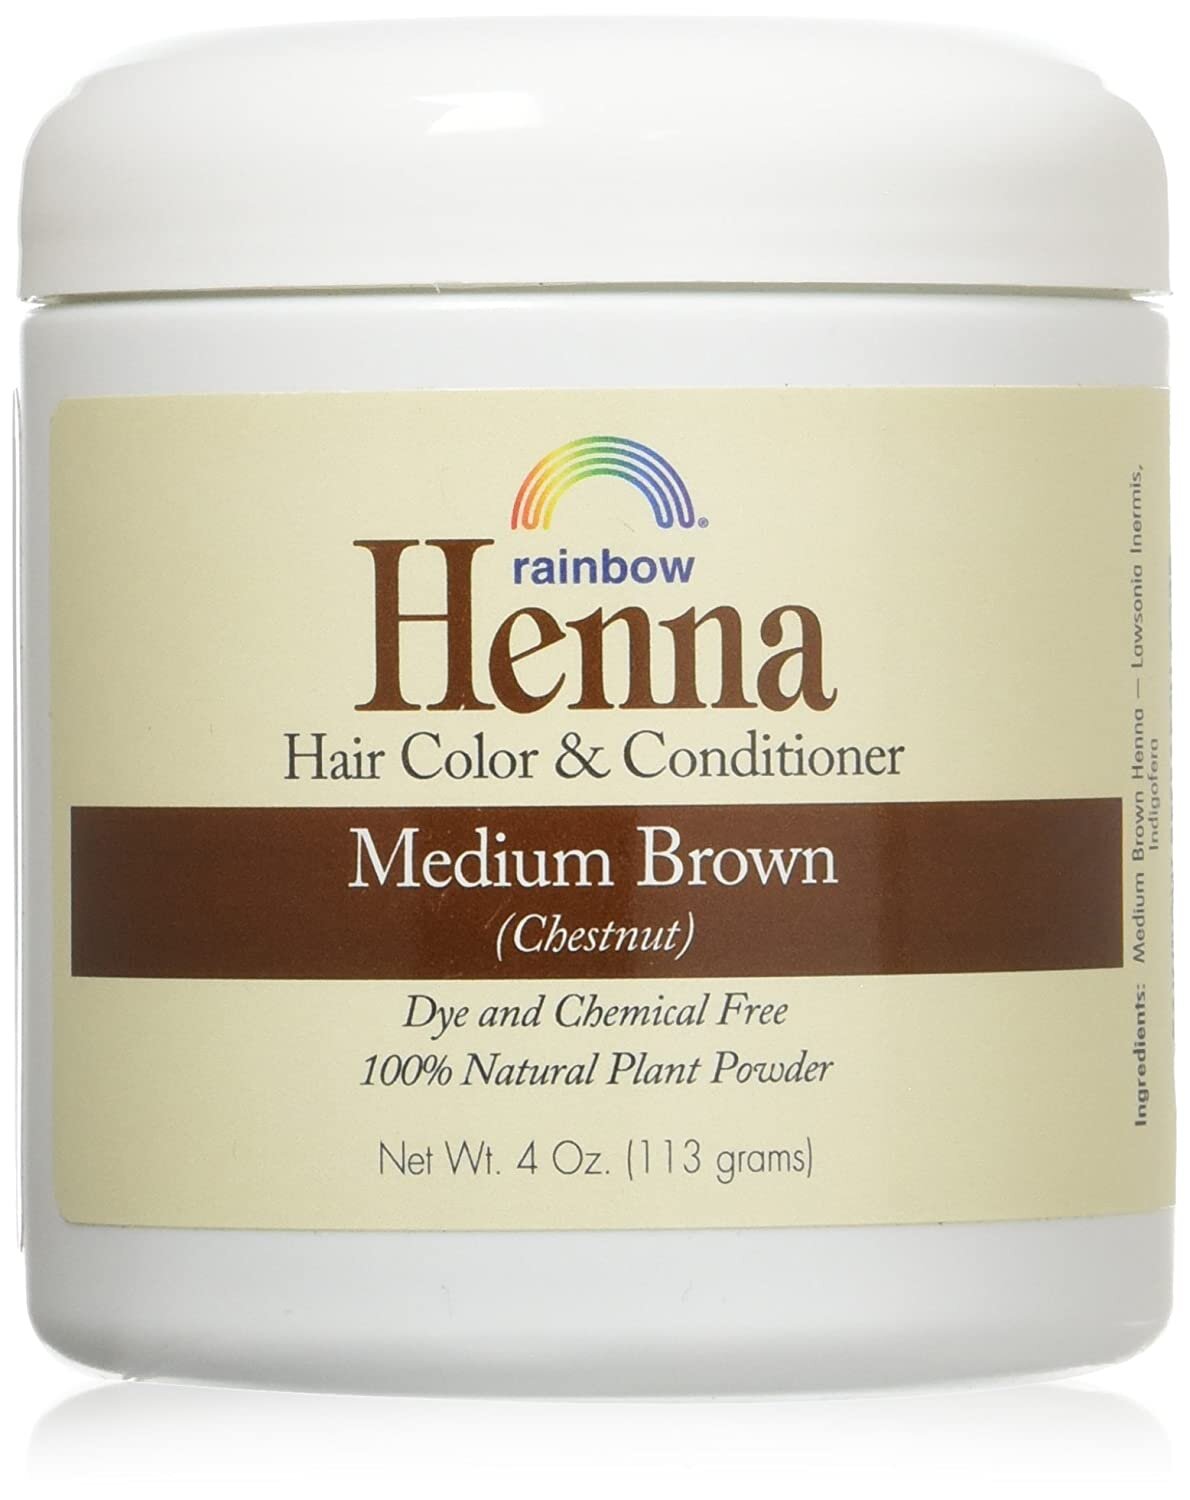
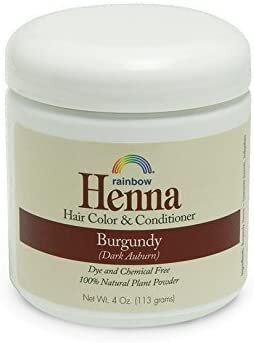
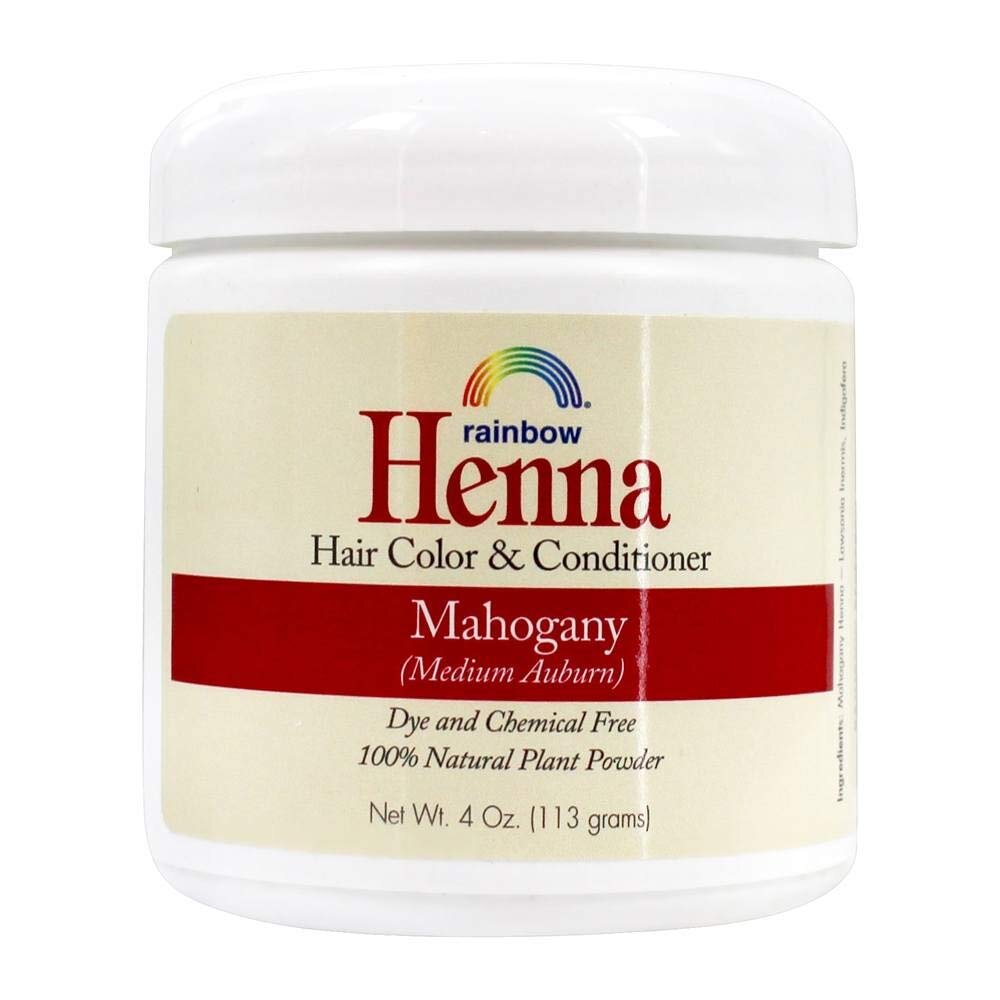
Rainbow Henna review
Pick a colour - there are loads! If you have really long or thick hair, you might want two pots just in case. My hair is long and I have a lot of it, but the strands are fine so I only needed 3/4 of a pot.
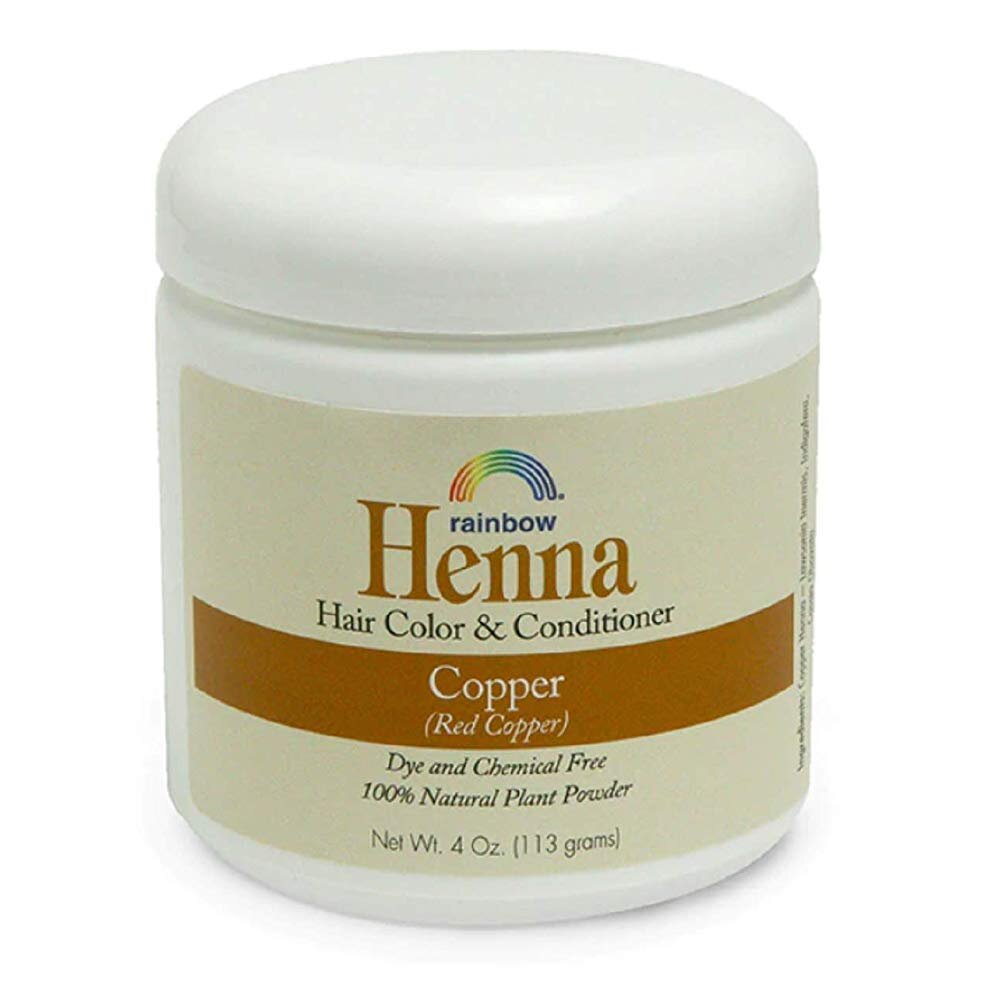
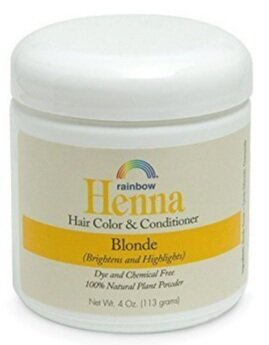
You’ll also need a plastic or glass bowl, a plastic or wooden spoon for mixing (metal does something weird to the dye so don’t use an ordinary spoon), a dying brush or comb with a pointy but on the end, gloves so you don’t stain your hands, something to cover the floor with, and some kind of oil or petroleum jelly to put on your face and neck so the henna easily comes off your skin. As with all henna, it’s a little messy.
Preparation
As with Lush Henna, you’ll need to mix Rainbow Henna with water to make it into a paste. Rainbow Henna comes in powder form is astronomically easier to dissolve than Lush Henna.
If you’re covering greys with a dark colour, you will need:
A pot of hot brewed coffee (not instant) and apple cider vinegar. The coffee takes the red shades out of the dye and the apple cider vinegar helps the greys latch on to the colour.
In the glass or plastic bowl, put in as much henna as you think you’ll need and gradually add the coffee. You’re looking for pancake batter consistency. Gloopy, but not too thick. Add about a tablespoon of vinegar and mix it in.
I put my glass bowl in a saucepan with a small amount of boiling water in the bottom to keep the dye warm. Like you’d do if melting chocolate.

Application
The directions say you can apply it to wet or dry hair, but I chose dry. I felt like the colour might not stain as much if the hair was wet, but it’s entirely up to you. It also says to apply on clean hair, but I think this is to ensure there are no styling products that would get in the way. I think it had been about two days since I washed it, but don’t really use gels or anything in my hair so I figured it was fine.
If you’ve got someone to apply it for you, use them. I have done it myself and had someone else do it, and it will save you loads of time and cleaning up if someone else does it.
Either way, start with the roots and move on to the length once all the roots are completely covered. The best way to do that is with a dye brush, but if you’re on your own that might be hard so use your fingers as best you can. It still works without a brush.
You want to do the roots first because henna is thick. It’s so thick that if you cover the length and the root at the same time, you’ll have a lot of trouble moving the length out of the way to get to the parts that haven’t been coloured. You’ll thank me later.
When you feel like it’s done, your hair should look all thick and ropey - like Tarzan’s hair.
Lift it up and twist it in to a high bun on top of your head. Smooth it down and it’ll stay there on its own. If it doesn’t, fashion a headband out of a piece of cloth and tie it up. A hair elastic probably won’t fit around it.
Washing it out
Getting this stuff out is an effort. Don’t bother trying to do it in the sink, you will need to have a full shower. But I did notice it wasn’t nearly as messy as getting Lush Henna out - the shower looked significantly cleaner after.
Rinse and rinse until the water runs clear.
You’re not supposed to use shampoo for about 48 hours after putting henna in your hair to give the dye the best chance of staining your hair. This will be hard because it will feel gritty, but put some non-silicone conditioner in, rope it through, and rinse again until there’s no grit left.
Dry it as you normally would.
You’ll need to wait about 48 hours before the henna has finished developing. If you feel like the greys are still there after you rinse it all out, wait a few days then make your mind up.
The result
I noticed an immediate improvement.
My hair was dark like I wanted and there was no red or copper tinge. On top of that, the greys were more or less the same colour as the rest of my hair. This is a huge change from Lush Henna, which left the greys all coppery. not a huge problem because I guess they weren’t grey anymore, but not ideal. Rainbow Henna literally covered them all. I was shocked.
While my hair did feel ridiculously gritty for a few days until I was able to use shampoo again, the colour is pretty much exactly what I wanted.
Lush Henna vs Rainbow Henna
Rainbow Henna was about 100% better for so many reasons.
Time. To get your hair a darker colour, Lush Henna requires two separate applications. One takes two hours and the other takes four. And that’s just the developing time, not the preparation. Rainbow Henna took about 2.5 hours from beginning to end.
Preparation. Lush Henna comes in big blocks that have to be cut up really finely. Rainbow Henna comes in powder form so most of the work has already been done. Again, this saves a heap of time and washing - you don’t need a knife or chopping board.
Ingredients. Lush Henna is full of shea butter and Rainbow Henna is not. This makes a huge difference when you rinse it all out. Shea butter makes my hair look really greasy and I literally can’t not shampoo it out, but on the other hand it does make your hair feel nice afterwards than Rainbow Henna, which feels gritty after.
Cost. Lush Henna is about $25 per block. Seeing as I use red and mix brown and black, it costs me about $75 in total. Rainbow Henna costs $10 for a pot that covers my whole head in one go.
Result. Rainbow Henna coloured my hair in a way that Lush Henna never did, even though Lush stayed in my hair for twice as long. Ultimately, it covered all my greys and basically made them the same colour as the rest of my head. That’s all I was after, so Rainbow Henna wins hands-down.
Do you prefer Lush Henna or Rainbow Henna? Let me know in the comments below!
Like It? Pin It!
You Might Also Like…

Does Sand and Sky Really Work? A Candid Review
If you’re a human who uses the internet, you’ve probably come across Sand And Sky – the Australian Pink Clay Mask and Exfoliating Treatment said to be making everyone’s face brighter than sunbeams, but does it really work?
If you’re a human who uses the internet, you’ve probably come across the Sand And Sky – the Australian Pink Clay Mask and Exfoliating Treatment said to be making everyone’s face brighter than sunbeams, but does it really work?
If you don’t know what I’m talking about, Sand and Sky is an independent Australian company that fashioned a face mask and exfoliating treatment from Australian pink clay, and its been wildly successful.
The mask supposedly absorbs dirt and impurities, detoxifies, tightens pores, restores the skin’s natural defence barriers, and brightens skin tone, while the exfoliating treatment does all of the above, and resurfaces and mattifies the skin.
As a traveller, I find my skin often doesn’t know how to handle extreme climates. It loves the weather in warm and sunny Sydney, and doesn’t deal with extreme humidity or extreme cold very well. My skin was so dry in summer in Banff that no amount of moisturiser kept it hydrated, and freezing cold temperatures in Montreal weren’t much better.
It was a nightmare, but I know I’m not the only one who has this experience when they travel. So, after the realising Sand and Sky Australian pink clay mask had thousands of fantastic (and honest) reviews, I decided to make the most of the Black Friday sales and get on the bandwagon in the hope of finding something that can fix whatever my skin does while travelling in new climates.
Here is my Sank and Sky mask review.
Sand and Sky Face Mask and Exfoliator: An honest Review
Having spent my entire life in sunny Australia with skin so pasty-white that finding foundation in the right hue is legitimately a struggle, I have mild discolouration from sun exposure, and my nose and the apples of my cheeks have always been slightly red. Make-up covers it pretty well, but I have a fairly uneven skin tone all-round.
Having fallen for a few cult ‘miracle’ products in the past, I wasn’t so sure about Sand and Sky. The products promised to help with almost all my skin issues, but the raving reviews are largely by girls who are young and already supremely beautiful with pre-mask skin that looks radiant with no makeup on. I’m not denying any skin issues they may have, but I, for one, do not look like that in front of a camera with no makeup on. It seemed too good to be true.
But I’m a sucker for natural vegan products, and there were so many reviews that my curiosity got the better of me and I had to know if it was really worth all the hype.
The Product
I bought the Perfect Skin Bundle as part of a Black Friday package, which included:
1 x Porefining Face Mask + brush applicator
1 x Flash Perfection Exfoliating Treatment
1 x Sand and Sky ‘Holiday Pouch’
1 x Sand and Sky hairband

On sale it cost $101 CAD, but if you buy it without a discount it’ll cost $122.
It sounds like a lot of cash to hand over, but the items don’t feel cheap. In fact, everything about the packaging of the mask and exfoliator is high-quality, beautiful to look at, and satisfying to hold. The clay needs to be stored in a cooler environment to stop it from drying out, so the pot itself is thicker and heavier than you expect it to be to insulate and protect the product. It’s weighty and feels almost like it’s made of ceramic. The exfoliator tube is smooth matt plastic with a click-lid, and the same beautiful pink branding.
The only things I didn’t really ‘get’ were the ‘Holiday Pouch’ and hairband. Sure, they were part of a package deal, but the pouch is made of the same translucent pink plastic used for inflatable chairs in the early 2000s. It doesn’t have the same high-quality feel as the rest of the packaging and seems gimmicky.
The hairband is white with pink stitching, and feels like a cheap towel. I used it once and decided it didn’t do much a scrunchy couldn’t do, but I can see how it might be useful for people with really curly hair, or people who have a lot of fly-aways that might get caught in the mask.
Application
For best results, Sand and Sky recommend applying the mask on one day, and the exfoliator the next. They also recommend using the exfoliator in the evening so your skin has time to rejuvenate overnight after being scrubbed. So that’s what I did.
Mask
The clay is a dark shade of brownish-pink, and it’s quite thick and very smooth. A little bit goes a long way, so after cleansing and drying my face, I put a bit on the brush and pasted away, avoiding my eyes and eyebrows, mouth, and hairline.
The brush makes application really easy. There’s no mess, and you have a lot of control over the amount of product you’re using. I can’t imagine how much mess and waste there would be if you were only using your hands, and it’s not a cheap product, so the brush is a nice touch.
I read that it’s totally normal to feel a ‘stinging’ or ‘tingling’ sensation after applying the mask. Apparently that means it’s doing its job, but I left it on for 10-15 minutes until it dried and never felt anything like that. I did notice the clay was more translucent around my nose, which means there were more ‘impurities’ there for the mask to draw out, but overall the mask made my face look like a cracked shade of pinkish-white.
Washing it off was ridiculously easy (seriously, it just slides off without scrubbing or anything) and, after following up with my usual moisturiser (coconut oil – it’s the bomb), my skin did feel really, really smooth.
Exfoliator
The product is brown, dense, and granular.
The directions say to use the exfoliator on clean, damp skin. You’re supposed to rub it in with your fingers in a circular motion for around 30 seconds, and let it sit there for five minutes, or until it dries.
Given how dense it is when it comes out of the tube, the exfoliator mixes with the water that’s already on your face and spreads surprisingly easily. I did feel like I had more on my fingers than my face, but I did what I could and left it there until it dried. As with the clay, washing it off was really easy. I followed up with coconut oil, and my skin felt super-smooth afterwards.
The Result
After the first use, my skin was definitely smoother.
Make up application was a smoother process, it looked more even, and my skin wasn’t dry. While there was a brightness to my skin, it wasn’t really noticeable to others – my boyfriend is usually pretty good at noticing subtle changes with all the different products I’ve tried, but even he could only vaguely tell the difference after I pointed it out. My pores also didn’t really shrink like they seemed to for all the influencers, but because my skin looked smoother, I don’t think they were as noticeable.
After a few uses I noticed the redness in my skin had decreased, my skin tone was a little more even, and I suddenly felt a little more comfortable walking outside without makeup on. I used it twice per week for a couple of weeks, before cutting it down to once per week for experimentation purposes and it made no difference.
The Verdict
Having now used Sand and Sky for a few months, I use it on a need-to basis and it does actually make a difference to my skin texture. While I don’t look like a glowing moonbeam and I’m not floored by a newfound brightness to my skin like the people on Instagram, I use it when my skin starts looking a bit red or feeling uneven and it fixes it right up – foundation goes on smoother, powder doesn’t look cakey, and blending is so much easier it’s ridiculous.
Some people say they have breakouts after using it the first few times, but that didn’t happen to me, and I still haven’t experienced the ‘stinging’ or ‘tingling’ sensation others talk about, but that could be to do with the amount if product I’m using. Some people really cake it on, whereas I apply a thinner layer and, as far as I can tell, it still works. I will eventually try a thicker coating so see if that makes a difference, so watch this space!
Overall, I find the benefits of the mask are only visible for me on day one and whatever ‘glow’ I had disappears by day two. I much prefer the exfoliator because I feel like it actually works to make my skin tone and texture more even, and the results are visible for a few days. Having said that, I have a Baiden Mitten that does a pretty similar thing, but cost $50 and lasts for at least two years.
Is it worth it?
Sand and Sky is pricey. If you forgo the bundles and buy each product individually, one 60g pot of mask will cost you more than $65, and the 100ml tube of exfoliator will cost $57.
Given that the product is all natural, vegan, cruelty-free, and is made and manufactured in Australia with free shipping, the price is totally justified, but if you use it the way Sand and Sky recommend, it won’t last long at all.
Sand and Sky recommend using the mask and exfoliator combo twice per week on average (more if you have oily skin, less if your skin is dry). Sand and Sky also suggest the clay pot contains enough for around 15 uses, which means you could be ready for another in under two months.
Having said that, I’ve almost had mine for four months and, after an average use of once per fortnight for the mask and once per week for the exfoliator, both products still have more than half left. The key is to keep track of how much you’re using – I read one review where someone only got seven masks out of her pot because she piled it on, so it really depends.
Another major selling point is that it’s supposed to decreases the appearance of acne scars quite significantly, and the before and after shots do look pretty amazing. I’ve never had acne so I can’t provide any insight on this one, but if you’re looking to get rid of acne scars, Sand And Sky might be a good thing to try.
The other thing I can’t really look past is that the price is set to USD, even though it’s an Australian company. This means people from the US will pay $78 for the bundle with shipping, while Australians will pay $111 for the same bundle that’s made, manufactured, and shipped within their own country. On one hand I understand that decision, but on the other hand it’s a bit unfair to local customers.
All in all, if you have the cash but you’re on the fence about it, give it a go! It’s a natural, vegan, and cruelty-free product, and if it helps you feel great in your skin, it’s priceless.
Have you tried Sand And Sky, or do you have another product recommendation? Let me know in the comments below!
Like it? Pin it!

You Might Also Like…

Review: Is Function of Beauty Skincare Worth It?
I absolutely love the Function of Beauty hair line, so when I found out about their new range of customized skin care, I was pretty keen to try it out. Here’s what happened.
I absolutely love the Function of Beauty hair product line, so when I found out about their new range of customized skin care I was pretty keen to try it out. Here’s what happened.
For anyone wondering what Function of Beauty is, it’s a brand of hair and body care that customize formulas based on each individual’s unique preferences. Everything is vegan and cruelty-free, and I loved the shampoo and conditioner and have just ordered the larger bottles (read my review here), and I really do think they’ve enhanced the health of my hair.
Cue skin range.
Before
I have been using the NueBar face wash bar as a cleanser and regular organic coconut oil as a moisturizer at night. I only wash my face once a day - because I think twice is too much for your skin - but I do rinse it with water in the morning and use either sunscreen (Ultra Violette is my fave at the moment), or a Vitamin C cream that I once got as a sample and haven’t used up yet. So my skin regimen is pretty low-key, but effective. I’ve said it before, I’ll say it again - coconut oil is an excellent moisturizer.
I am quite pasty and I live in a hot country. Try as I might to protect my skin from the rays, you can’t shield yourself completely so I have quite a few freckles, some redness around my nose, and small amounts of sun damage here and there.
My skin often gets sick of products, which means I can use something great and it’ll work for a month, before it stops working and my face feels horrid - coconut oil is the only moisturizer I have used that my skin hasn’t suddenly rejected. My skin is quite smooth in texture, so when I cover it up with makeup, you can’t really see any uneven texture.
Function of Beauty Skin Care Review
Much like the hair products, I was asked to complete a skin quiz prior to my purchase to ensure the products would match my skin and that I would get the results I wanted. As with the hair quiz, there were visual aids so I understood how to answer each question, with little info boxes to spell it out for you if you don’t know what any of it means. It was all very quick, easy, and visually pleasing.
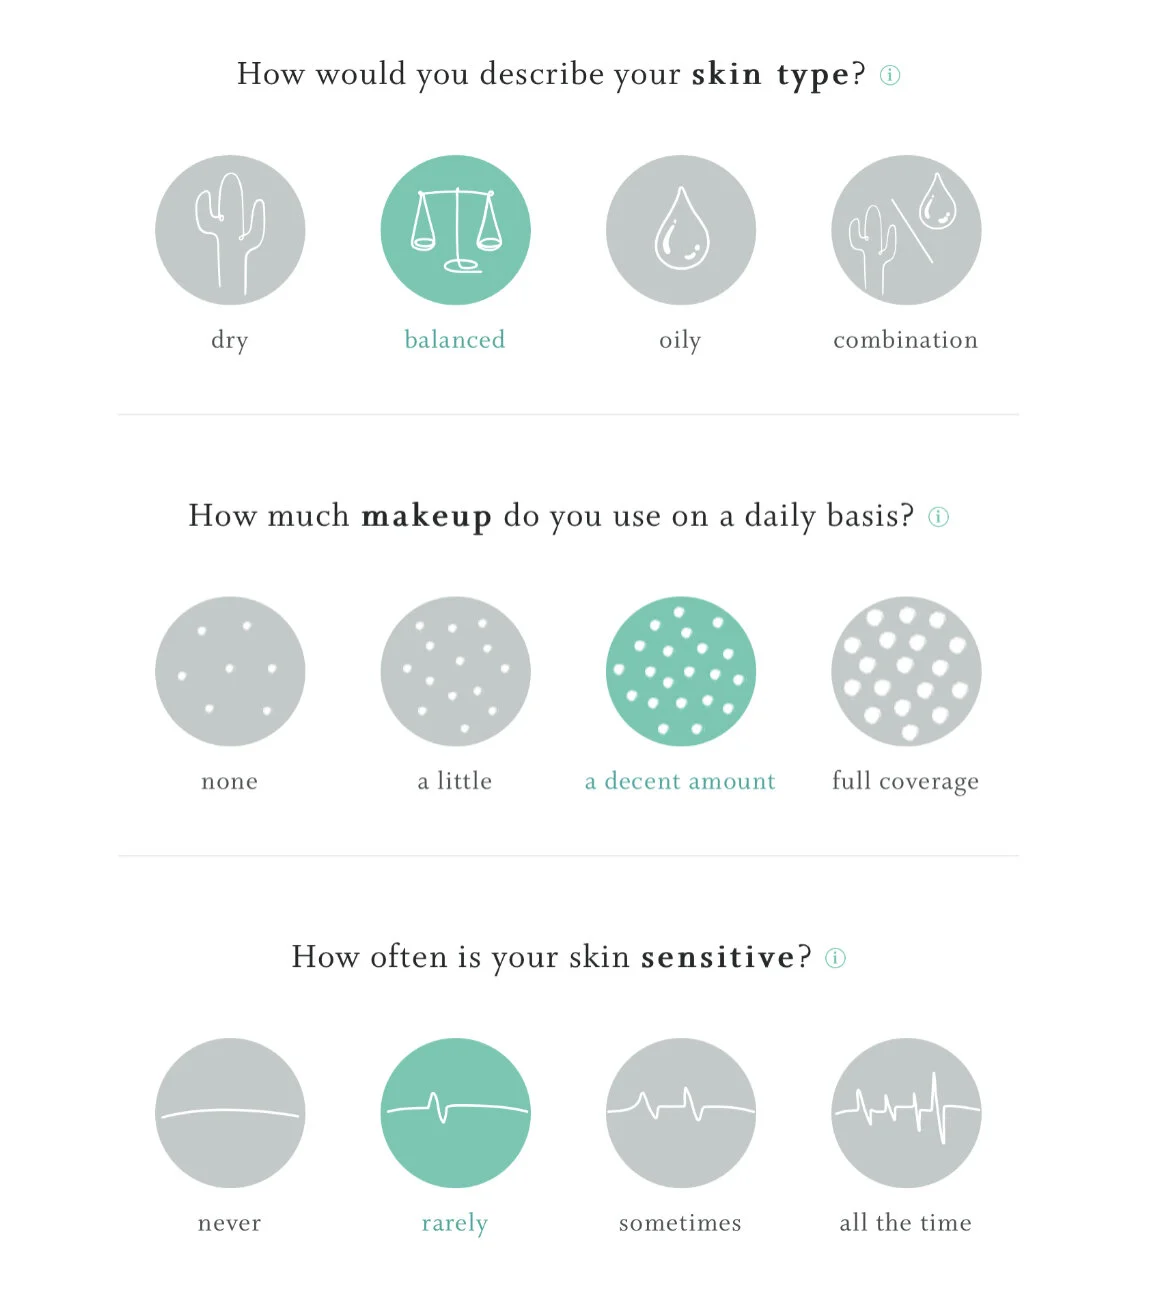
I was first asked whether I had dry, balanced, oily or combination skin, how much makeup I use daily and whether my skin is sensitive. I’ve never really had issues with dryness or sensitivity and I do wear makeup, so that is what I selected.
I was then asked what my #skingoals were from a reasonably extensive list. You can only pick three, but really they were all my #skingoals so it was a struggle. I opted to minimize redness, and brighten my aging facade with a touch of ‘anti-aging’ - whatever that means. I liked this section because, based on what you choose, up pops the active ingredient they will use to help you achieve your #skingoals. Mine said ‘Southern magnolia bark extract’. How fancy and exotic.

I then decided what name I wanted on all the bottles (I chose Charlotte…though the desire to have something ridiculous was real. And it really bothers me that I can’t capitalize my name. It’s a proper noun. I am a writer <screams on top of a mountain>). I also opted for no fragrance, sadly, because a main cause of irritation with skin products is scents (though I was curious to know what ‘dew’ smelled like. Apparently the aromas are reminiscent of cucumber. Who knew).
That question signified the end of my quiz experience and I was asked to choose what products I which products I would like, and in what form I would like them to arrive.

Of course, the company recommends you buy all three products.
But upon closer inspection, I saw they all claim to do very different things. I had the choice of a cleanser, which was a no-brainer - you need one of those - along with a serum and a moisturizer. If anything were to be eliminated for me, it would have been the serum because that’s one more step than I usually take when cleaning and hydrating my face, and there’s a moisturizer so serum seemed a bit redundant.
But they really sell it to you.
Not only is the serum the most expensive item on the list at $79.99 a bottle, it apparently has the highest concentration of #skingoal ingredients. So skipping out on the serum potentially means your skin won’t reap all the benefits of the customized range. Who wouldn’t get the serum after that? Nicely played, Function of Beauty.

With the cleanser I opted for a gel, I opted for the fragrance-free serum, and I chose a lotion moisturizer rather than a gel or a cream. I feel like the serum will probably be something of a gel and I feel like lotion hydrates your skin in a way cream doesn’t. Throughout this process, I had visuals on what my product bottles would look like when I selected the different options.
The whole bundle came to $189.99 (which is, frankly, outrageous), and I confirmed my purchase.
The Products
The products came in beautiful bottles. They were a nice weight, smooth, matte and pleasing to hold, and in colors that ombréd towards the top. I was pretty blown away by them, actually. The serum came with an eye dropper that fills itself every time you place it back in the bottle and screw the lid shut. Pretty nifty. The cleanser had a pump device, as did the moisturizer. The cleanser was the largest bottle, which indicates to me that you need to use more of it than the other two products.
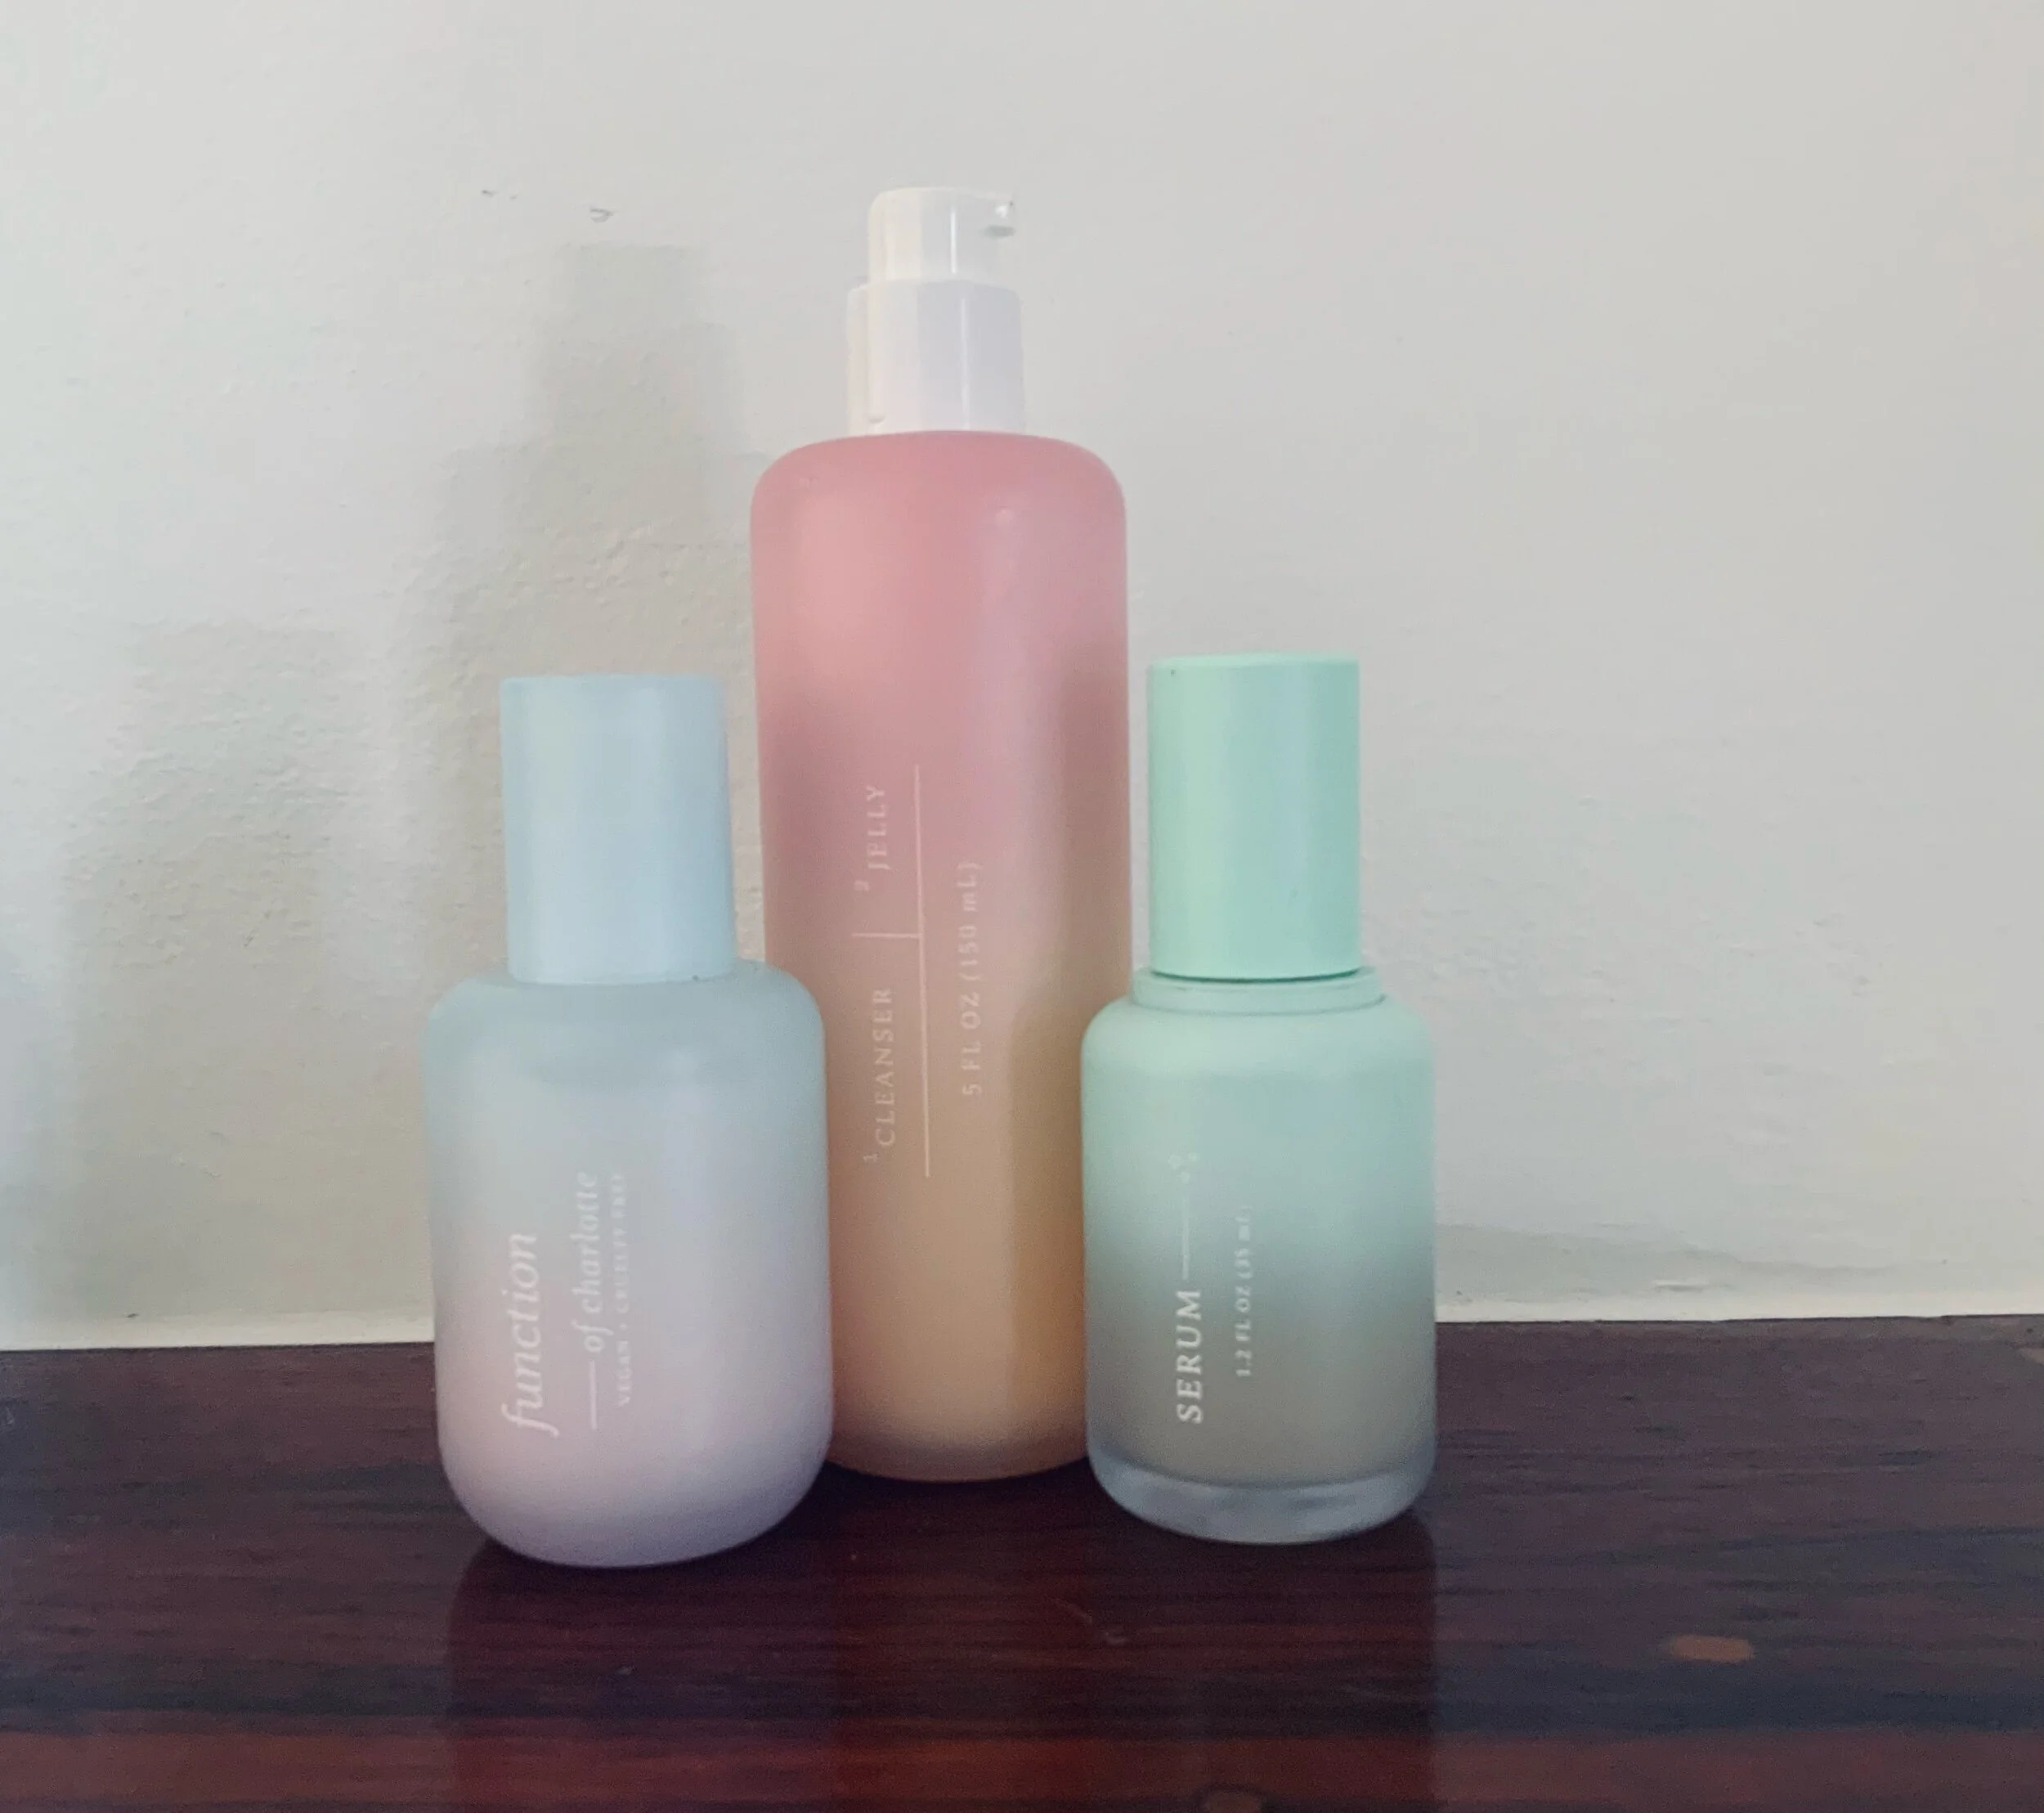
Left to right: Moisturizer, cleanser (it did come with a lid, I just misplaced mine), and serum.
Cleansing
The instructions said to use the cleasner first. Because I said I wear makeup, my cleanser was supposed to strip the products off without stripping the skin of its natural oils.
I used one pump to start with and moved the cleanser in small circles over my skin with my fingers, as per the instructions. I quickly realized one pump would not be enough and had to use a second. To be honest, a third would probably have been the better option but it’s so expensive I couldn’t justify using three pumps on my face every day. Two did the job, and my face appeared makeup-free.
The thing I didn’t like about the cleanser was it looked like more of a cream, but it didn’t go the distance. There’s a watery texture to it which kind of makes it feel like it’s not doing very much. It doesn’t foam or anything and basically feels like washing your face with lotion. I wondered whether it was only getting rid of surface makeup and leaving remaining product in my pores. From experience, my skin needs something a bit grittier to be clean.
The Serum
The eye dropper thing is pretty nifty. The instructions say to use half a dropper per application, but first off it’s quite hard to control how much comes out, so I used a whole dropper to begin with. Second time around I learned to control it better and ended up with exactly half a dropper, and it was a good amount.
The serum is much more satisfying to use than the cleanser. It’s a touch milky in color, but feels thicker and like everything you imagine a serum might be. The instructions say to use it after the cleanser, and to literally press it in to your face instead of rubbing it in. So that’s what I did. Half an eye dropper does go the distance and it spread nicely over my skin. It felt hydrating and absorbed nicely over about a minute.
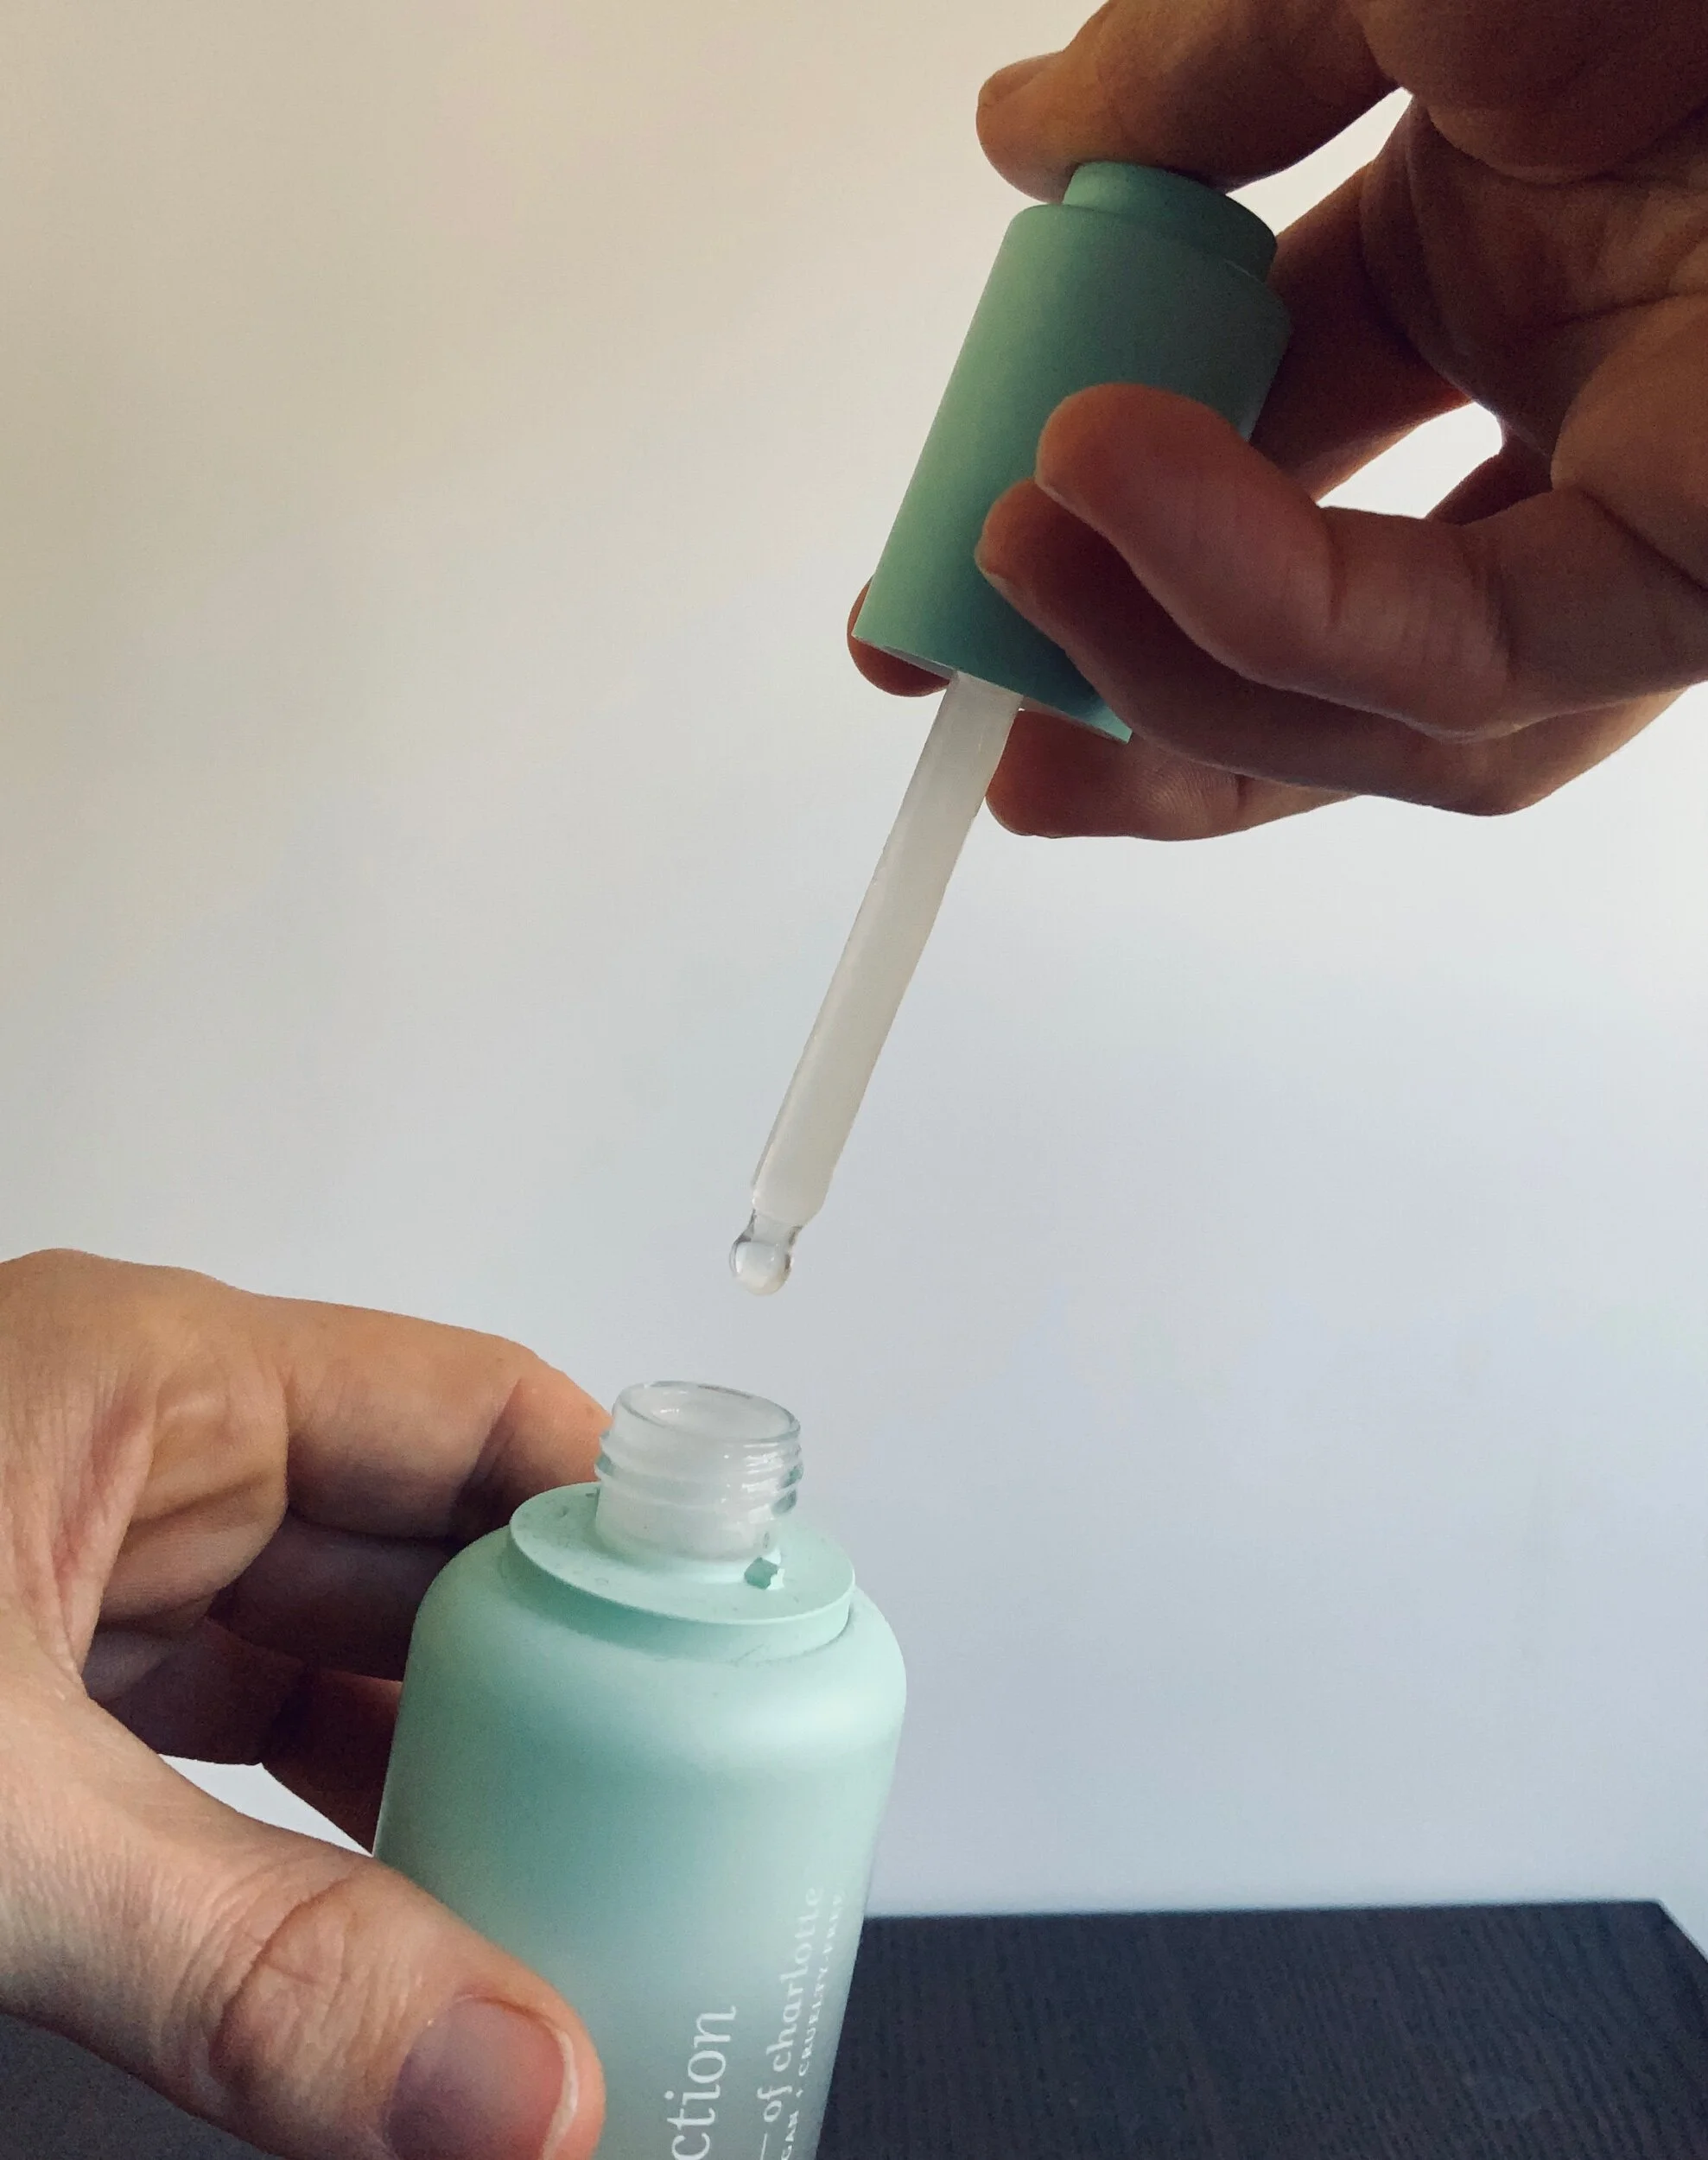
Moisturizing
I waited until the serum was all absorbed and dry before using one pump of the moisturizer on my face. I rubbed it in small circular motions, like the instructions said, without dragging it ‘down’ over my face. It’s supposed to lock in the serum and make sure it does the thing it’s supposed to do. Again, they’ve really made it so the serum feels like a vital step that you just can’t miss.
One pump was enough to coat my face, and it felt like it did what a moisturizer is meant to do. My skin definitely felt hydrated.
Results
My skin felt nice and smooth and moisturized the following day. It didn’t look any different, but the #skingoals changes happens over time so I didn’t read too much. But I will say that some products leave your face looking brighter, and this one did not.
I used the Function of Beauty skin care range consistently for a few weeks and I still didn’t see much of a difference. I continued to question whether the cleanser was cleansing properly and continued to resent that I really should have been using three pumps of the stuff instead of two. Having said that, because the cleanser feels strangely watery, I do not believe a third pump would have cleansed my face any better than two pumps did - it just would have spread a little easier.
I went back to my NueBar and coconut oil combination a couple of times for contrast, and I think coconut tones my skin quite a lot in ways I didn’t notice before. So my skin looked better after that than it did with Function of Beauty. The redness stayed the same (I think that’s genetic - a little like shadows under the eye or something, there’s not much that can realistically be done about that externally), anti-aging I guess it all about hydration, and it did feel hydrated, but no noticeable ‘brightness’.
Verdict
Would I buy it again? No.
For the astounding $189 price tag I expected the products to do quite a lot more than what I saw in the results. I did like the serum and perhaps I would get that again on its own, though I’m still not convinced it did what it’s supposed to do. The cleanser was the biggest let down, which is a real shame because what is a beauty range without a good cleanser? The moisturizer was fine, but for that price, it has to be more than fine. I do wonder how I would feel about these had I not tried coconut oil as a moisturizer, because compared with regular moisturizers, I guess Function of Beauty is better.
I still use the products from time to time because they do leave my face feeling smooth, and sometimes it’s nice to break up the routine, but I won’t be devastated when they run out. I think Function of Beauty managed their hair line so well that I did wonder how they could replicate something so successful. I know there are a lot of amazing reviews for these products, and everyone has a different experience, but I didn’t think they were all they were cracked up to be.
Have you tried the Function of Beauty skin care range? Let me know what you thought in the comments below!
Like it? Pin it!

You might also like…

Lush Henna Review: Does Henna Cover Grey Hair?
Yes. Lush Henna makes your hair darker and covers grey hair, but there is a right way to do it. Here’s what you need to know. Here’s my review.
Short answer: Yes. Lush Henna makes your hair darker and covers grey hair, but there is a right way to do it. Here’s what you need to know.
As someone with naturally very dark hair who was blessed with varying amounts of grey hair from the age of 24, covering it up has been on my mind for a while, but I didn’t know how to do it without causing damage.
My hair hates chemicals. And I mean, hates chemicals.
Having used a vast array of chemical dyes over the years (red, black, bleach, blue – you name it) and it turning in to a matted and unhealthy disaster almost every time, I wasn’t sure if it was possible to colour my long mop of curly hair without destroying it.
Then I found out about henna.
In my mind, henna was red. It’s a plant and it is red in its natural form, but the world of henna hair dye has evolved to include other plants that can make your hair dark, such as indigo which supposedly does just that.
I was skeptical. I did not want red hair. But after reading a range of reviews and asking the people at Lush, I realised it was probably possible to use henna without looking like an apple, and decided to give it a shot. Here’s what happened.
How to cover grey hair with henna
The first thing you need to do is clear a whole day – this is a slow process and you will need time.
Lush henna comes in big blocks. The number of blocks and colours you need will depending on what colour you’re going for. But either way, if you’re trying to cover greys, you will need to start with a big block of red.
As with regular chemical hair dyes, it’s difficult to get black to take to blonde, grey, or white hair – it needs a bit of red in it for the dye to work. It’s the same with henna.
If your hair is predominately your natural colour with greys here and there and you try to use a darker henna without using red first, the greys will be very highlighted, especially if you go straight for black. It kind of defeats the purpose, so best to get it red first.
Depending on the colour you want, prepare to get a few different blocks.
For red hair: Caca Rouge
For brown or chestnut hair: Caca Rouge and Caca Brun
For very dark brown hair: Caca Rouge, Caca Brun, and Caca Noir
For black hair: Caca Rogue and Caca Noir
Since my hair is dark brown and I want to keep it that way, I went with option three and got three blocks.
Before
The amount you need really depends on the thickness of your hair. The longest pieces of my hair stretches to the small of my back, and I have a lot of hair, but it isn’t thick so I found about 80% of a block was enough. If you’re unsure, opt for more instead of less. If it’s too much, use less next time.
To make sure your skin is protected and you don’t end up looking like an orange, put on clothes you don’t care about and douse exposed skin in some kind of balm. I used pawpaw ointment because that’s what I had on-hand, but Vaseline or some kind of petroleum jelly will do fine.
Put it all over your face and neck, any parts of your chest, shoulders, arms, legs, and feet left exposed – henna goes everywhere. Line the floor and the sink and any surfaces you’re using with cardboard or plastic, and have rubber gloves ready. It’s messy stuff.
Preparation
Start with red.
Some websites will tell you to chop the block as finely as possible before whacking it in a bowl, but that’s unnecessary – it melts down.
I chopped it until each piece was roughly the size of a chocolate square and put it in a bowl over a saucepan of simmering water. Add boiling water from a kettle gradually, stirring, until the henna reaches the consistency of pancake batter, not crepe batter. It should slowly run off a spoon on its own, but not too easily. If it’s really thick and gloopy, it’ll be hard to run through your hair.
It takes a bit to melt, so I used a whisk in the end to make sure all the chunks were gone.
Once you’re done melting it, keep it over the saucepan of hot water and take it to your workstation.

Application
Apply it on clean, dry, brushed hair.
A dye brush would probably be easier, I used my hands and it was fine, but I will say having something to divide your hair in to sections is definitely worthwhile. I used the pointy end of a make up brush, but you could use the pointy end of a comb.
Starting in the middle, take a section of hair and start applying henna to the roots. I found it easier to do the roots first because it means wet pieces aren’t hanging over your face as you try and divide and colour each section. And the henna is heavy, so it is an effort to flick between dry hair and henna-covered hair. Doing the roots first is much easier.
The back is a little tricky, so I covered my hands in the stuff and rubbed it on to the back of my scalp like I would with shampoo. When I felt sure that was all coated, I started on the length.
When you have long hair like I do, it can take a while to ensure every strand is covered because the henna is so thick and gritty. I spent time pulling chunks of my hair apart and rubbing more of the stuff in. When I thought it was all coated, I put more through the roots and the ends to make sure.
When you feel like it’s done, your hair should look all thick and ropey—like Tarzan’s hair.
Lift it up and twist it in to a high bun on top of your head. Smooth it down and it’ll stay there on its own.
For henna to develop red, it needs heat. I tied a bag over my hair and left it for two hours to keep the heat in.
Washing it out
Getting this stuff out is an effort. Don’t bother trying to do it in the sink, you will need to have a full shower. And your shower will end up looking like a kid ran through new turf with a sprinkler.
Rinse and rinse until the water runs clear. Put some non-silicone conditioner in, rope it through, and rinse again until there’s no grit left.
Dry it as you normally would.
If you’re going for red and the greys are lighter than the rest and you hate it, you can always go over those bits again. The great thing about henna is you can go over it as many times as you like without damaging your hair, so go for it!
Brun and Noir Application
When your hair is totally dry, prepare the henna exactly as you did with the red.
Douse yourself in petroleum jelly again, make sure surfaces are covered, and chop the blocks.
I wanted dark hair, so I used 50:50 Brun and Noir. It was pretty dark, so I’d probably go for 60:40 next time.
Mix them together over the saucepan and start the process again.
The only real difference here is the developing time. Dark henna needs time to develop. At least four hours, in fact.
It’ a little difficult because the henna is heavy on your head after all that time and you can’t rest your head on anything, so be warned.
Since you shouldn’t cover this one with a bag unless you want to bring out the red tones, you’ll need to make sure you’re sitting somewhere without carpet – pieces will crumble and fall during those four hours, and you don’t want it staining anything.
You also want it to dry hard on your head, and a bag would slow the process down.
Once you’ve made it through four hours, you’ll be pretty keen to get it out.
Some people say not to use shampoo for a few days after you rinse henna out, but Lush henna is infused with shea butter, which is super moisturising so it’s handy to know how your hair reacts to shea butter beforehand.
Since my hair is fine, it ends up looking and feeling like I dipped it in a bowl of grease when I use shea butter, so I shampooed my scalp.
If you’re only rinsing it, make sure you take the time to get all the product off your scalp – the grit will stick around otherwise and it will look and feel weird, and probably stain your bed sheets.
I then ran conditioner through it to smooth it out, and dried it as normal.
The result
I noticed a difference immediately. My hair was dark like I wanted, and greys were more or less covered. The down side is that they were lighter than the rest—coppery—but it didn’t really look like dyed grey hair, they just looked like vague natural highlights.
My hair felt thicker, fuller, and healthier. I have fewer knots, it’s conditioned, and the henna doesn’t seem to be fading.
In fact, it takes a few days for henna to fully develop, so if your greys are lighter than you want, wait a couple of days before going over it again.
I wasn’t 100% in love with the colour at first, but it beats chemically damaged hair by 1000%
Pictured below are a before and after—you can definitely tell my hair is darker on the right.

Verdict
While extremely time-consuming, I would use Lush henna again.
Henna is one of the most permanent dyes you can get, so you’d only theoretically need to dye the roots every month or so. That’s what I plan to do, which automatically takes a lot of the time out of the equation.
While each block does cost around $25, if you’re only dying the roots every month, one block will go a long way, so it’s not too pricey when you look at it that way.
Things to note
While hair dye is essentially not natural, henna is different to regular dye. Where chemical dyes break down the structure of the hair and inject it with colour, henna acts as a varnish and coats the hair while maintaining structural integrity. When you have fine hair like me, that makes a huge difference. But even if you have thicker hair, chemical dyes will break your hair down over years of use, so it’s worth considering no matter what your hair type is.
The other thing is that once you use henna, you won’t be able to use any regular hair dye with bleach in it. The chemicals do not react well and your hair could break off, so make sure this is what you want.
Have you tried Lush Henna? Let me know in the comments below!
Like it? Pin it!

You Might Also Like…
Vegan Hair Dye Review: Biokap vs Clairol Natural Instincts
Looking for a vegan, cruelty-free and curly gurl friendly hair dye that causes minimal damage to your hair? I compared Clairol and Biokap. Here’s what I found.
Looking for a vegan hair dye that causes minimal damage to your hair? I compared Clairol and Biokap. Here’s what I found.
I’ve been avoiding dying my hair with box dye for a loooong time, but with Henna taking upwards of two hours per month and not lasting a super long time, I needed to find an alternative that wouldn’t damage my very sensitive hair.
I know there are a lot of extra dyes that you can import from other countries, but when I look for a hair dye, I want something I can quickly grab off the shelf. I don’t want to have to plan my order months in advance, or worry that I don’t have any left for an event, or pay $50 in delivery fees. Don’t get me wrong, I would love to try some of the box dyes from other nations that are supposed to be amazing for your hair, but they cost a lot, shipping always takes forever, and they’re just not accessible for everyone. I want something affordable, that everyone can have a crack at. I got mine from Priceline.
After trying to research the hair dye brands available in Australia (options were limited, as always) and trying to find the vegan brands that were least likely to destroy my dye-sensitive hair (that aren’t henna - you can read my henna reviews here and here) I narrowed it down to two - Clairol Natural Instincts and Biokap.

Ingredients
Biokap is a small company that also makes cosmetics, and everything is vegan and cruelty-free. They use a lot of natural botanicals and proteins that strengthen your hair.
Clairol Natural Instincts is vegan, but being from a massive company that also makes non-vegan products, I don’t think they can call themselves cruelty-free. I also didn’t quite trust Clairol because it’s a very mainstream company, and - it felt like they were trying to turn a profit just by having a vegan range. I also didn’t trust them not to put terrible things in the product because they don’t hesitate with their non-vegan range - terrible things can still be vegan.
Both dyes are ammonia-free. Ammonia is toxic, and it’s the component in normal hair dyes that burns your eyes. It breaks the hair cuticle apart to allow color in. So on one hand you end up with a more vibrant result if you use ammonia, but if your hair is fine like mine, it will end up in terrible condition. Even if your hair is in good condition and takes hair dye well, ammonia will damage it over time. So that was a win for both products.
Clairol Natural Instincts comes with globes, developer, colour and conditioner
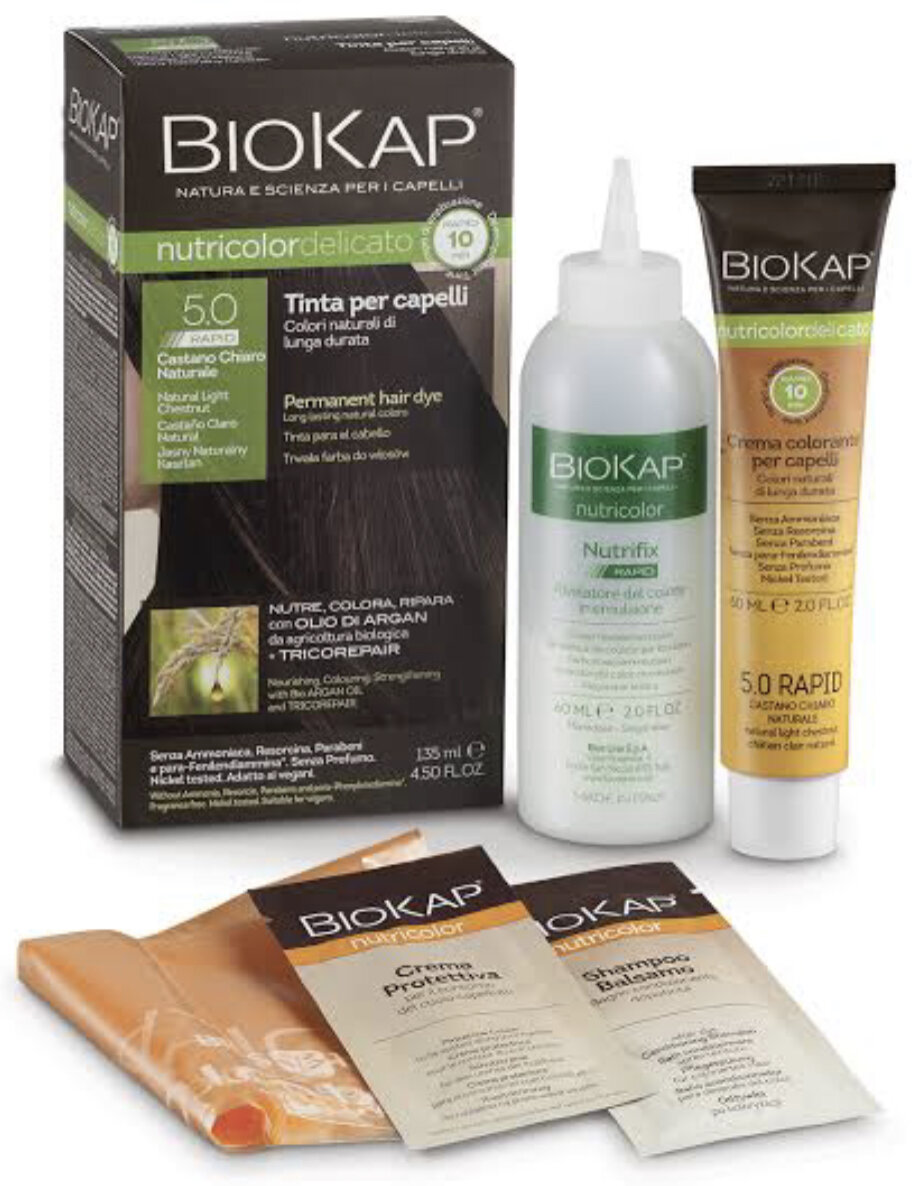
Biokap comes with gloves, developer, colour, conditioner and a cape
Sustainability
Biopkap is owned by Bios Line - a company founded in Italy in the ‘80s - dedicated to the creation of natural and environmentally-friendly products.
Biokap has a fleshed-out an environmental commitment on its website. The company brand is part of a zero impact scheme, aims to use recyclable packaging, uses solar panels to generate energy to power its factories, uses papers and cardboards from environmentally sustainable and certified plantations, pledges to never test on animals and supports a FRAME - a company developing alternatives to animal testing, with the goal of eliminating it in the cosmetics industry entirely.
Clairol is owned by Coty - an international company, founded in Germany in the early 1900s, that specializes in beauty products from big brands, including Burberry, Adidas, Calvin Klein, Rimmel…you get the idea. There is a sustainability statement on its website that basically says it has some 10-year goals going all the way to 2031. Which is great, but I also think big companies are expected to have an environmental statement these days to show they’re not behind the times. Nevertheless, the statement does say the company is trying to reduce emissions by 30% and energy consumption by 25% by 2030, along with switching to 100% renewable energy within that same time period. Considering how large the company is, those goals are fairly substantial.
The Clairol website is missing an environmental statement. The only mention of anything along that vein is the vegan hair dye range, which literally just says ‘vegan’.
Coty has some impressive goals and I don’t want to diminish the effort, but Bios Line was founded with goal towards sustainability so is has the upper hand in that department.
Are they Curly Girl-Friendly?
Strictly speaking, hair dye in general isn’t CG-friendly, but there are things you can do to ensure your dye isn’t going to kill off your curls.
I couldn’t find much online about whether Biokap and Clairol Natural Insticts are curly girl friendly, so I did my own research and punched the ingredients of both into Curlsbot - literally a bot that will analyze the ingredients in your favorite hair products and let you know what will dry your hair out, what is curly girl approved (click here if you don’t know what I’m talking about) and what harsh chemicals you should avoid entirely.
The screenshots below are pretty revealing.
Curlsbot results for Clairol Natural Instincts
Clairol Natural Instincts had red flags all over it. Along with weird silicones and sulfates, it had five different kinds of alcohol (they’re not drying alcohols, but five at once? Really?) and a tongue-twister mineral that stops your hair from absorbing moisture. Curlsbot ultimately recommended against Clairol.
Curlsbot results for Biokap
The Biokap ingredients were inconclusive because there was only one alcohol the bot couldn’t determine - phenetyl alcohol. From my own research, it’s an alcohol that occurs naturally in plants and has a rose-like scent. It can cause skin irritation, but it’s been tested on humans and a reaction is unlikely. If in doubt, test the dye on a small patch of skin first. It does exist in other cosmetics from other companies that are also deemed clean and vegan. That doesn’t mean it is, of course, but there were no red flags that I could see.
Aside from the one unknown, there were three approved alcohols, one approved cleaner and no red flags in Biokap.
Coverage
Henna does not have coverage that lasts a long time. This is because it’s a stain and doesn’t actually dye the star and - it coats it. Since I was supremely unlucky and started getting grey hair quite early (24, to be exact), I really wanted something to cover it up. I don’t have an issue with grey hair at all, but I my hair is naturally very dark and I just don’t think light colors suit my skin. I will probably embrace the grey when I’m older, but for now, I plan to cover it up.
I think most dyes these days have pretty decent coverage, but grey is the hardest color to cover because it has no pigment. Clairol claims to cover greys and, according to the review, it does a pretty good job.
Biokap also has good reviews in the coverage department so the competition there was fairly even.
Price
For box dyes, the difference is pretty substantial. Clairol is about $11 and Biokap is $25 - when you have to re-apply every six weeks, the costs do add up, but going to a salon every six weeks would be significantly more expensive. About $250 more, per session. Salon dyes are supposed to be better quality than box dyes, and I would say they are 9 times out of 10, but you still never really know - you basically have to trust whatever the colorist tells you.
I also believe you get what you pay for. I don’t want to spend $300 and three hours of my life in a salon chair every six weeks, but I would much rather pay an extra $14 for the box dye with better ingredients every six weeks if it mean’s my hair will be healthier in the long run.
Verdict
Unless you’re using henna, hair dye will damage your hair at the end of the day. The best thing you can do is avoid dye entirely, but there are steps you can take to ensure your hair doesn’t get as damaged as it could.
I ended up going with Biokap for a range of reasons - the main one being that Clairol has a bunch of harmful ingredients in it. I didn’t spend so long testing out henna to ruin my hair with one cheap box dye, so Biokap really won the competition on that front.
And (SPOILERS!) I did try out Biokap and my hair does feel a little different, but it doesn’t feel damaged so I do think I made the right choice.
Want to read my tried and tested Biokap review? Watch this space!
Like It? Pin it!

You might also like…

Vegan Skincare: NueBar Face Wash & Body Wash Bars
I’d been looking for a vegan face wash and body wash that doesn’t use harsh detergents for a long time without any luck, until I came across NueBar - the tiny Australian zero waste beauty and skincare company. Here’s what happened.
I’d been looking for a vegan and ethical skincare brand that doesn’t use harsh detergents for a long time without any luck, until I came across NueBar - the tiny Australian beauty and skincare company.
I generally struggle when buying soap and face wash. I hate the dry, stretched feeling that comes after using soap on my skin - it feels as though my skin will shrivel unless I moisturise immediately, and I just don’t think skin is meant to feel that way.
When one of my readers commented on my Caring for Natural Hair post asking for a vegan shampoo bar recommendation, I came across NueBar and realised it basically had everything I was looking for.
NueBar has a full range of vegan, cruelty-free, CG-friendly (more on that later) and natural beauty products, and everything has been formulated by the owner Katie, who also happens to be a naturopath. All shampoo bars, conditioner bars, body washes and face wash bars are handmade in Australia, all packaging materials are plastic-free and recyclable, and the ingredients are natural, organic and Fair Trade.
I didn’t think it was possible to incorporate all those things, but omgosh it’s the dream.
I am very grateful to have been gifted these products to try, but I am not being paid to write this and I am under no obligation to give them a good review. This is my honest opinion. SO, let’s get to it.
(Note: This post has affiliate links but clicking on them doesn’t cost you anything extra - you just get some super karma points :) )

NueBar Vegan Face Wash Bar
I opted for the Normal Skin bar because my skin tends to err on the side of dry if anything, but you can get different bars for oily or acne-prone skin, mature or dry skin, or fragrance-free bars if you’re sensitive to scents. If fragrance is not a problem for you, I do recommend choosing the scented option - it smells phenomenal.
The first thing I noticed when I took the square face wash bar out of the box was how light and ever so slightly textured it felt. Not grainy, but definitely a natural surface compared with the impossibly smooth feel of mass-produced soaps.
I could feel the essential oils lightly on my fingers when I held the dry bar, but it didn’t dent when I touched it - a good first indicator as to how quickly it will disintegrate in water, and how long it will last.
On top of all that, NueBar say their wash bars are soap-free, which basically means that they don’t use lye to make them (this is what makes soap alkaline, definitely not the correct pH for skin which has a mildly acidic pH). NueBar also don't use harsh sulfate based detergents so the wash gentle and good for skin health, and have managed to achieve it all without the use of palm oil - which is great because it destroys rainforests - which is a pretty big achievement, given how much hidden palm oil is found in hair and skin products.
Before
I workout six days a week, which means I sweat six days a week and my face doesn’t like it. I tend to break out along my hairline and around my chin where natural oils build up.
I have tried a few different products over the last six months, including natural scrubs, gentle foamy cleansers and a charcoal face wash bar, and none of them really got rid of the problem, so I figured breaking out was likely a byproduct of working out, and I would have to live with it.
Test one: Without Make up
After the gym, I wet my face with warm water and smoothed it over my cheeks and forehead. I find this easier than rubbing the soap in my hands first, and I’m the only one using the bar sooo it doesn’t matter. Despite the bar’s textured feel, the product was smooth on my skin and didn’t feel grainy at all. It also didn’t foam much, or start to soften or disintegrate in my hand.
When I thought I had enough on, I used my fingers to gently move the product over the rest of my face, the way I usually would to cleanse it. It felt light and smooth, and smelled amazing - not overpoweringly so, it was nice and subtle. I rinsed it off, dried my face and noticed I didn’t get that dry and stretched feeling on my skin, but it definitely felt clean. I moisturised like I normally would, with coconut oil, and that was it.
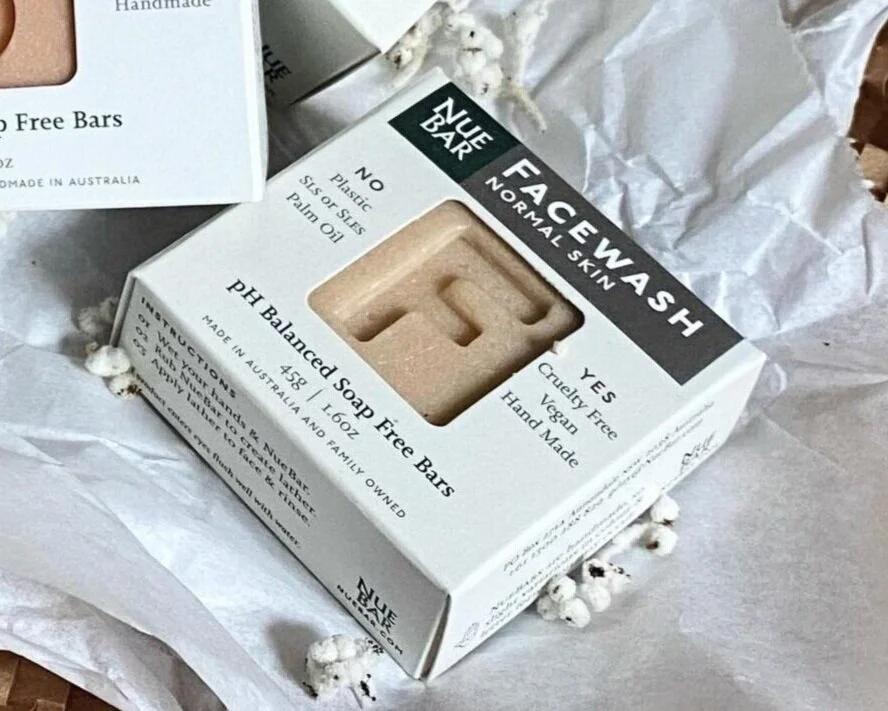

Test two: with make up
I wear sunscreen, primer and foundation if I’m leaving the house for any reason other than to go grocery shopping or to the gym, so cleansing products I use need to be able to get it all off. After a day of wearing a full face of cosmetics, I basically followed the steps above, but I made sure to rub a little more product on my face this time, and spent more time using my fingers to really make sure it was lifting the cosmetics off.
Because it doesn’t really foam, it doesn’t really feel like it’s getting everything off so I was a little skeptical as to how it would go in the make up department. Once I thought I’d rubbed it all away, I rinsed my face, dried it, and got a clean make up removal pad with some toner to see if there was any residual make up left on my skin.
It was clean.
result
My skin hasn’t broken out in almost three weeks, which is a first since I started working out profusely. I found that surprising because it honestly doesn’t really feel like NueBar is doing anything better than other products while you’re using it, but the results are noticeably better. Not only have I not broken out at all, but my skin feels hydrated, cleansed and fresh.
The bar itself hasn’t disintegrated at all, and I use it once a day - so that’s almost 14 uses and it barely looks touched - the big F on the top has shown no signs of fading. Other bars I’ve used have become slimy and/or noticeably smaller after just a few uses, which ultimately means you’ll have to buy a new one sooner.
NueBar recommend letting each bar dry after use to avoid further disintegration, so I pop mine to the side, outside the shower, when I’m not using it.
Verdict
Given the positive results, I would definitely continue using the NueBar face wash. The bar dries well and doesn’t feel sticky after use so you can take it travelling or on holidays without worrying about it getting squished in your bag. At $16 for months worth of product, it’s very well priced and I would say a worthwhile purchase.

NueBar Vegan Body Wash Bar
There are a lot of similarities between the NueBar face wash and body wash in terms of texture and scent, but the body wash bar is larger, foams quite a lot, and designed for full-body use.
As a soap-free bar, the body wash is meant to help retain the moisture in the skin. It also has ghassoul clay - a brown clay from the Atlas mountains of Morocco - to draw away impurities.
It’s also probably worth noting that this particular product was a finalist in the 2020 Australian non-toxic awards for sustainable products.
The other thing I love about NueBar is the ‘bit bags’ (see pic below) that you can get for body wash, shampoo and conditioner bars. You know how soap eventually gets small, flimsy and breaks into a couple of pieces when it gets too small and you start abandoning those pieces because they’re just too small. Queue bit bag. Pop all those extra bits into the bag, secure it with the draw string, and wet the whole bag to use up those last bits of bar. Each bag is labelled with a W (body wash), C (conditioner) and S (shampoo) so you don’t get them mixed up.
The Bar
The first thing I noticed was how light-weight it was, and how much I didn’t realise how great the smell of orange and cocoa butter would be. Unlike the face bar, I submerged the wash bar in water before use, before I lathered it in my hands. It foams nicely and has a smooth feel on skin. It didn’t start to shink in my hands from the first use and holds its shape very well.
Like the face bar, it doesn’t feel like it’s doing much at the time, but again the proof is in the results. My skin didn’t feel all tight and stretched like with regular soap, but cleansed and hydrated. It has now been about two weeks exclusively using the NueBar body wash and my skin still feels fresh and clean.
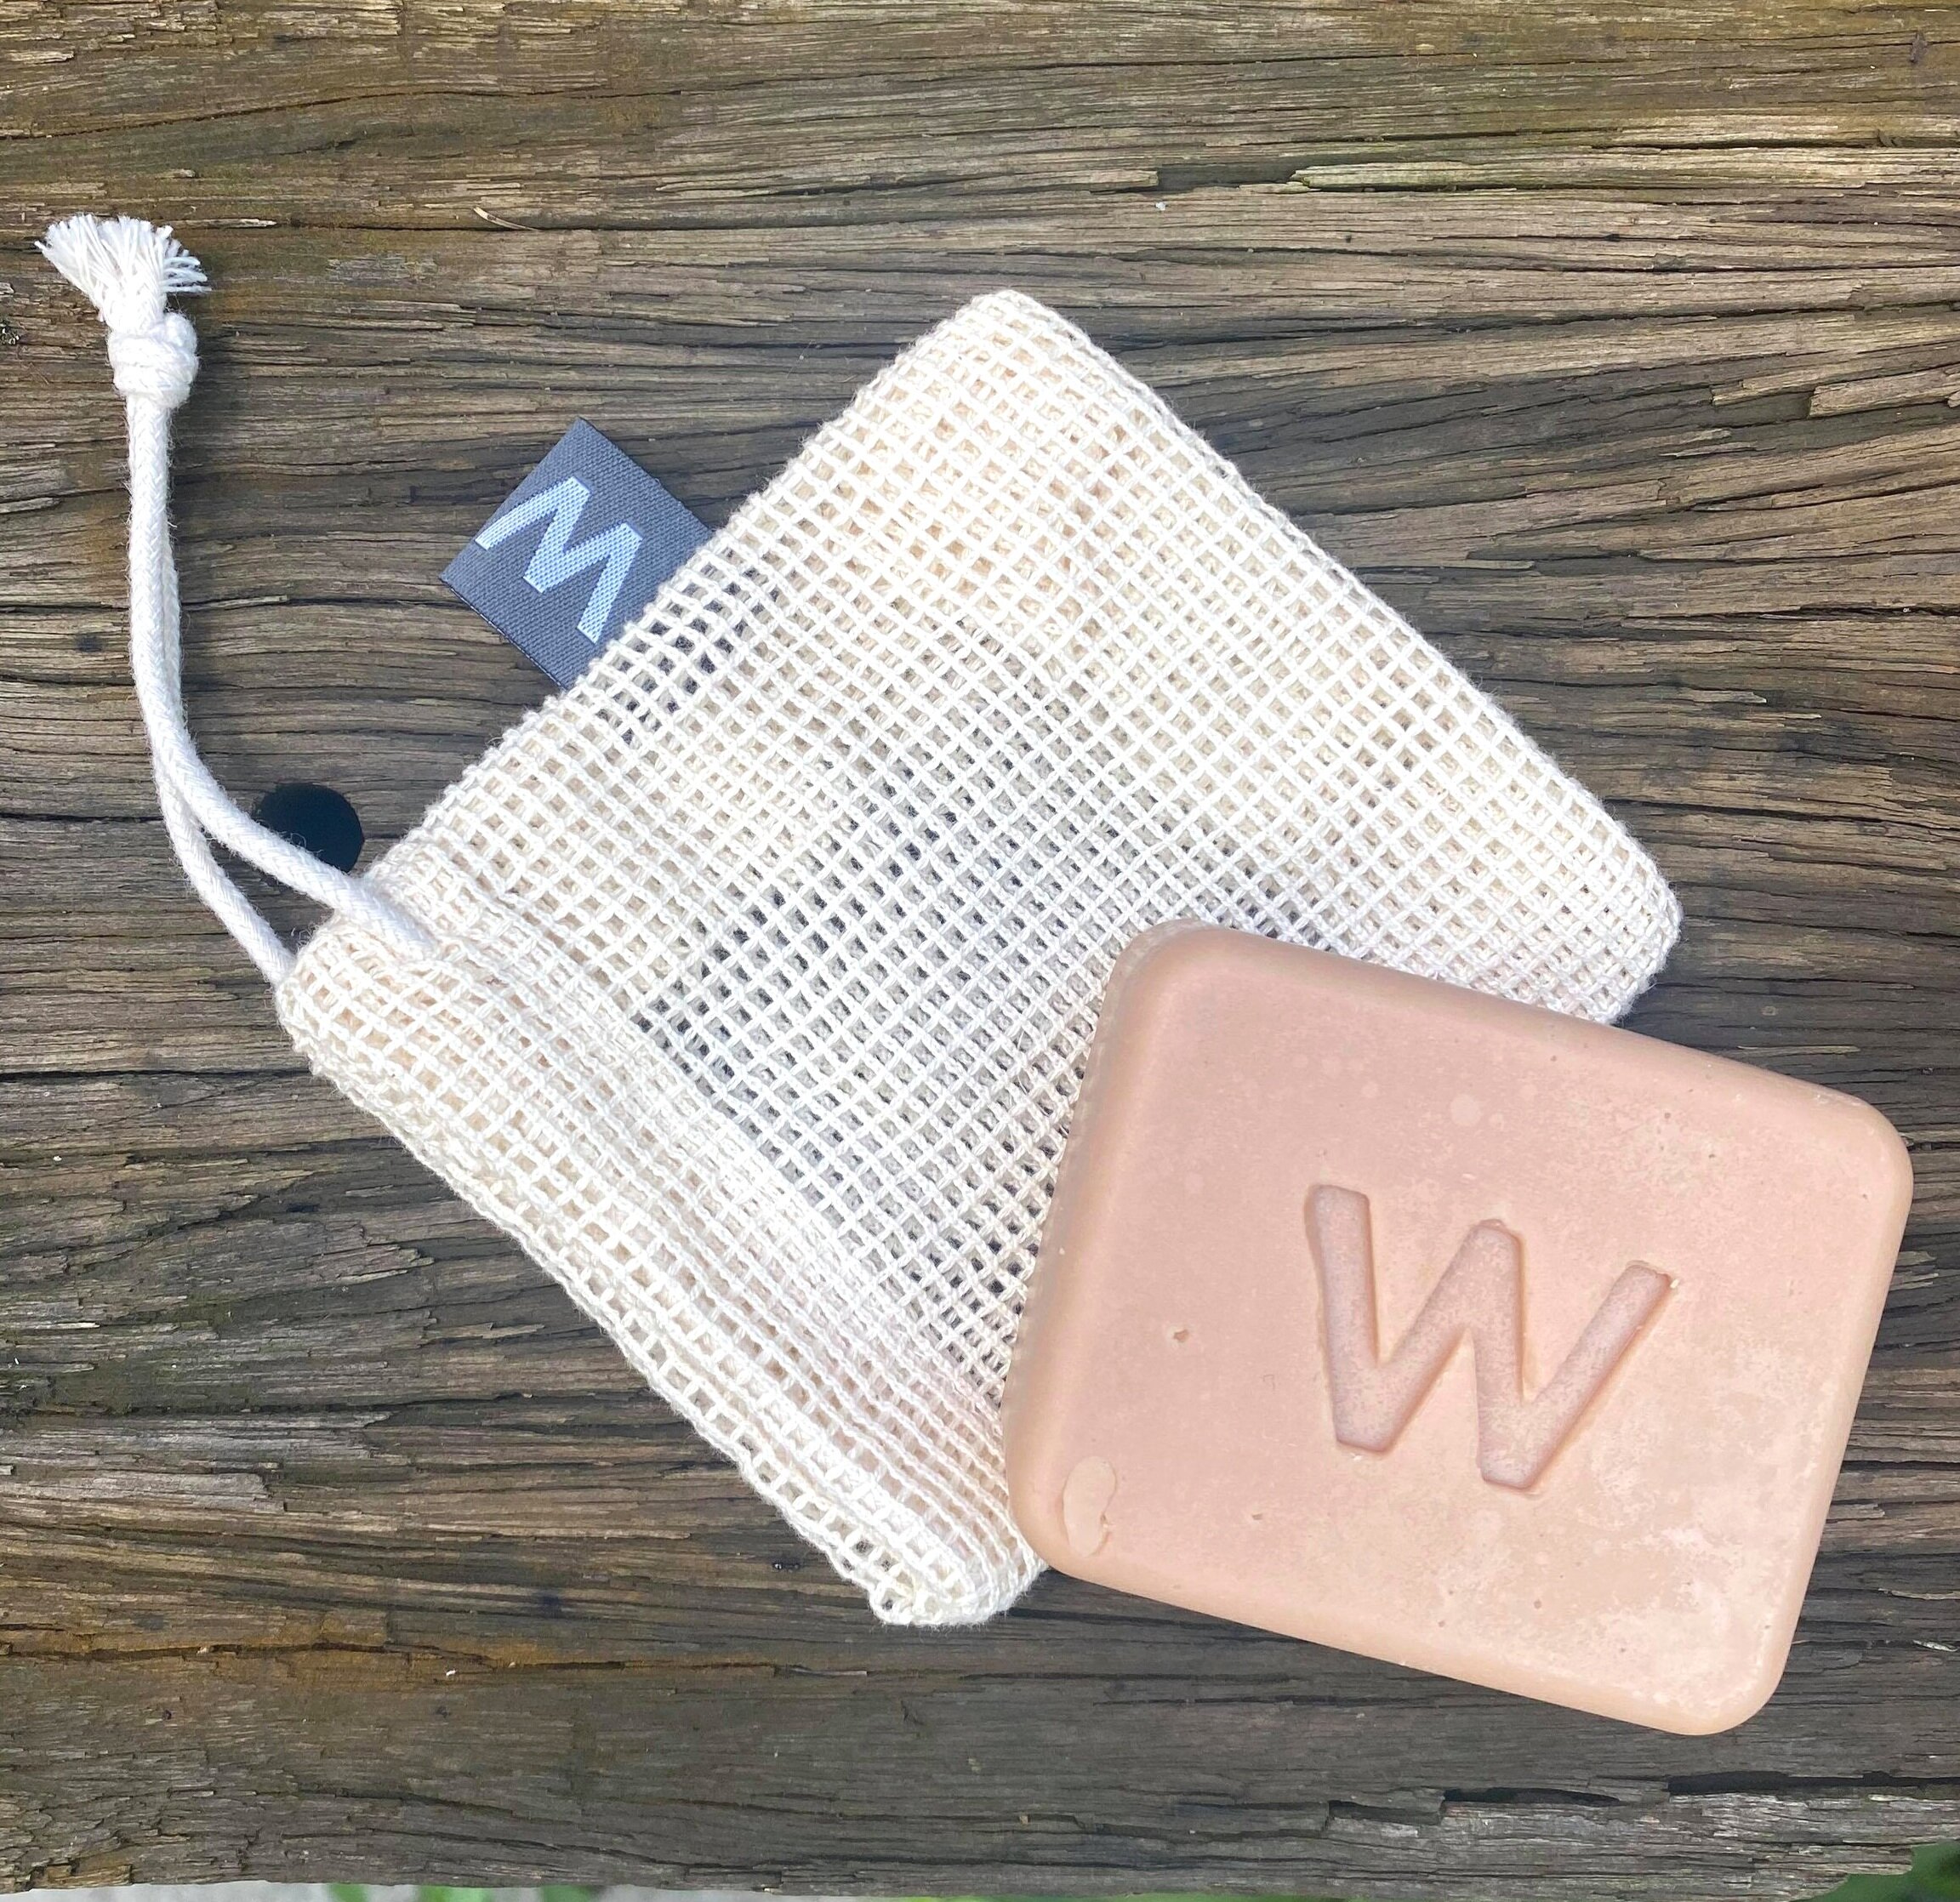
Verdict
I have now been using the body wash every day for about three weeks and the W has only just started to fade, so I expect it to last quite a long time. And at $23 a bar, that’s what you want. It’s not cheap, but given that the ingredients are all natural, fair trade, vegan and cruelty-free, and the bar is hand-made and will last quite a long time, I would say it’s a worthwhile spend if you have the money to spare.
I would definitely get it again because I just love the ethos of the company, the product is clean and good for my skin, and I love knowing I’m supporting small local businesses.
Like it? Pin it!

You Might Also Like…

How Make A Curly Hair Routine, Part Two
There’s so much information about the curly girl method that knowing where to start or how to make a curly hair routine can be a bit overwhelming. I definitely struggled knowing where to start, what products best suited my hair, and how to apply them all to start living my curly hair dream. Here's what you need to know.
Ready to try the curly girl method but don’t know how to start or make a curly hair routine? You’ve come to the right place!
There’s so much information about the curly girl method that knowing where to start can be a bit overwhelming. I definitely struggled knowing where to start, what products best suited my hair, and how to apply them all to start living my curly hair dream.
Before we get into it, this is a two-part post and you should definitely go back and read part one if you haven’t already. There’s a bit of assumed knowledge below, like how silicones an sulfates work, and you’ll get a lot more out of the post below if you’re familiar with those terms to start with. On top of that, part one will help you determine what products might work best for your hair type.
Finished part one? Let’s go!
What You Will need
The trick to figuring out a curly hair regimen is to start simple with a few basic products:
Clarifyer: This is a one-off step to rid your hair of silicones, and the only way to do that is with a sulfate-heavy shampoo.
Pre-poo: This is an optional step before you wash your hair. Some people rub oils onto their scalp to fight dandruff, others detangle their hair with deep conditioner before washing - it’s up to you! I usually put Jamaican Black Castor Oil on my scalp the night before I wash it.
Cleanser: This is basically shampoo or a co-wash, but you want to find one with no sulfates or drying alcohols. Curlsbot is really good for determining what shampoos are terrible. I use Function of Beauty at the moment and I love it, but anything by Shea Moisture also works great.
Conditioner: I usually alternate between a deep conditioner and a regular conditioner. Again, I’m loving Function of Beauty at the moment.
Styler: You’ll need something to keep your curls in place after washing it. Because my hair is fine, I choose Not Your Mother’s Kinky Moves Curl Defining Hair Cream because it’s light on my hair and absorbs really well.
You might also want a brush or wide-tooth comb and a microfibre towel or cotton T-shirt.
How to start a curly girl routine
Step Zero: Clarify
If this is the first time trying the curly girl method, you’re going to want to jump in the shower and douse your head in a sulfate-heavy shampoo. This can be absolutely anything - you could even use dishwashing liquid here because (terrifyingly) it’s basically the same. The idea here is to get all the silicones out of your hair, and sulfates are the only way to do that. Foam it up, rinse it out, then never look at it again.
Step 1: Pre-Poo
As stated above, this is optional, but if you have really thick hair it can help with the detangling process, or it can provide some nourishment to your scalp - healthy scalps make healthy strands. I use Jamaican Black Castor Oil because it strengthens hair and, apparently, encourages growth which results in more hair on your head.
Since my hair is fine and the oil is really thick, I rub a small amount of oil between my fingers and massage it into my scalp the night before wash day, but you could do it 30 mins before you wash it and I’m sure that would be fine. I don’t drench it because I find it really difficult to get out, but if you have type 3 or 4 hair, or just really thick hair, you might want to use a lot more. It’s about trial and error - you’ll figure out what works for you in no time. You might want to wrap your hair in something if you’re leaving it in overnight so your pillow doesn’t get all oily.
You could also wet your hair before washing it and rake through deep conditioner to get all the tangles out so it’s easier to wash and detangle later.
Step 2: Wash
I get a small amount sulfate-free shampoo and massage it in to my scalp, using my fingertips to lift the oil off my skin. I don’t put shampoo down the length of my hair because I find that dries it out. Once it’s all over my scalp and thoroughly massaged in, I’ll rinse it out - ensuring the suds move down the length.

Step 3: Condition
Once the shampoo is out, I’ll use a pump of conditioner and start working it into the length. I don’t put conditioner up past my ears because it makes my hair really flat, but if you have thicker hair you might want to put it all over. I use my fingers to detangle it as much as possible. It can take a while, so be patient. Some people can detangle with their fingers alone, but I find the best results come with using a tangle-teaser or a wide-tooth comb. It just helps get those last stubborn strands nice and smooth.
When it’s all detangled, I’ll get a little more conditioner and literally squish it into the ends, or wherever it usually gets dry. I squeeze the hair up, encouraging the curl pattern, and let it sink in for a few minutes. No matter what conditioner you’re using, I recommend always letting it sit in your hair for a few minutes, rather than washing it out straight away. It gives the product time to sink into your hair and work its magic.
Option: People with thicker or dryer hair will often only rinse about half the conditioner out to ensure the hair stays nice and nourished.
Step 4: Styler
Once the conditioner is rinsed out, I tip my head upside down, brush it forward to make sure there are no tangles left. I get a little bit of styler and rake it through the length. Once I feel like it’s coated each strand, I’ll get the tangle-teaser and brush it through to make sure it’s everywhere. I then rake my fingers through it again until all of my hair is in about 6 clumps, before I use my palms to scrunch it up and encourage the curl pattern. I then get the microfibre towel and scrunch it up again, absorbing excess moisture.
Again, I usually don’t go up past my ears because I find it makes my scalp feel weird and stringy and producty, but I think that’s because my fine strands don’t absorb it properly near the roots. I also do this when it’s soaking wet because I find that gives the best results. Wet hair is far more receptive to product because the cuticles are open. When you hair is dry, the cuticles are closed and it’s much harder to get moisture in - it’ll usually just sit on top and look greasy.
Finally, I fold my hair into the microfibre towel - keeping the clumps in tact as much as possible - and leave it there for about 15-30 mins. Piling your hair into a towel (also called ‘plopping’…yes, it’s a terrible term) encourages the hair try dry in its curl pattern, rather than twisting it up in a traditional wrap which stretches it out.
Step 5: Drying
I find I get the biggest and best curls when I take it out of the towel, part it, let the clumps fall where they want and don’t touch it until it’s dry. I used to take it out and shake it around to separate the clumps, but the result is flatter curls. Penny Tovar has a good tutorial on how to do it. She uses a shirt but, as she says, they get pretty wet pretty quickly so I prefer to use a microfibre towel.
I always let my hair air dry, but if this isn’t an option for you I recommend using heat on a very low setting.
Options: Some people will diffuse their hair with cold air for more volume, but it can take about 45 mins. I tried once or twice, but I got 10 mins in and decided it wasn’t worth it, but something to keep in mind if you want more volume.
What’s next?
Test it out, see how your hair responds, and mix it up! As long as you follow the basic rules (as outlined in part one), you can’t go wrong.
Have you tried the curly girl method? Let me know in the comments below!
Like it? Pin It!

You Might Also Like…

How To Slay Your Curly Hair Routine Part One: Figuring Out Your Curly Hair Type
As a long-time fan of the curly girl method, I’ve tried and tested quite a few things over the years to figure out what works best for my hair. Here’s how I did it, and you can too.
As a long-time fan of the curly girl method, I’ve tried and tested quite a few things over the years to figure out what works best for my hair. Here’s how I did it.
With a curly hair routine, there’s no one size fits all.
Hair is almost as unique as a fingerprint - no two heads are exactly the same, which means no two routines will be exactly the same, but with a bit of trial and error, you’ll be on the way to finding your perfect routine that leaves your curls feeling thick, full and bouncy in no time.
There are a few factors you need to determine to work out what routine and products will work best for you, but stay with me! A few extra steps at the beginning will make an enormous difference to the end result.
To break it all down into bite-sized pieces, I’ve divided it into two parts - part one is all about figuring out your hair type so you know what products will work for your hair, and the second part will be all about the routine itself.
Here’s what you need to know.
Step 1: what’s your curl type?
To determine what methods and products will work best for your hair, you’ll need to know what kind of hair you have and how quickly your hair absorbs moisture.
For example, if you have thick hair that absorbs moisture quickly, you’ll want to start with heavier products to make sure it stays moisturized for as long as possible - weaker conditioners with lighter oils, like coconut oil, likely won’t add the moisture you need. On the flip side, people with fine waves will want to use weaker products so their hair isn’t weighed down by heavy creams.
Figuring out your curl type basically means looking in the mirror and comparing your locks to the pictured ones below. Curl patterns range from 2A to 4C. The number refers to the type of curl, while the letter refers to the tightness of the coil.
Curl type 1 is straight, type 2 is waves, type 3 is spirals and 4 is kinks and coils. It’s totally normal to have a mixture - mine is a combination of 3A, 2C and 3B.
Why is this important?
It will help determine what kinds of products you use. Type 2 usually lacks volume, so people with Type 2 hair would want to stay away from heavier conditioners, creams and co-washing (washing your hair with conditioner only) - it will weigh the hair down too much, take out any volume, and possibly flatten the curls. I found Deva Curl’s no poo was too much for my fine hair - it’s very thick and creamy and much better suited to Type 4 hair.
Type 3 and 4 hair can have a lot of volume so thicker creams and leave-in conditioners often work for this curl pattern

Type 2

Type 3

Type 4

Type 2: Often classified as wavy hair, Type 2 hair is often flatter at the roots and gets curlier from the ears down. It can be prone to frizz and sometimes struggles to hold its shape. To help lift the shape and add body, lighter products such as mousses and gels can be used. Oils tend to weigh it down or make it appear stringy, so opt for less styling products.
Type 3: This curl pattern usually starts fairly close to the scalp and falls in coils or spirals. People with Type 3 often have more volume, which means they can use heavier products, such as styling creams and gels.
Type 4: Coily hair has the most natural volume, but suffers from dryness. It seems robust, but it’s actually very delicate because of the tight curl pattern and fewer cuticle layers. People with Type 4 hair can usually use very heavy butters and oils to help lock in moisture and avoid tangles. Adding oils, such as coconut or castor oil, before wash day can help maintain scalp health, and leave-in moisturizers can help ensure hair stays hydrated for longer.
Step 2: What’s your hair type?
The next thing you’ll need to know is your hair type - the thickness of your strands and how it absorbs water, also known as porosity.
To start with, roll a strand of your hair between your fingers. If you can really feel it there and there’s no ignoring it, you have thick strands. If you can kind of feel it but could forget it’s there, you have medium strands. If you can’t really feel it at all, you have fine strands. Thicker strands can often take a lot of moisture without becoming flat and weighed down. Heavier products will often drown finer strands and leave them lifeless.
Next, you’ll need to work out your hair porosity - arguably the most important factor when it comes to figuring out your curly hair routine.
There are three levels of hair porosity:
Low: This means the hair cuticles are tightly bound and repels water, products and dyes. It usually takes a long time to dry. Water might bead on top of your head in the shower instead of sinking in, dyes might be ineffective unless left for a long time, and conditioners sometimes just don’t work.
If this sounds like you, you’ll need to add a little heat to your curly hair routine to open up your cuticles and get moisture in. You can do this by covering your hair in conditioner and covering it with a microwaved heat cap - kind of like a shower cap - to ensure the moisture sinks in. Leave the cap on for about 20 minutes before you wash the conditioner out.
Medium: This kind of hair is usually the easiest to manage - it holds on to moisture but may become dry as it gets closer to wash day. It will likely take a few hours to dry, but not a full day. Medium porosity hair doesn’t need anything special to retain moisture - if this sounds like you, your curl type and strand thickness will largely determine your curly hair routine.
High: Where low porosity hair struggles to absorb moisture, high porosity hair absorbs it easily but struggles to retain it. It will often dry quickly, but become brittle fairly soon after wash day. Hair that has been dyed or heated excessively is often high porosity because the cuticle has been damaged (don’t stress, it’s fixable! You’ll need to let the damage grow out and get regular trims).
People with high porosity hair will need lots of moisture, so you’ll want to deep condition with every wash. You can also use a microwavable cap to make sure the moisture sinks in, and use heavier products with natural oils and butters.
Not sure what your hair porosity is? Do not fret! Determining your hair porosity is easy - you need a glass or bowl of water and a fresh strand of hair. Put the strand in the water and wait about 10 minutes. If the strand floats, your hair is low porosity. If it hovers under the surface, you have medium porosity hair. If it starts to sink towards the bottom, you have high porosity hair.
Step 3: Finding the right Products
The right products will very much depend on the type of hair you have, but you have to start somewhere! I recommend getting a run-of-the-mill hydrating shampoo and conditioner, a deep conditioner, a wide-tooth comb or a tangle teaser (I love them!), one styling product and a microfibre towel (or cotton t-shirt) to dry your hair with (top tip: a regular towel will make your hair frizzy).
For a mixture of Type 2 and 3 hair, I use Function of Beauty or Shea Moisture for cleanse and condition, and Not Your Mother’s Kinky Moves Curl Defining Hair Cream to style.
Now that you have a better idea of your hair type, we can move on to creating a curly hair routine! Check out Part Two.
Like it? Pin It!

You Might Also Like…

Australian Pink Clay Mask Review: What Happened When I Tried Hurtig Lane
Australian pink clay is having a moment right now - featuring in loads of skin care products all over the joint which promise to make your face sparkle vampirically. The mask by Hurtig Lane is the latest on the market, but does it work?
Australian pink clay is having a moment right now - featuring in loads of skin care products all over the joint which promise to make your face sparkle vampirically.
The mask by Hurtig Lane is the latest on the market, but does it work?
I consider a lot of factors when I’m picking skincare products - are they cruelty-free and vegan? Is the packing reusable? Is the product full of words I can’t pronounce or is it as natural as possible? Is it affordable? And more importantly, does it work? I was lucky enough to try a sample of the Hurtig Lane mask before it was on sale and, IMO, it comes super-freaking-close to ticking all those boxes.
As I’ve said in a couple of other reviews, my pasty skin has been exposed to the Australian sun for a touch too long and I have mild discolouration. My nose and the apples of my cheeks have always been slightly red and my skin tone is basically just a tad uneven. To combat these things, I started trying pink clay masks that promise to draw out toxins, impurities and reduce the sizes pores while locking in moisture to give you a spritely glow.
Here’s what happened when I gave Hurtig Lane a whirl.
Hurtig Lane Australian Pink Clay Review
There are all sorts of clays used in skin products all over the world - white clays, yellow, green and red - but pink clays have unique properties that do wonders for your complexion. Pink clay specifically contains silicia - a natural ingredient that helps with skin regeneration and collagen production - along with zinc and magnesium that are natural anti-inflammatories and can help rejuvenate damaged skin.
All pink clay masks promise to help with dryness, discolouration, uneven skin tone and give wearers a nice glowy look. While the active ingredient in all pink clay masks is, well, pink clay, not all masks are made equally. Hurtig Lane’s mask claims to use a significantly greater percentage of pink clay, along with an infusion of aloe vera, rose extract and - my skin care holy grail - coconut oil.

The Product
The standard package includes:
1 x Australian Pink Clay Face Mask, 120ml
1 x Brush applicator
The standard package costs $83 AUD, the double package (which includes two mask pots and brushes) is $149 and the triple package (which includes three of everything) is $211.
You can also use my promo code GLOBALSHUFFLE when you check out for a discount.
It may look pricey at first glance, but this mask is actually a lot cheaper than other masks. Sand And Sky, for example, costs $15 less than Hurtig Lane, but the pot only contains 60ml - half the amount.
The packaging is also made from high quality and sustainable materials. The product, which arrives in a recyclable cardboard box, sits in a Pyrex glass jar with an acacia wood lid - both of which are totally washable and reusable - and the application brush is made of sustainable bamboo. Winner.

Application
Hurtig Lane recommends using the mask after washing your face with warm water and a gentle cleanser, so that’s what I did.
After drying my face, I applied a thin layer of the mask - avoiding my mouth, eyes and hairline. The product is a dusty pink colour and has a creamy whipped-like texture. It applies smoothly and was easy to distribute evenly over my skin, and it smells great.
The directions say to leave it on for 10 minutes, but I got distracted and I’m pretty sure mine was on for more like 20. In any case, it was definitely dry by the time I arrived back at the sink. The clay became almost translucent around my nose, which means there were more ‘impurities’ there for the mask to draw out, but overall - like competitor masks - my face looked like a cracked shade of pinkish-white.
To remove the mask, Hurtig Lane says to use warm water and ‘gently massage in circular motions to boost circulation’. I did that for a while until I felt like my circulation was sufficiently boosted, before going all in with warm water and rinsing the remaining product off, which was super easy to do.
I followed it up with my usual moisturiser combo of coconut oil and black castor oil and my skin felt, well, pretty hydrated.
Result
My skin felt smoother immediately after washing the clay off.
The mask definitely hydrated my skin and evened out the tone and discolouration right from the very first application. It worked so well I didn’t feel the need to apply make up before taking a few snaps afterwards with no make up (like the one below), and I never take pictures without make up, so that was a nice surprise.
I did notice a brightness to my face in a way that no one else would, but that has been my experience with face masks in general. There are loads of Instagrammers who seem to use face masks, and BAM, they glow, buuuuut I am yet to use a face mask that has that kind of effect. Nevertheless, I am more than happy knowing I can see the glow, because that’s what matters.
My skin texture stayed smooth over the next few days even after going to gym a few times and wearing a full face of make up, so I’ll definitely finish the pot.
Is it worth it?
While Hurtig Lane’s Australian Pink Clay Mask may seem expensive at $83 a jar, it does have features other brands lack.
For example, I could not find how much actual pink clay is in other masks by competitors such as Sand and Sky and Alya, so I can’t do a comparison, but each pot of Hurtig Lane’s mask is said to contain 55% of OG Aussie clay. The remaining 45% is full of natural oils and extracts that combine to make the clay something you want to put on your face - any more than that would be like sticking your face into a solid pile of mud, so we can probably all agree that 55% is quite a high ratio.
Along with possibly more benefits of Australian pink clay with the higher percentage (refining pores, detoxifying skin, removing impurities, reducing redness, I could go on), Hurtig Lane are strong on the ethical products front - I think that’s really what sets them apart.
Based in Barcelona, the company has a range vegan make up brushes, jewellery and vegan leather-free straps. All products are PETA-approved, and the company is really in to paying manufacturers properly and maintaining an equal-opportunity work environment for men and women of all nationalities. While a lot of other brands are vegan and PETA-approved, the packaging materials generally aren’t sustainable or reusable, and the companies haven’t necessarily made it their mission to be as ethical as possible.
At the end of the day, I think if you have the money to spend on taking care of your body with high-quality and natural products, it’s cash well spent, and Hurtig Lane’s pink clay mask is definitely worth a shot.
Promo code for 15% off: GLOBALSHUFFLE
Have you tried Hurtig Lane, or is there another mask you love? Let me know in the comments below!
Like It? Pin It!

You Might Also Like…

Olaplex Review: Does it really fix dry and damaged hair?
I’ve struggled with dry and damaged curly hair for years, so when I heard Olaplex could potentially fix my hair, I ordered a bottle immediately and gave it a go. Here’s my review.
I’ve struggled with dry and damaged curly hair for years, so when I heard Olaplex could potentially fix my hair, I ordered a bottle immediately and gave it a go. Here’s what happened.
I’ve tried a lot of different products to help nourish my dry and damaged hair, but the only thing that actually worked was switching to the curly girl method. As I’ve said in previous posts, my hair was damaged from poor nutrition when I was younger, box dyes, bleach, hard water in different countries, and travel in general. It was a borderline nightmare for a long, long time.
But in all honesty, following the curly girl method (CG) and getting rid of sulphates, silicones, drying alcohols, and parabens did wonders for my hair, to the point where the only issue I really come up against now is the intense amount of time it takes to detangle my hair every 4-5 days in the shower. Oh my gosh it takes so long.
So when I heard about Olaplex, I decided to give it a shot.
Olaplex is supposed to temporarily fix broken bonds in your hair. While Olaplex’s main draw card is that it can help repair bleached hair, broken bonds can happen through excessive heat styling, poor nutrition, and regular dying as well. Basically, if you have damaged hair, Olaplex can supposedly help with that.

Olaplex 3: A Review
While Olaplex has been touted as a salon product and you can only access to most of the products through a professional, Olaplex 3 is available to everyone, and it’s the only CG-friendly product in the line at this point in time.
The Process
My hair was its usual tangled self when I woke up on hair-washing day. But instead of washing and conditioning the crap out of it like I usually would, I reached for the Olaplex 3 bottle.
The instructions say to apply the product it all over wet, towel-dried hair. I’ve always been confused by the term ‘towel-dried’ anyway (what does that even mean? Is it meant to be damp or not?), so I put my head under the shower, absorbed the excess water with a microfibre towel, then squeezed a 10 cent coin-sized (quarter-sized or dollar-sized, depending on where you live) amount of Olaplex in my palm, and applied it to the ends of my hair, detangling and working up.
The product has a decent amount of slip (‘slip’ means it detangled easily) so, to my surprise, it wasn’t super painful or stressful trying to detangle it without ripping. Since the instructions say to put it all over your hair, I used a few more coin-sized amounts of products and made sure my hair was coated, before combing it through with a wide-tooth comb.
The instructions also say to leave it in for 10 minutes. I did some research beforehand and found a range of results. Some people swear 10 minutes does the trick while others leave it in for an hour, and some all-or-nothing Olaplex enthusiasts leave it in overnight. Feeling as though 10 minutes wasn’t quite enough, I tied it up for an hour.
I noticed a difference immediately when I started rinsing it out. My hair felt lighter, smoother, and since it was already detangled, the washing process took a fraction of the time. I washed and conditioned as normal, used a microfibre towel to absorb the excess water, then skipped styling product (I wanted to see what happened when left to its own devices) and let is air dry.
The Results
Not only did my hair feel lighter and bouncier after washing, the feeling continued on all week. It was kind of amazing.
My hair looked shinier, felt smoother, and wasn’t as tangled by day four. There was also less hair in the comb after washing it again that week, and instead of drying out towards wash day, it retained moisture and stayed smooth.
The best part was I didn’t have to use it weekly. While the instructions suggest using it on a weekly basis, my hair isn’t bleached or dyed, so I found I only needed to use the product once every two weeks or so – whenever it started feeling dry again.
The Verdict
Overall, I was pretty happy with how Olaplex 3 changed my hair. It’s been a while since I started using it, and I still have less tangled and dryness. It’s kind of been a miracle.
One downside is it’s a little expensive, but it does last a while.
I read that you only need to use a little bit each time – one coin-sized amount…but…well…I definitely used more than that. About three times more than that. But the bottle is still more than three-quarters full.
I also tend to think if something is going to improve the overall health of my hair then it’s worth the cost, but that’s just me – it’s very individual and entirely up to you.
The other downside? Pretty sure I’m allergic to it 😂
The first time I used it my scalp was mildly irritated, but that happens to me sometimes when seasons change, so I put it down to that. The second time was a bit more of a disaster. My hair felt great, but my scalp felt so uncomfortable.
Super. Freaking. Itchy.
Oh. My gosh.
I don’t know what ingredient it was, and I don’t know why it happened, but it was so bad it started stinging after a while.
So obviously I had to stop using it for a while, but as a testament to Olaplex, my hair didn’t immediately revert back to its dry ways so, as insane as it sounds, I still stand by it.
Olaplex is vegan, cruelty-free, and paraben, sulphate, and silicone-free, so by all accounts, it’s pretty rare to have a reaction to it. I’ve only managed to find one other person on the internet who seemed to be in the same situation as me, so odds are it won’t happen to you!
Have you tried any miracle products to help dry and damaged hair? Let me know in the comments below!
Like i? Pin it!

You Might Also Like…

Caring for Natural Hair: How To Do It Without Looking Like A Hot Mess
Whether you’re a naturalista newb or you’ve been rocking your god-given locks for years, caring for natural hair is a journey en route to fabulous.
Whether you’re a naturalista newb or you’ve been rocking your god-given locks for years, caring for natural hair is a journey en route to fabulous.
I have been on my natural hair journey for about four years now and my hair has transformed dramatically.
Gone are my weird straight bits amid a sea of brittle frizz - hello hydrated waves and coils. I’ve tried oils, sulfates, no sulfates, shea butter, henna, gels, mousses, creams, co washing, not washing, washing frequently, washing with unconventional cleansers (spoiler: apple cider vinegar was an epic fail) - you name it - and I’m here to impart my findings. Brace yourselves.
For context, I have dark Caucasian 2b to 3a curly hair that is prone to dryness and breakage, and my oh my does it hate chemicals. And I mean, hates them. I learnt that the hard way dabbling with box dyes, bleach and non curly girl-friendly shampoos and conditioners.
While the process varies widely depending on the type of hair you have, the foundations are the same whether your hair is curly, straight or anything in between. I’m going to talk a lot about curly girl-friendly products in this, but really, I think everyone should be using those anyway. They’re free of drying alcohols, silicones, sulfates and harsh chemicals, so they basically suit any hair type.
Before we kick-start this this adventure together, I want to add that I’ve done a lot of research on caring for curly and natural hair over the years, but that doesn’t mean these are set rules - it’s just something to get your started. Whatever works for you, works - try it all out and see what happens!
Note: There are some affiliate links in this post, but I have tried and tested everything recommended and my reviews are 100% genuine.
What it really means to go natural
In a nutshell, having natural hair means you don’t use chemicals or heat to alter the texture, colour or pattern of your hair.
Relaxers, perms, dyes and heat tools weaken the hair shaft and make it dry, brittle and prone to breakage, but it they also impact the the overall shape and appearance of your hair. For example, if you have curly hair, your curl pattern might collapse a bit or cause your curls to jut out at weird angles. The more you use chemicals and heat, the higher the risk of damage.
By this point you might be thinking of someone you know with luscious tendrils who dyes or straightens their hair all the time, but odds are it’s because they just have naturally resilient hair. Some people also sun bake a lot and have no wrinkles, or eat a lot of junk and don’t put on weight - it’s all down to genetics in the end, and people with thicker strands tend to be able to put their hair through a lot. This doesn’t mean their hair is unaffected, it just means the damage isn’t as visible.
At the end of the day, you want to try and take care of your hair the way you take care of your body. Foods laden with natural ingredients are recommended for a healthy body, and it’s the same with your hair - the less you pump it full of chemicals, the healthier it will be.
Step 1: Restock your hair products
I’ve written quite a bit about the damage sulfates, silicones, alcohols and chemicals, so here’s a basic run down from a previous post:
The curly girl method states that washing your hair with regular shampoos is akin to washing your hair with dish soap. And when you look at the ingredients of each, they’re scarily similar.
Both contain an ingredient called ‘sodium laureth sulfate’ – a harsh detergent that strips away the oil on a fry pan, just as it strips away the natural oils on your head. You may wash your hair because it looks too oily, but you do need some oils to stick around – just like the natural oils on your skin, natural hair oils act as a natural moisturiser that your scalp and hair need to be healthy. Removing them completely strips your hair of its natural vitality and shine.
To combat the damage caused by the sulfates, generic conditioners contain silicone, which is kind of like plastic. There are all sorts of silicones in conditioners, and they’re used to coat your hair give it the illusion of shine, but in actual fact silicone is coating your hair your hair so it’s impenetrable by anything except sulfate. This means your hair looks shiny, but can’t absorb any moisture.
To get the best natural hair results, you want to eliminate all that from your hair products. A really easy way to do this is by finding the ingredients of your favourite products online and pasting them to Curlsbot - an amazing and free product ingredients analyser that will instantly tell you if your products are clean or not.
At the minimum, you want a shampoo, conditioner and deep conditioner. If you usually use styling products, you might also want to grab a couple of those (recommendations below!)
Step 2: Purge your hair of chemicals
You kind of have to start your natural hair journey with a clean slate, which means ridding your hair of anything unnatural where possible. If you have relaxers or permanent dyes, you're in it for the long haul and will have to wait until they more or less grow out to see the best results, but you can still absolutely start your natural journey while you’re waiting - it means your regrowth will be healthy af.
When I started, I used a cleanser to strip silicones out of my hair, but any shampoo heavy with sulfates will do the trick.
Re-hydrate your hair using a curly girl-friendly deep conditioner. I recommend anything by Shea Moisture, Garnier Hair Food, or I’m actually loving Function of Beauty at the moment so would definitely recommend that too (click here for 25% off).
Your hair won’t be looking its best after this first wash, but stay with me, patience is key.
Still want to dye your hair? Henna is a great natural alternative! Check out my reviews below.
Step 3: Find your new routine
With your natural hair journey comes new products and a whole new routine, so play around and see what works for you.
Every wash after your final sulfate wash should be with a sulfate-free and curly girl-friendly shampoo. No matter what product I’m using, I will always work shampoo into my roots only. When I rinse it out, the shampoo washed through the rest of my hair to keep it nice and clean. I find that shampooing the ends just makes them dry, but that might not be the case you you so try it out and see what works.
I then use a regular conditioner or a deep conditioner, depending on how tangled my hair is, and detangle as much as possible with my fingers, before moving on to a gentle brush. This is because brushes can break your hair, which leads to frizz. You don’t necessarily notice when a brush hits a snag, but you do noticed when the knot is between your fingers, so it does prevent quite a lot of breakage.
My curly hair routine is just an example - by no means did I figure this out overnight. It’s not a sprint, it’s a marathon.
Step 4: Stop Using Heat
We all like to blow-dry or straighten our hair from time to time, myself included, but doing it every day, or even every week, is going to impact your natural hair goals. No matter what kind of hair you have, heat is damaging your hair - whether you can tell or not.
When I get out of the shower, I wrap my hair in a microfiber towel (a gym towel, in other words) or cotton t-shirt for about 20 minutes, or until the drip is gone. I then tip my head upside down, scrunch the hair up removing any excess drip, part it and let it air dry. It can take a while to dry this way, but I did find the health of my hair dramatically improved when I stopped using a blow-dryer.
I also completely understand that some people live in very cold parts of the world and stepping outside with wet hair isn’t really an option - I lived in Canada when I first started my curly hair journey, and the struggle is real.
What you can do is dry your hair on the ‘cool’ setting (though this will take a lot longer), start washing your hair when you get home from work in the evening so it’s dry by the morning, or line up hair washing day with a weekend or a day where you won’t be leaving the house.
I know those aren’t necessarily possibilities for everyone, so don’t beat yourself up if you have to use heat - just try to make sure you don’t have you device set to ‘high’.

Step 5: Be Patient
Your hair will not look phenomenal overnight. In fact, it might not look good at all for a while and you kind of have to be okay with that. It might be a struggle in the beginning, but it really is worth it in the long run when you have flowing locks of naturally detangled hair that looks and feels healthy. Even if the length of your hair is damaged, your roots will be reaping the benefits of all the natural products you’re using. If you get regular trims, eventually the healthy hair will take over and your hair will be living its best life.
My hair was dry and breaking from being bleached and dyed a thousand times. During the transition to natural hair, it was an awkward length, the curl pattern was fine on top but down the length it was brittle and weirdly straight. I resisted the urge to dye it, and four years later, it has never looked or felt healthier.
Things to keep in mind
No two people are the same, and no two people will have the same reaction to the same product. A lot of people will oil their scalp before washing to keep the skin nice and healthy. A healthy scalp means healthier hair, but there’s not a one size fits all.
Then there are all sorts of things like protein treatments, oil treatments, scalp cleansers, co-washing, no poo to go in to, but that’s for another time.
I will do a post detailing my curly hair routine soon with my favourite products, but until then, I wish you all the luck in the world with your natural hair journey.
Let me know how you go in the comments below!
Like it? Pin it!

You Might Also Like…

Solid Toiletries for Travel: Vegan Beauty Products for the Carry-On Backpacker
Sick of pouring all your liquids in to a series of 100ml bottles and hoping they didn’t run out? What if I said you never had to do that again! Here’s a fail-safe list of vegan solid toiletries for travel that won’t get confiscated at the carry-on x-ray machine.
Before discovering solid toiletries for travel, pouring my liquids into 100ml bottles every time I jumped on a plane was something I hated.
Not only because getting thicker liquids in to tiny bottles is a pain (looking at you, sunscreen), but it means you run out of your favourite products quickly and have to find replacements in foreign countries, and it doesn't always work out for the best... I once had to find exfoliator in Thailand. I’m a paste-queen, and all I could find were whitening products. It was not ok.
But then I discovered solid toiletries, my world transformed, and yours can too!
Before we go on this travel-friendly beauty journey together, you’ll need to detach yourself from the mainstream beauty companies. I know. I too used to love Tarte, Palmers, Dove, and a bunch of others, but sadly, they don’t actually care about your skin. They care about whether you’re buying more product.
I used to buy products for skin smoothing, toning, reducing redness, acne, and moisturising, and sure, they worked for a while, but my skin would always get used to the products and I’d be back to square one. Every. Single. Time.
It wasn’t until I started looking for natural products that I began to realise there are actually natural, fail-safe ways of looking after your skin without walking in to Sephora or the drug store.
The best part? Most of these products aren't liquids, so you can shove them in to your carry-on without having them confiscated at the x-ray machine.
Win!
*Note: There are some affiliate product links in this post (not all links, just some). Clicking on them won't cost you anything extra, it just means there's some super-karma coming your way :)
1. Cleansing: African Black Soap
This stuff has been handmade in Africa for a long, long time. It's 100-percent natural with no chemicals, it's cruelty-free and vegan, keeps acne at bay, and it lasts forever.
Well, maybe not forever, but to wash your face you only need to pinch off the tiniest bit (don’t submerge the whole thing – it’ll turn to mush), so one block can last a year .
The one I have is below, but if you’re looking elsewhere, make sure it contains plantain skin, shea butter and ash. It should look brown, chunky, and generally unappealing. There are a lot of knock-offs, and a lot of beauty companies have tried to make it look pretty, buuut that isn't the real stuff. Real African black soap looks like something you don't want to touch.
NOTE: African black soap traditionally contains palm oil, so it's important to choose one that uses sustainable palm oil, or none at all. The product below doesn't contain palm oil at all.

2. Toning: Lemon, Rose Water, and Apple Cider vinegar
I hate to think about what Clearasil toner did to my skin. It always smelled so alcoholic and left my face feeling so, so dry. And it’s not only Clearasil – a lot of toners are full of alcohol because it’s an antiseptic and ‘treats’ acne, but alcohol is really harsh on your skin, and will affect your complexion negatively in the long run.
The options below are natural ways of achieving the same results, but actually good for your skin, they're at a fraction of the cost, and they're traveller-friendly.
Lemon: This one's for people with light skin. I literally get a lemon, cut out a wedge, rub it on my face, let it dry, then rinse it off after a few minutes.
I know some of you are probably screaming on the inside, but wait for it...
I use lemon because I have very pale skin, which means even the slightest hyper-pigmentation on my skin is really visible when I’m not wearing makeup. Lemon is a natural bleach and helps to smooth out my skin tone.
It’s also full of Vitamin C, which is excellent for your skin, and it's highly acidic, which can help balance out your skin’s Ph levels. But in any case, I find my skin is a lot brighter and smoother after toning with lemon.
There are a lot of videos and articles that say not to put lemon directly on your face because it irritates the skin, but I find it only irritates the skin under the eye, so I don’t apply it there. If you find it too acidic for your skin, you can dilute the lemon juice with a bit of water.
Customs officials may not be happy to find a few lemons in your carry-on, but you should be able to find a lemon at your destination.
Rose Water: Rose water on its own is excellent for unclogging pores, getting rid of redness, evening out skin tone, and it smells amazing! Put a little bit on a piece of cloth/towel/cotton and rub it all over your face, the way you'd use any toner.
You should be able to pick it up from a supermarket or a Middle Eastern grocer, but failing that I have a link below. I know this is a liquid, but you really don't need to use much – 100ml should last you a long time.
Apple Cider Vinegar: This is good for balancing your skin's Ph levels, evening our skin tone, and unclogging pores. Rather than putting straight apple cider vinegar on my skin, I fill 1/3 of a 100ml spray bottle with acv, top it up green tea, and add a few drops of lavender, or any essential oil I have lying around. As with the rose water, use it as you'd use any toner, and a little bit goes a long way.

3. Face Moisturizing: Coconut Oil
I know coconut oil was all-the-rage in 2013 and most people probably think that ship has sailed, but coconut oil is the only thing I’ve found that consistently leaves my skin feeling moisturised, hydrated, and fresh. Every. Single. Time.
After cleansing and toning, get a really small amount of coconut oil (enough to coat your thumbnail) and rub it into your face. You need just enough to very thinly cover your face – if you feel like you don’t have enough to go the distance, that’s probably enough. If your skin feels really oily afterwards, you’ve used too much.
I know this one has to go in a 100ml bottle, but a little bit goes a long way, so that amount should last you a long time.
Use cold-pressed oil for the best results – the less it’s been processed, the better. It should still smell like coconuts. You can usually find it at your local supermarket or health food store.
4. Exfoliating: Baiden Mitten
This thing is Amazing. Hands-down amazing. I will never use anything else again. Ever. It’s transforming my skin into its best self.
The Baiden Mitten kind of acts like microdermabrasion, which is a cosmetic process that involves scrubbing off the top dead layers of skin to reveal the bright, new skin underneath. It also forces the body to send blood to the treated areas, which heals the skin and causes new, healthy skin cells to replace the old ones. Microdermabrasion works, but it’s recommended that you get this done regularly to see results. For the rest of your life. The cost adds up.
Cue Baiden Mitten. It’s a mitten made from tree fibres in Hungary (I know what you’re thinking – wait for it) that literally removes the top dead layers of skin while you’re in the shower. It doesn’t hurt, pull out your hair, or cause any damage – it just does what a microdermabrasion session does, but it only costs $50 and lasts for two-years.
It also helps keep acne at bay, gets rid of fine lines, shrinks pores, evens out your skin tone, and smooths your skin so much you won’t be able to keep your hands off it. The mitten itself is extremely light-weight and will fit in the tiniest corner of your bag.

5. Whole Body Moisturising: Shea Butter
Not the fancy kind you find in a tub that smells like cocoa pods, I mean a real chunk of shea butter from a shea tree.
Packed with Vitamin E and fatty acids that help your hydrate your skin and repair damage, shea butter can reduce skin inflammation, relieve sunburn, reduce stretch marks, has a host of anti-ageing properties, and has a very mild UV filter. You can also melt it down and use it as a deep conditioner for your hair, and mix it with essential oils to make a lip balm. The only thing you shouldn’t do is put it on your face – it’s quite thick and will clog your pores.
Real shea butter doesn’t smell like much, comes in a large block, and has one ingredient: shea butter. When I travel, I cut a bar-sized rectangle of butter, put it in a soap container, and throw it in my bag. It’s a solid, so security won’t take it from you.

6. Shampoo: Bars
I used to use commercial shampoo with loads of alcohols and sulphates, and hair was so dry and damaged it was ridiculous. I couldn’t figure out why, until I looked in to it and realised I was washing my hair with detergent. After I switched to more natural products, my hair transformed.
I have curly hair, so I carry around two kinds of shampoo bars – one is curly girl method-friendly, the other is a largely-natural shampoo bar from Lush, because my hair does need to be washed with sulphate from time to time.
If you don’t know what I’m talking about, Lush shampoo bars contain sulphate, which is a detergent. The kind you’d wash your dishes with. It’s what causes the lather in most shampoos, and it’s very drying for your hair. When used too much, it can cause split ends, breakage, and weaker, more brittle hair overall. Curly hair is more prone to dryness and breakage, which is why sulphate is basically forbidden in the curly girl method. Having said that, washing your hair with sulphate all the time probably isn’t good for anyone’s hair. If you hair’s perpetually dry, consider switching it up!
Did you know you can get more than 100 washes out of a single shampoo bar? If you washed your hair twice a week, one bar would almost last you a full year <gasp>.
It’s about a million times better than a bottle of liquid that might last you a few months, or a 100ml bottle that might last you a week.
7. Conditioner: DevaCurl, Sukin, Bars
When travelling to a different country, it’s always good to bring a regular conditioner for weekly use, and a deep conditioner for monthly use. This helps keep any damage caused by excessive sun exposure, humidity, hard or polluted water, or anything else you might get in your hair while backpacking in a foreign country.
I didn’t bring any kind of deep conditioner with me to Asia where there’s hard water, and my hairdresser was horrified when I got back. Now I always bring a small bottle of deep conditioner. I use Deva Curl Deep Sea Repair.
When buying conditioner, you want to watch out for alcohols, sulphates, and silicones. Alcohols and sulphates are drying, and silicone is like a plastic that coats your hair. It makes your hair shiny, but it also builds up in your hair and makes it lifeless, and stops moisture from getting into the hair shaft. When I was using silicone conditioners, my hair was dull, lifeless, dry, my curls were flat, and nothing I did moisturised it properly. As soon as I started using natural products, my hair bounced back to life. The transformation has been amazing.
The only thing that removes silicone is sulphate, but then silicone is used to treat sulphate-damaged hair… You see where I’m going with this – it’s a vicious cycle. Just avoid it altogether.
Solid conditioners haven’t really caught on yet so, unfortunately, there's only really one I'd recommend. If you're not keen on that, you might have to divide your liquid in to separate bottles for this one. Lush do make solid conditioner bars, but they have very mixed reviews and, for whatever reason, the bars contain sulphate (why would conditioner – something that’s supposed to heal any damage – contain the very thing that causes damage?), so Lush get a big FAIL for that one, and they appear to have dominated the market.
There is a company in Tasmania, Australia that make solid conditioner bars (you can find them here). I haven’t tried their products because they contain honey and I’m vegan, but they have great reviews.
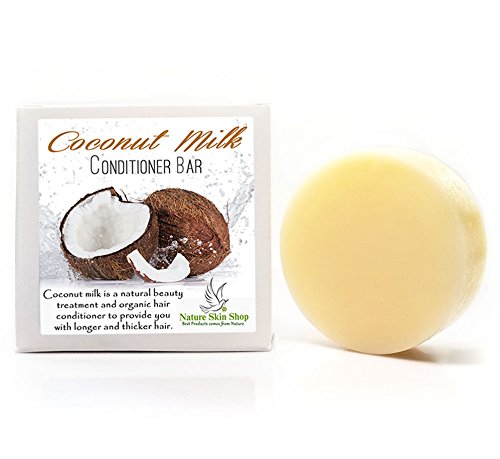
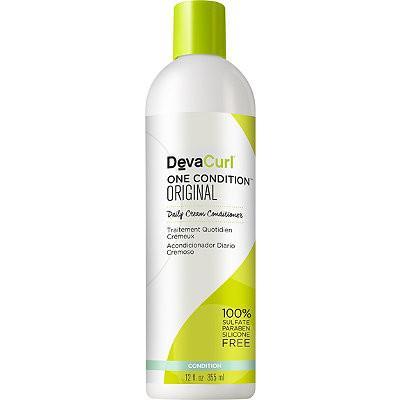
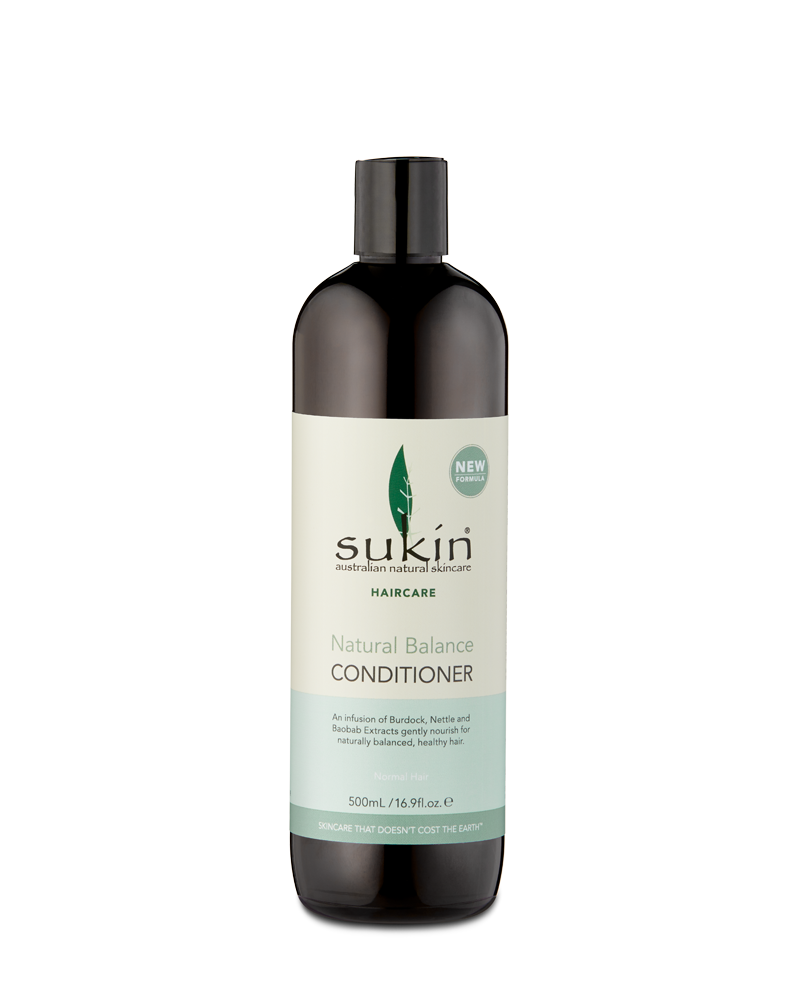
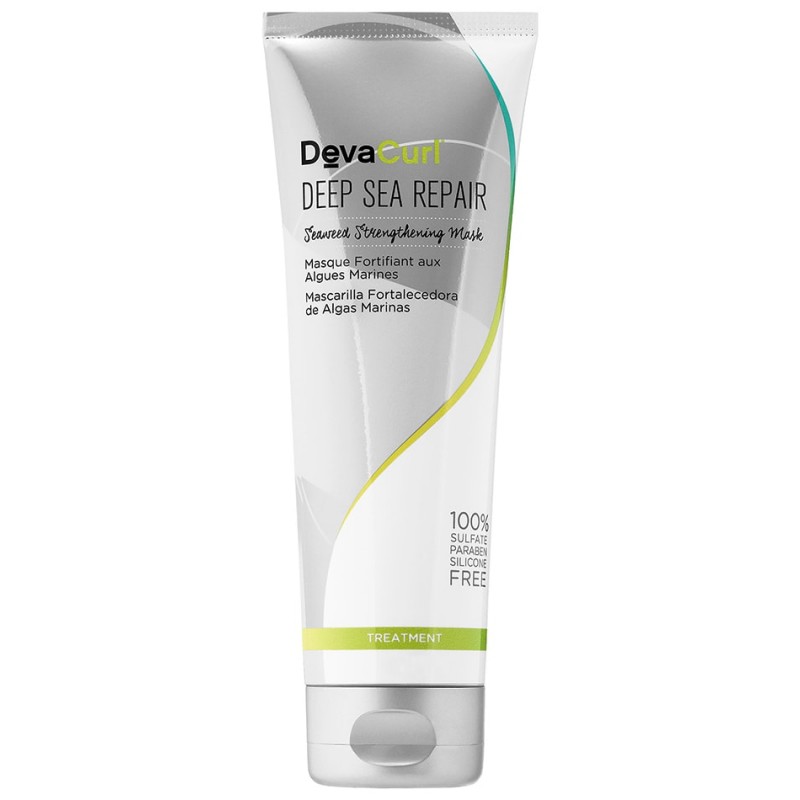
8. Toothpaste: Toothy Tabs and Powders
Traditional tubes of toothpaste can last a long time, but the ingredients definitely aren’t natural, and you can never get it all out of the tube…
Lush Toothy Tabs are a great alternative. Pop one in your mouth, chew it a little, start brushing your teeth, and boom! It foams and cleans your teeth, just the pasty kind of tooth cleanser. You get around 40 in a pack, so it’s easy to buy as many as you need before your trip.
Simply Sooney is a powder that you dip your toothbrush in. I haven't tried that one, but they have excellent reviews.
9. Deodorant: Salt Sticks
Get a stick of salt-based deodorant. It’ll last forever, and change your life.
I find most deodorants wear off at the end of the day, but not this one! It lasts all day (even after 90-minutes of hot yoga), has no scent whatsoever, and all you need to do to activate it is add water and use it on clean skin.
They’re SO much better for you and the planet than aerosols and commercial roll-on brands, and they actually work.
10. Sunscreen: Natural, ocean-safe Bars
As someone who burns ridiculously easy, sunscreen has been a staple in my bag for the last 10 years, but realistically, everyone should take up this practice because the sun damages your skin, and it’s your largest organ! You need to look after it.
The problem is that sunscreen tends to come in liquid form, and contain loads of chemicals that can also damage your skin (and the ocean, if you go swimming) so I’ve been looking at natural products that are waterproof or resistant, natural, cruelty-free, and ocean-safe, and came across sunscreen bars.
I haven’t used them yet, but they have great reviews, and I will definitely be using them as I venture around the world.
11. Insect Repellant
This is a must if you’re going anywhere hot or tropical – you don’t want anything carrying a disease to bite you.
Finding a solid vegan insect repellant was a challenge. Sam's Natural Campn' Stick has a lot of promise but no reviews, Kosmatology has mixed reviews, and Badger Anti-Bug Balm has great reviews but contains beeswax so I can't try it... In any case, they all contain natural, organic ingredients, and they're cruelty-free.
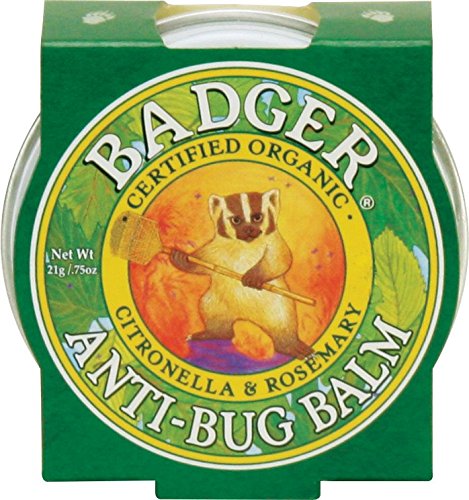
So there you have it!
I hope these natural products do wonders for your hair and skin, like many of them have done for me, and help you pack more consciously for your next trip.
Have you used any of these, or do you have any suggestions to add? Let me know in the comments below!
Like it? Pin It!

You Might Also Like:
I Tried DevaCurl to Fix Damaged Curly Hair. Here's What Happened.
Struggling to manage your curly hair while travelling? You’re not alone! Curly hair gets all kinds of dry, frizzy, and knotted while on the road, so I tried the holy grail of curly hair products to see if it’s really worth the hype. Here’s my DevaCurl review.
Struggling to manage your curly hair? You’re not alone! My curly hair was so dry, frizzy, and knotted after years of travel and chemical damage, so I tried the holy grail of curly hair products to see if it’s really worth the hype. Here’s my DevaCurl review.
UPDATE: DevaCurl has recently been accused of putting a bunch of nasty chemicals in their products. You can find out more about it here. I am not affiliated with DevaCurl - this is an authentic review with my honest opinion but, if the accusations end up being true, I will stop endorsing them. I haven’t used them for a while because, well, given the allegations I’m a bit concerned. But if you’re interested in reading my original review, I’ve left it below.
Endorsed by a slew of Instagram and YouTube Curly Girl Method devotees, DevaCurl is said to be the cream of the crop when it comes to curly hair.
Based on the theory that curly hair is more porous than straight hair, the Curly Girl (CG) Method states that washing your hair with regular shampoos is akin to washing your hair with dish soap. And when you look at the ingredients of each, they’re scarily similar.
Both contain an ingredient called ‘sodium laureth sulfate’ – a harsh detergent that strips away the oil on a fry pan, just as it strips away the natural oils on your head. You may wash your hair because it looks too oily, but you do need some oils to stick around – just like the natural oils on your skin, natural hair oils act as a natural moisturiser that your scalp and hair need to be healthy. Removing them completely strips your hair of its natural vitality and shine.
To combat the damage caused by the sulfates, generic conditioners contain silicone, which is kind of like plastic. There are all sorts of silicones in conditioners, and they’re used to coat your hair give it the illusion of shine, but in actual fact silicone is coating your hair your hair so it’s impenetrable by anything except sulfate. This means your hair looks shiny, but can’t absorb any moisture.
As you’ve probably guessed, DevaCurl is completely void of all those chemicals, along with most alcohols and parabens. Instead, it contains natural oils and botanicals that supposedly leave your hair moisturised and healthy, while encouraging your natural waves or curls to spring in to shape.
As someone with a head of moderately traumatised curls induced by travel, bleach, box dye, a lack of nutrition, cheap products, and intense brushing, DevaCurl looked like the holy grail and the solution to all my problems.
(Note: There are some affiliate links in this post, but clicking on them won’t cost you anything extra, and you’ll just get some extra karmic points :) This is not sponsored, and all opinions are my own. Read more about that here.)
DevaCurl: A Review
Before
I have a lot of hair with natural volume, but the strands themselves are quite thin (I believe the technical word is fine). It tends to be quite curly underneath and, when it’s healthy, the curls are more ringlety. Before starting my curly hair journey, it was so, so dry and damaged, with weird straight bits that weren’t straight when I was younger.
Poor nutrition, years of dumping chemical-riddled box dyes in my hair, and two rounds of bleach bleach killed my natural curls, leaving a dry and stringy mess after every wash.
On top of that, my hair freaks out every time it’s introduced to a new climate. It really, really didn’t like the hard and highly-chlorinated water in England, just as it hated the cold in Canada. My curls were gone.
No amount of keratin treatments or deep conditioners made a difference, and I felt at a loss. As a last resort, I took to Google, stumbled across the Curly Girl Method, and decided I had nothing to lose.
After gawping at the cost of each product on devacurl.com, I jumped on Amazon and ordered the DevaCurl Miracle Workers kit, which included:
No-Poo Original
(moisturizing, non-lathering formula that stimulates and cleans the scalp without stripping your hair)
One Condition Original
(rich, creamy conditioner that delivers softness and hydration)
Buildup Buster
(powerful cleanser using micellar technology to gently remove buildup from the hair and scalp without stripping)
Melt In To Moisture Mask
(nourishing mask that melts weightlessly into every strand, infusing hair with moisturizing matcha green tea butter, vitamin-packed sweet almond oil and protective beet root extract)
Deep Sea Repair Mask
(reviving mask that transforms damaged hair with restorative seaweed, a strengthening blend of rice, soy and wheat proteins, as well as moisturizing sea lavender)
I was so excited I couldn’t move.
Pre-wash
The first thing you need to do is remove all the silicone from your hair so it can absorb moisture again. As silicone is not water-soluble, the only thing that will get it out is sulfate, or a good clarifier.
This means you can use a regular shampoo with sulfates before moving on to a CG-friendly conditioner, but I didn’t want to risk doing even more damage to my hair, so I opted for Buildup Buster. According to DevaCurl, Buildup Buster is a strong enough clarifier to remove silicone.
The difference between CG-friendly shampoos and regular shampoos is, because CG products don’t contain sulfates, they usually don’t foam up. The Buildup Buster was a little like using regular shampoo, but of course it didn’t foam. It actually didn’t feel like it was doing anything, but I scrubbed it all over my head hoped for the best, before moving on to the No-Poo.
Wash 1
After clarifying with Buildup Buster, I squeezed a pile of No Poo in to my hand, and the first thing I noticed was how thick it was. It has the consistency of conditioner, which isn’t really something you expect from a shampoo.
DevaCurl recommend using your fingertips to rub the No-Poo into your scalp, rather than lathering all your hair in to a giant ball like you would with a regular shampoo, so that’s what I did. It’s pretty weird using something that doesn’t lather and I did wonder whether it was actually cleaning my scalp, buuut hundreds of reviews suggested it was, so I stopped thinking about it and pressed on.
I could feel my hair start to detangle immediately. It was kind of amazing, and it literally smelled like a bunch of flowers.
After rinsing, I coated the ends in One Condition and detangled with my fingers, which was surprisingly easy. My fingers slipped through my damaged hair more effortlessly than they had in years. left it in for a few minutes, then rinsed it out.
Using a microfibre sports towel (also recommended by the CG method), I scrunched the water out of my hair, then wrapped it up and left it in the towel for 15 minutes.
Drying
After taking my hair out of the town and letting it fall naturally, I immediately noticed a difference.
Even when it was wet, my hair was 1000-times curlier than it had been in years. As it dried, the curls only enhanced. It actually felt mousturised rather dry, limp, and lifeless, and retained it’s shape. Even the bleached ends had twisted up in to tight coils, bouncing when I pulled them, and looking shinier and healthier than ever.
I was kind of floored.
Result
The end result of my DevaCurl experiment was pretty surprising.
The curls were defined, bouncy, and felt healthier than they had been in years. It really highlighted for me why my hair had been such a disaster for so long – sulfates make a massive difference to the overall health of your hair, drying it out of the course of years.
The ends of my hair were so damaged (the lighter/coppery parts in the photo above) that I found the One Condition wasn’t quite enough, so I alternated between different deep conditioners every time I washed it. Melt In To Moisture was a go-to because, according to the directions, it doesn’t need to be in your hair for as long, but ultimately I found the Deep Sea Repair was better.
Even though keeping the Deep Sea Repair in for 20-mins is recommended, I found it made a difference almost on contact. My fingers were literally gliding through my hair when I used this products, and I could feel the difference in my hair afterwards. It took longer to get knotty, and held it’s curl for much longer.
Ultimately, you can’t ‘heal’ chemical-damaged hair – you just have to chop it off – but if you’re like me and want to avoid having super-short hair, DevaCurl helps you maintain your hair until it’s long enough to chop. The ends always looked rubbish again the day after wash day (dry, stringy, lifeless), but no product could have fixed that in the long-term so, all things considered, DevaCurl did a pretty remarkable job at keeping the damage at bay.
After the first week I decided I would 100% buy it again.
Pros
After finally chopping all the damage off, I noticed a huge difference in the overall health of my hair.
For the first time ever (including when was a teenager with healthy hair), I had no split ends whatsoever. The curls held their shape for days, I could get away with not washing it for a week and it didn’t get all knotty and dry, and it looked about 1000-times better.
The Deep Sea Repair also acts as a protein treatment, which is a huge bonus, and the products are cruelty-free, vegan, very high-quality, and actually enhance your curls. It’s kind of incredible. The No Poo is also so moisturising that you could probably get away with only using it as an all-in-one product, without conditioner.
Cons
DevaCurl is pricey.
You can get it a little cheaper on Amazon and at some online retailers, but it’s still around $25-35 per bottle, and they don’t ship to Australia. BIG thumbs down.
The only other issue I have with DevaCurl is it’s very heavy and weighs my hair down enormously.
Since it’s largely developed for people with African-style curls that can handle a lot of extra moisture, my fine hair couldn’t really deal with the No Poo or Low Poo (the lighter alternative for wavy hair). It ended up feeling greasy, all my natural volume was gone, and it took an additional three hours (five hours in total) to dry due to the extra moisture. Not a deal-breaker, but I did look in to alternative shampoo options.
The Verdict
Despite the price and the fact that the shampoo is too heavy for my hair, I would absolutely recommend DevaCurl to anyone struggling with their curls or waves, while travelling or in every day life.
It adds an incredible amount of moisture and shine, and really does help your hair maintain its curl for much longer.
On top of that, the ingredients are great for your hair! DevaCurl doesn’t contain any sulfates or drying alcohols, and you really can tell the difference. This whole process taught me to look at what’s in hair products and think about what I’m putting in my hair, and even though DevaCurl shampoos are too heavy, I still use the One Condition and Deep Sea Repair because they make such a difference to the overall health of my hair. It’s kind of amazing.
While it’s not carry-on friendly for travellers, it’s still worth a shot if you’re really looking to improve the heath of your curls or waves. Having said that, there are sulfate-free carry-on options if that’s what you’re in to, and you can check them out here.
Interested in trying DevaCurl? You can get it on Amazon or NaturallyCurly, and let me know how it goes in the comments!
Like it? Pin it!

You Might Also Like…
AFFILIATES
I use affiliate links and advertising on this site, which just means that if you buy a product through a link on this site, I'll get a small commission (not all links are affiliate links). This is because all the content I provide here is free, and I want to keep it that way :)