
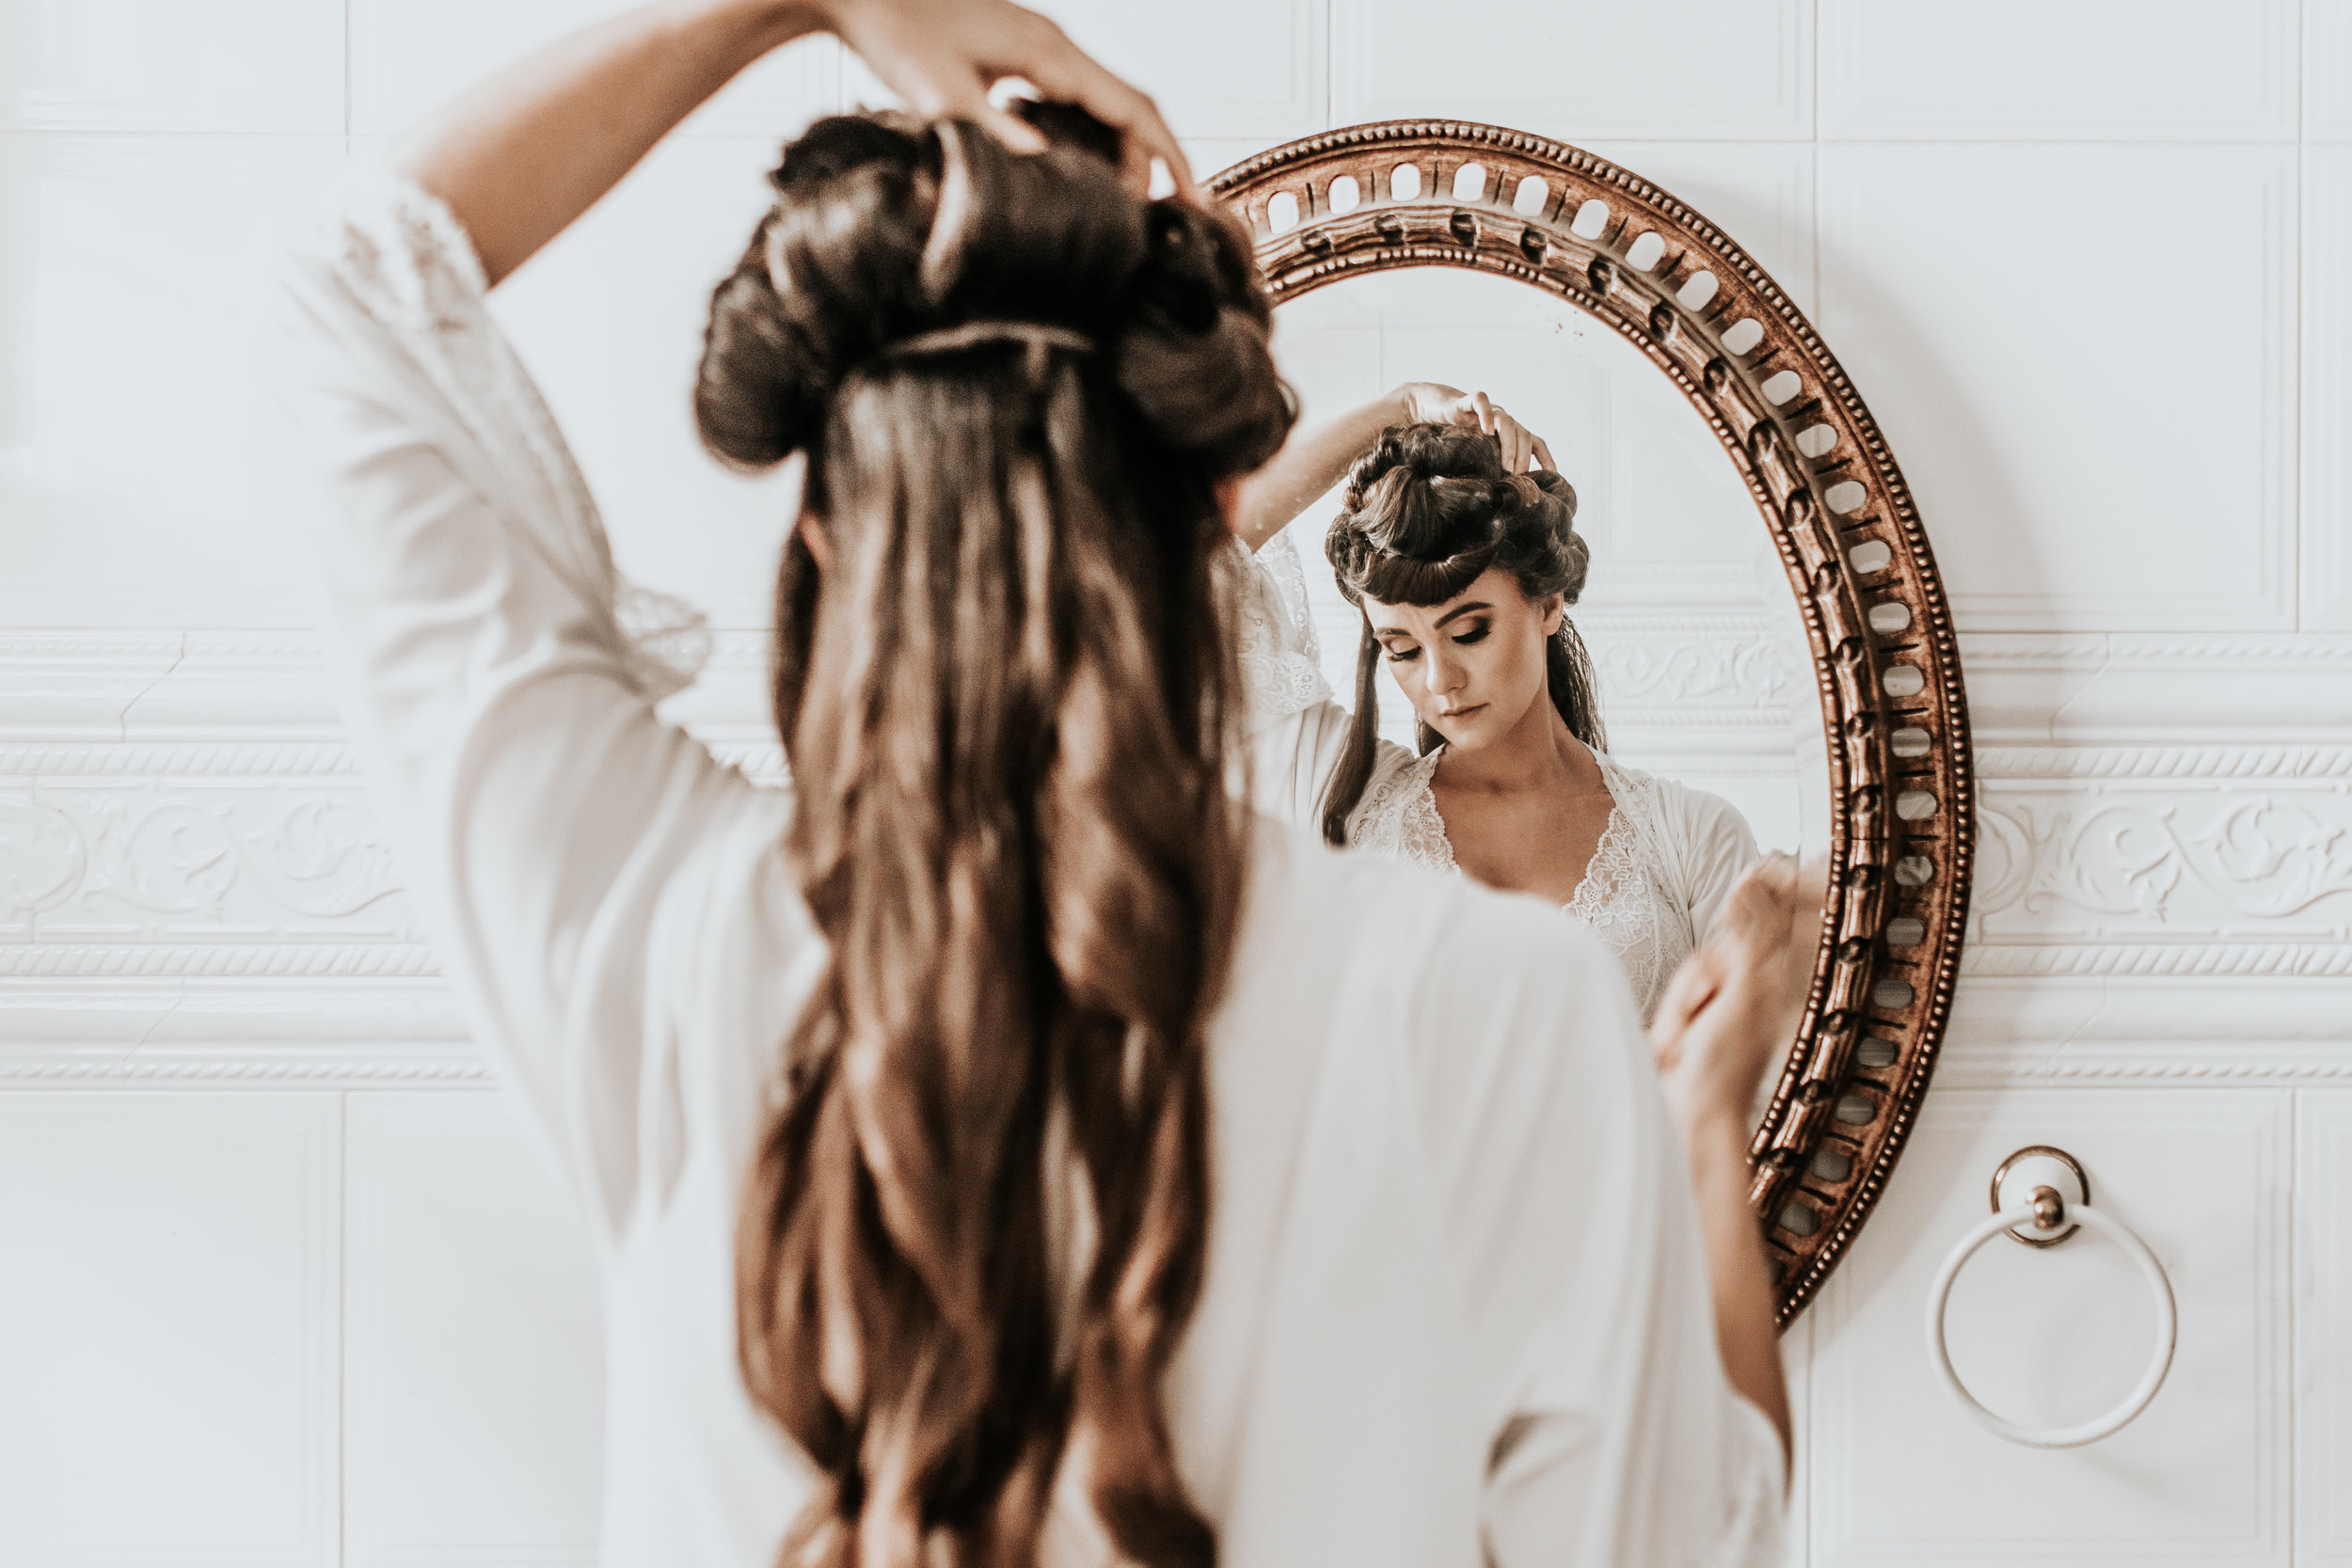
Silk bonnets for sleeping: Do they really work, and how do you choose one?
Silk bonnets for sleeping have surged in popularity with people of all ethnicities and hair types. They’re meant to reduce frizz, breakage, and help prevent hair loss. But do they work? And how do you choose one?
Silk bonnets for sleeping have surged in popularity for people of all ethnicities and hair types. They’re meant to reduce frizz, breakage, and help prevent hair loss. But do they work, and should you use one?
Hair bonnets are having a moment, and not just for people with curly hair - everyone seems to rave about them, whether they have curly, straight, long hair or a pixie cut.
They’re supposed to reduce friction between your hair and your pillow while you sleep. Traditional cotton pillowcases have a rougher surface that can pull on hair strands as you move around at night, causing breakage and generally causing tangles.
By comparison, silk has a smoother fibre structure, which means hair glides in the bonnet rather than catching on cotton.
Bonnets are supposed to reduce:
Mechanical breakage.
Tangling and matting.
Frizz caused by abrasion.
I wanted to give the bonnet a go because I have very fine hair that’s a combination of 1c, 2b and 3c curls, tends to lose its shape overnight, tangles very easily, and I end up with a lot of split ends.
Wash day is definitely my best hair day, and I have always struggled to keep it looking tidy-ish and tangle-free beyond day one.
I hoped the bonnet would fix these problems.
Note: I have designed this site to focus on cruelty-free products, and silk comes from silk worms and is not cruelty-free. I bought my bonnet a while ago from a small Australian business, and I chose mulberry silk. If I had my time over, I would choose bamboo silk (more on that below). Discarding my mulberry silk bonnet would be wasteful, so I have not replaced it. I have provided information on different fabrics in this post, and you can choose the one that best suits you.
There are some affiliate links in this post. Clicking them will not cost you anything extra, it just helps keep the site running.
Who should wear a hair bonnet?
Bonnets have only really entered the global hair market relatively recently, but people with coily 4c hair have been wearing hair bonnets for a really, really long time to protect their hair.
There has been some conversation about whether people from different cultural backgrounds should be wearing bonnets, and whether it’s culturally insensitive to wear a bonnet if you have white skin or do not have 4c hair.
I think KimladBeauty (video below) says it best.
If you have hair, you should protect it with a bonnet.
Silk hair bonnet review
I chose a black hair bonnet by Strands of Silk, which is a small Australian business. I chose this particular one because silk was touted as the best bonnet material, and there were thousands of great reviews for this specific brand.
Strands of Silk bonnets have a single layer of silk, which means they’re very lightweight with no lining. They have a silk band around the edge that extends to two lengths of silk for tying at the back, with a few inches of elastic at the very back so they fit any head size.
To fit the bonnet over my hair, I tipped my head upside down and looped a satin scrunchie once around my hair in a loose top knot. Some people find that two scrunchie loops hold the hair in place more effectively, but I find there’s a dent in my hair the next day if the scrunchie is any tighter than a single loop.
Using my hands to expand the bonnet, I placed it over the top knot, stood up straight and pushed any loose bits of hair under the bonnet before tying it up at the bottom.
I went to bed, half expecting it to fall off overnight because there’s no elastic around the front.
But it didn’t.
I actually forgot it was there until I woke up the next morning and went to put my hand under my head. I took it off, shook my hair a bit upside down, and I was shocked.
My hair didn’t only keep its shape, it felt moisturised and healthier than it did when I went to sleep.
The result
I thought maybe those initial great results might not last, like most products that start amazing and fade over time. But that didn’t happen.
The silk bonnet, somehow, consistently locked moisture in and improved the quality of my hair.
There were nights when I struggled to get to sleep and tossed and turned a lot, which would have normally resulted in a knotted mess the next day - but not with the bonnet.
During the summer, it was so humid that I couldn’t sleep without a fan. Ordinarily, my hair would have suffered in that weather - there would have been matting due to the heat on my scalp interacting with my hair texture. But not with the bonnet.
My hair looked great. Every. Single. Day.
Not only did my hair largely remain in place inside the bonnet all night, but the silk was so light and breathable that overheating wasn’t a problem - even when it was 30C overnight.
Washing and detangling my hair was also so much easier. I didn’t have massive tangles anymore, breakage reduced significantly, and my hair looked smoother and tidier than it had in years. It didn’t take me half an hour to detangle in the shower anymore.
I was completely shocked. I thought it would make a difference, but I didn’t think it would improve the quality of my hair so drastically.
I’ll never sleep without one again.
How to choose a hair bonnet
Choosing the right bonnet is not an exact science…but it’s close. I didn’t know what to look for when I bought my bonnet, but fortunately, I happened to buy a really good one and quickly learnt what does and does not work.
For example, there was one very popular satin hair bonnet that I almost bought on Amazon. It had elastic and ties at the front to stop it from coming off overnight - it looked great.
As I was reading the reviews, I came across someone complaining about the lining of the bonnet. When I looked further into it, I found that while the outside of the bonnet was lined with satin, the inside was lined with cotton.
A cotton-lined bonnet defeats the purpose of having a bonnet at all. You may as well remove it and sleep straight on the pillow.
Why was it lined with cotton? Because the manufacturers don’t care about your hair, they’re only cashing in on the moment.
If you’re buying on Amazon, make sure you read the descriptions carefully. A lot of sellers have jammed ‘silk’ into the product description to get more exposure, but their bonnets are actually satin. Some bonnets are also promoted as ‘silk satin’, which is not a thing. It’s either silk or satin; make sure you know what you’re getting.
If you get the wrong one, you’ll probably be less inclined to try another and that would be a tragedy because a good one will change the quality of your hair.
Even if a good one costs a bit more, it’s absolutely worth it.


What bonnets are better, satin or silk?
There are so many different kinds of bonnets, and they come in a range of styles and at different price points.
They’re pretty cheap on Amazon, but a bonnet is the kind of thing you only want to buy once - get a good one, they are not all made equal.
Your two choices are satin and silk.
The silk bonnet is by far the most effective. It’s light, breathable, locks in moisture as you sleep, and your strands glide over the material all night, which means your hair retains its shape and looks fabulous for days.
A good-quality satin bonnet can achieve similar results as a silk bonnet, but it’s not the most effective.
Silk is so light that your scalp can breathe overnight (particularly good in warmer climates), but satin is a thicker material and it’s usually byproduct of plastic, which can result in static and heat retention. This can sometimes lead to matting and tangles if you’re not getting good quality satin.
So, what do you choose? I have broken down a few options below along with some key considerations.
-
Satin bonnets are the most accessible and widely used option today. Satin refers to a weave, not a fibre, and most satin bonnets are made from synthetic materials like polyester. The smooth surface reduces friction between the hair and pillowcase, helping to minimise breakage, tangling, and frizz during sleep. Satin bonnets do not absorb moisture the way cotton does, which can help hair feel less dry by morning. They are often chosen as a vegan and affordable alternative to silk, though the synthetic fibres are derived from petrochemicals and may be less breathable.
-
Mulberry silk bonnets are made from silk produced by silkworms fed exclusively on mulberry leaves. This type of silk is known for its long, uniform fibres, which create a very smooth and breathable fabric. Mulberry silk reduces friction effectively and regulates temperature well, making it comfortable to wear overnight. However, traditional mulberry silk production involves boiling the cocoons with the silkworm inside, which raises ethical concerns for those seeking cruelty-free or vegan products. Mulberry silk bonnets are also more expensive due to the labour-intensive production process.
-
Peace silk bonnets, sometimes called ahimsa silk (which means ‘non-violent’), are made by allowing the silkworm to complete its life cycle and emerge from the cocoon before the silk is harvested. This approach avoids killing the silkworm, making peace silk a more ethical alternative. Because the silk fibres are shorter and less uniform after the cocoon is broken, peace silk fabric is typically less smooth and more textured than mulberry silk. As a result, peace silk bonnets may not reduce friction quite as effectively, but they offer a compromise between performance and ethics. There is some debate about the treatment of the moths once they emerge from their cocoons but, as with everything, check the manufacturer before buying.
-
Bamboo silk is a textile marketed as a silk-like fabric made from bamboo, but it’s not chemically or structurally the same as real silk.
Most bamboo silk is actually bamboo viscose or bamboo rayon. The bamboo plant is broken down through a chemical process that dissolves the cellulose, which is then re-extruded into fibres. The end result is a regenerated cellulose fibre that feels smooth and soft, but it is no longer bamboo in its natural form.
Bamboo silk is smooth, breathable, and has a sheen similar to silk, which is why it is often used in bedding, scarves, and hair accessories like bonnets and pillowcases. However, its performance depends heavily on how it’s manufactured. Some bamboo viscose fabrics are tightly woven and reduce friction well, while others are less durable and prone to pilling.
How does the bonnet stay on your head?
You want a bonnet that either has elastic around the edges to stop it from falling off overnight, or ties at the front or back that will not get in the way when you sleep.
A thick bow at the front might look cute, but do you sleep on your front? What about when you roll over? It will probably get in the way. I chose one with slim ties at the back and I don’t notice it at all during the night.
What’s the bonnet material?
Is your satin or silk breathable? If you go the satin route, you want to check that it’s quality satin and that your hair and scalp can breathe underneath it.
The idea behind the bonnet is that it removes friction and prevents strands from breaking and weakening - your hair should easily glide over the bonnet as you sleep.
Check the lining of the bonnet
The fabric inside the bonnet is the most important part because that’s where your hair goes. Is the bonnet a single layer of silk or satin, or is it lined with another fabric inside?
The lining is one of the most important features.
Is the bonnet thick or bulky?
The best bonnet, in my opinion, is the one that doesn’t interrupt your sleep. You basically want to put it on, go to bed, and forget you’re wearing it.
What size bonnet do you need?
Hair bonnet sizes often refer to hair length and bulk, rather than head size. I learnt that the hard way.
I have a small head and I buy small hats, so I didn’t think twice before buying a small bonnet. That was the wrong choice.
When my hair was mid-length, it was difficult to fit it all into my small bonnet. I have fine hair so I can squish it all under the bonnet, but it’s a bit annoying and takes a bit longer than I’d like. I really should have gone with a medium.
If you have ear-length hair or a pixie cut, go with a small. If your hair is thick and/or has a lot of bulk, you might want to consider a large. Each retailer should have sizing information.


Ethical silk hair bonnets
There are a couple of ethical silk bonnet options, if you don’t want to use silk or satin.
Peace Silk
Peace silk is still manufactured with animals, but the silk worm was allowed to transform into a moth and emerge from its cocoon, unharmed.
Soluniere is a good peace silk option, based in Europe but ships internationally.
T.Berry is based in India, also ships peace silk bonnets internationally.
Bamboo silk
Bamboo silk is not manufactured with animals and is the most ethical option.
Curly Life is an Australian-based company that makes bamboo silk bonnets.
Clementine Sleepwear also does a bamboo silk bonnet, based in the US.
So…what are you waiting for?
Silk bonnets do not prevent hair loss, but they can reduce breakage and help hair stay healthier over time.
I was shocked at the difference in my hair after using a silk bonnet at night. I’m still amazed at how healthy and hydrated my hair feels every morning when I take the bonnet off.
If you’ve been thinking about trying the bonnet but haven’t made the leap, this is your sign to try it out.
Have you tried a bonnet? Let me know in the comments below!
You Might Also Like…

Best Styling Gel for Curly Hair
Finding a styling gel for curly hair can be hit and miss - some weigh your hair down, others are either drying or sticky, or they leave your hair feeling crunchy. But there is one gel that works perfectly every time.
Finding a styling gel for curly hair can be hit and miss - some weigh your hair down, others are either drying or sticky, or they leave your hair feeling crunchy. But there is one gel that works perfectly every time.
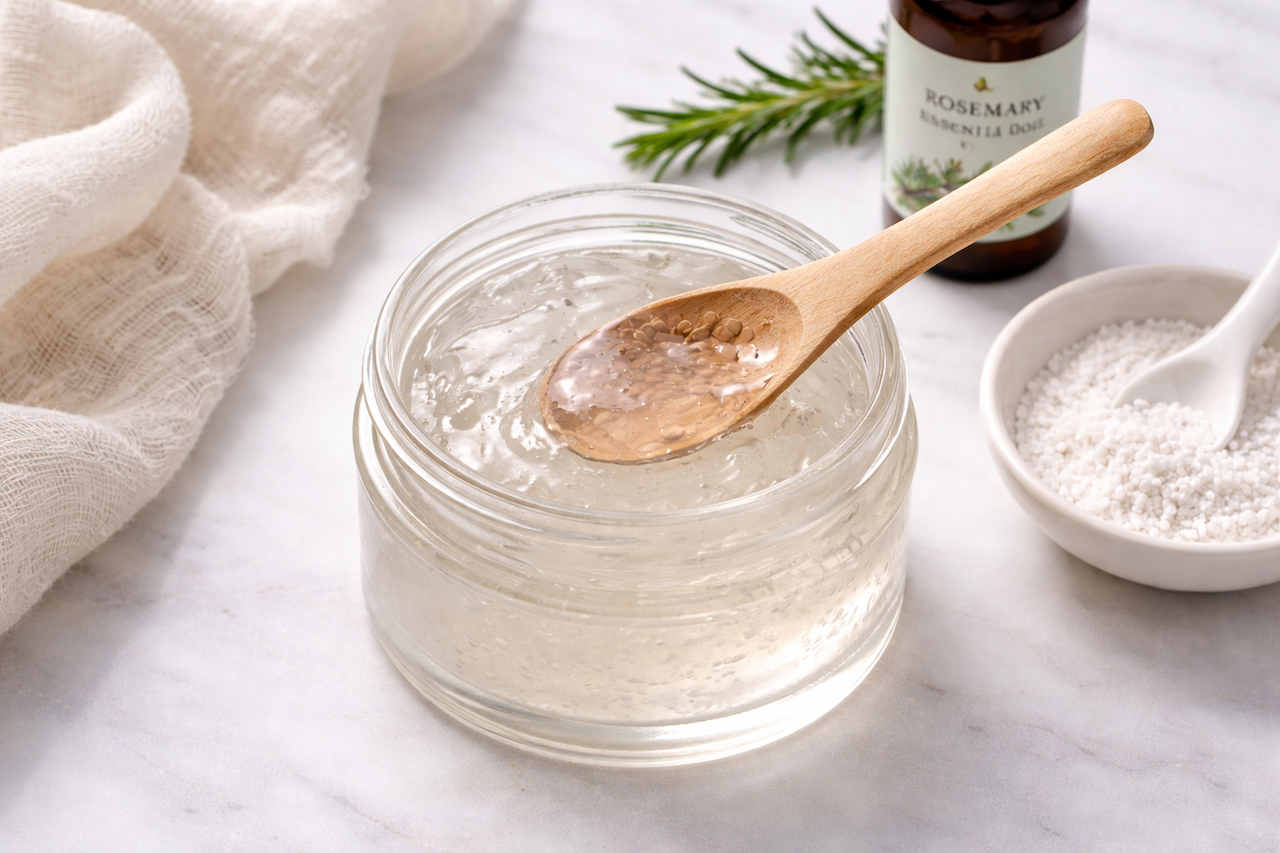
I’m talking about flaxseed gel.
The kind you make yourself.
Bear with me, hear me out, it’s much easier (and cheaper) than you think, AND there’s a way to preserve it so it lasts.
Flaxseed gel has no harmful chemicals, it’s vegan and cruelty-free and has no film-forming polymers, synthetic resins, and heavy conditioning agents that sit on the hair rather than working with it.
This means you’re not left with any buildup, dryness, or crunch.
It just works perfectly.
Every. Single. Time.
The best part? It takes about five minutes to make and it’ll keep for months.
(Note: There are some affiliate links in this post. It won’t cost you anything extra if you click them, it just helps keep the site running :)
Why it’s the best styling gel for curly hair
Products stop working for me all the time. They start out great, and then almost overnight they stop working. Sometimes the problem is protein build-up, but often the problem is artificial fragrances and preservatives that are bad for hair and scalp health anyway.
When a product stops working, it’s your body telling you the product is not good for you.
Ingredients like phenoxyethanol are in most haircare products, but it can inflame your scalp which leads to weaker hair over time. By making your own hair gel, you’re eliminating these ingredients entirely.
(Check out my ingredients analyser to find out what’s really in your favourite hair products)
Flaxseeds release a natural gel when heated in water rich in polysaccharides and soluble fibres, forming lightweight, flexible films that help curls clump together and hold their shape without stiffness or a hard shell.
Flaxseed gel also contains:
Omega-3 fatty acids, which help reduce dryness.
Mucilage, which improves slip and curl clumping.
These compounds sit on the surface of the hair and wash away cleanly, rather than accumulating over time, which means no harsh preservatives, and no more build up.
Why make your own gel?
Unlike commercial gels, homemade flaxseed gel:
Provides hold without stiffness;
adds slip for easier curl formation;
hydrates without coating or buildup;
rinses out easily with gentle cleansing.
Because the gel is water-based and free from synthetic polymers, it doesn’t block moisture or require harsh shampoos to remove.
Making your own flaxseed gel also means there are no unnecessary fillers or fragrance, which are a leading cause of scalp irritation.
Homemade flaxseed gel recipe for curly hair
You’ll need:
¼ cup whole flaxseeds
2 cups water
Potassium sorbate (optional)
A few drops of a hair-safe essential oil (optional, I use rosemary because it has growth properties)
Strainer (clean option) or cheesecloth (messier option)

Instructions:
Add flaxseeds and water to a saucepan.
Bring to a gentle boil, then reduce to a simmer.
Is using a preservative, dissolve a pinch of potassium sorbate into a splash of water into a small bowl and place to the side.
Stir flaxseed mixture occasionally for 7–10 minutes, until the liquid thickens slightly. Remove from heat.
Add the potassium sorbate mixture and a few drops of essential oil. Stir well.
Strain immediately using a fine sieve or cloth. It’s important to do this while it’s still hot.
If using a sieve: Pour the gel into the sieve over a bowl. Use a silicone spatula or the back of a spoon to press out as much gel as possible into the bowl.
If using cheesecloth: Line a small bowl or jug with a double layer of cheesecloth. Pour the gel onto the cloth, then lift the edges to allow the gel to strain into the bowl without letting the seeds fall over the edge. Squeeze the cloth like you’re wringing it out—just be careful not to rip the cloth or let any seeds fall into the bowl. The mixture will be hot, so be careful. You can also use clean dishwashing gloves to protect your hands from the heat.
Allow the mixture to cool slightly before transferring to a jar or glass container with a lid.
The gel will thicken as it cools.
Shelf life: If you’ve used a preservative, it will last about three months if stored in a cool, dry environment. It will last six months or longer if stored in the fridge.
If no preservative was used, it will last 7-10 days in the fridge. You’ll know when it’s off because it will smell rancid.
How to use flaxseed gel on curly hair
Apply flaxseed gel to soaking wet hair after cleansing and conditioning. Use praying hands or scrunching motions to distribute evenly, then scrunch upward to encourage curl formation.
You can:
Air dry for softer definition.
Diffuse for more volume and hold.
The result is defined curls with movement, not crunch.
Who flaxseed gel works best for
Flaxseed gel works well for anyone with:
Wavy and curly hair;
fine curls that get weighed down easily;
hair prone to buildup;
anyone sensitive to fragrance.
Because it’s lightweight and rinseable, it’s especially useful for people who struggle with gels that stop performing over time.
Why I love this styling gel for curly hair
If your curls seem to get tired of store-bought gels, making your own flaxseed gel is one of the simplest and most effective changes you can make.
It’s easy, extremely affordable, and free of harmful preservatives and artificial fragrances.
Have you made your own hair gel? Let me know in the comments below!
You Might Also Like…

Biodance Collagen Face Mask Review
The Biodance Collagen mask is supposed to be the original Korean sheet mask that pumps collagen into your face as you sleep, but does it work? Here’s my review.
The Biodance Collagen face mask is supposed to be the original Korean sheet mask that pumps collagen into your face as you sleep, but does it work?
The Biodance Collagen face mask is a Korean sheet mask formulated to hydrate the skin, smooth texture, and temporarily soften the appearance of fine lines.
It’s designed to be worn overnight. The mask is white and opaque when you open the packet, then gradually dries and turns transparent as it dries. The idea is that it delivers hydration and collagen to your skin as you sleep, leaving it looking dewy, plump, and more elastic when you wake up.
Like the Official Quasi Bio-Collagen mask, I approached this one with some skepticism. Collagen is a large molecule, and topical collagen is not known to penetrate deeply into the skin. From a formulation standpoint, collagen mainly works as a surface-level humectant and film-former, so I was curious to see how noticeable the results would actually be.
Biodance has traditionally been priced higher than Quasi, although that gap has narrowed recently. Because of that, and its status as the OG overnight collagen mask, I expected the Biodance mask to perform at least as well - if not better.
For context, I’m in my 30s with early signs of ageing. I have fine lines on my forehead, visible pores, some smile lines, and light creasing under the eyes when I smile. I didn’t expect Biodance to fix any of those things, but I hoped it would make a few lines less visible and deliver a blast of hydration to my face.
Here’s what happened when I tried the Biodance Bio Collagen face mask.
Note: This post is not sponsored, but there are a few affiliate links. Clicking them will not cost you anything extra, but it will help me keep the site going :)

Biodance Collagen Mask: A Review
Biodance promises to refine enlarged pores, instantly improve skin elasticity and visibly smooth out the appearance of fine lines and wrinkles, according to the website.
It also apparently contains three different kinds of probiotics that strengthen the skin’s barrier and prevent skin aging, and is formulated with non-toxic and non-irritant ingredients.
Collagen in topical skincare does not rebuild or replace natural collagen. Instead, it works as a film-forming ingredient that helps reduce water loss while the product is on the skin.
This just means the mask is designed to hydrate, more than anything else. Like most products, the effects are temporary and require consistency for any long-term impact.
When I was reasearching whether to try Quasi or Biodance, I came across a lot of forums and reviews saying Biodance was the original Korean brand, Quasi was a dupe and not very good, and to always get Biodance.
The bar was set high, I expected great things.
What happened
I bought a box of four Biodance Collagen masks, because these masks always seem to come in packs of four - regardless of the brand.
As with the Quasi mask, I washed all the makeup off my face, using micellar water to make sure there was nothing left. I didn’t apply anything else to my face.
I moved the mask from the packet. It was opaque, white and jelly-like.
It comes in two pieces, one for the top half of your face and one for the bottom, so you can tailor it to fit.
There are two oval cut-outs where the eye holes are, so I put those ovals directly under my lower lash lines to ensure my under-eye area would get collagen. I then placed one half of the mask over my chin and lower cheeks, and the other half on my forehead, cheekbones, and around my eyes.
What I noticed was that the mask seemed a bit thinner than the Quasi mask, which was quite thick and durable. The Biodance mask ripped a little when I put it on, and it didn’t feel as secure as Quasi. It didn’t adhere to my skin very well in general, and started lifting a bit around the bridge of the nose once it started to dry.
The mask felt a bit like it might peel off before it was dry.
I was glad I put it on about an hour before going to bed, so it had a bit of time to dry before I lay down.
Sleeping with a collagen face mask
Biodance definitely didn’t feel securely stuck to my face as I went to sleep, and I was pretty worried it would come off. I find it difficult to sleep with a face mask on as it is - it feels damp and cold, and I’m always slightly worried it’s all going to come off on the sheets.
The mask did stay on for the most part, but I woke up at about 3am and pulled it off. There was noticeable lifting around the cheeks by that stage, the mask felt dry enough to remove, and I didn’t think it would last until morning.
The result
My face did look hydrated and dewy in the morning, and I definitely had a healthy glow that remained in place even with a full face of makeup on.
My skin felt smooth and hydrated. The fine lines on my forehead did dissipate a little, pores were a bit smaller, and smile lines weren’t as pronounced. The creasing under my eyes remained, but I think that’s a structural issue that can’t be resolved with a face mask.
But the dewiness didn’t last long. I found the glow from the Quasi mask lasted three or four days, whereas Biodance lasted two days at the absolute max.
By day three, I’d almost forgotten I did a collagen mask.
Pros
My skin did appear hydrated and firmer, and fine lines were slightly reduced. Make-up went on very easily, and my skin generally felt very smooth and pores slightly reduced in size. The mask was easy to use.
Cons
The mask itself was thin and ripped easily, and it didn’t feel as though it adhered to my skin properly. There was significant lifting from the edges as the mask dried, which meant it didn’t last all night. The results were also short-lived, only lasting for a day or two.
Verdict
I probably wouldn’t get the Biodance Collagen face mask again. Having already tried the Official Quasi collagen mask, I had high expectations and Biodance didn’t really compare.
I do think the thickness of the mask itself makes a big difference - a thicker mask means longevity as you sleep, and reduced lifting around the edges as the mask dries, which means better results. The more collagen that sits on your skin, the longer-lasting the effects will be.
The Biodance mask was relatively thin, and the results just weren’t as pronounced.
Cost is also a factor - Biodance is touted as the original collagen face mask, and has historically been more expensive, but there are new deals all the time and prices vary substantially.
At the time of writing, Biodance was $16.99, reduced from $19. But these prices change all the time.
Have you tried the Biodance Collagen mask, or do you prefer a different one? Let me know in the comments below!
You Might Also Like…


Biodance vs Quasi Bio Collagen Face Mask: Which is better?
Biodance and Quasi Bio Collagen Face Mask are overnight collagen face masks that promise to boost hydration, reduce the appearance of fine lines, and make your face look all dewy. But do they both work? And which one is better?
The Biodance Bio Collagen Face Mask and Official Quasi Bio Collagen Face Mask are overnight collagen face masks that promise to boost hydration, reduce the appearance of fine lines, and make your face look all dewy.
But do they both work? And which one is better?
I definitely have my own opinion on this, but today I’m looking at the science behind the face masks to work out which one is actually more effective.
Note: There are some affiliate links in this post. Clicking on them won’t cost you anything extra, it just helps me keep the site running :)

How hydrolysed collagen works
The Biodance Bio Collagen Mask and Quasi Bio Collagen Mask both use hydrolysed collagen, which is collagen that has been broken down into small peptides that are easy to mix into water-based products, like sheet masks.
These peptides primarily act as humectants that form a thin, hydrating film on the skin’s surface, and they’re pretty powerful.
Humectant: They are excellent at binding water to the very top layer of your skin.
Film-Former: They leave a thin, flexible, invisible layer on your skin.
This film, combined with the occlusive environment of the mask itself (the physical barrier that locks everything in), creates a hydration lockdown. This stops water from evaporating out of your skin.
The result? The top layer of your skin swells up with moisture, making it look instantly smoother, plumper, and bouncier. That satisfying firming effect you feel is incredible hydration.
| Feature | Biodance Bio-Collagen Real Deep Mask | Quasi Bio-Collagen Mask | Comparative summary |
|---|---|---|---|
| Key hydration technology | Hydrogel mask designed to solidify and turn transparent as ingredients are absorbed (can be worn up to 8 hours/overnight). | Hydrogel mask with similar long-wear technology, also designed to turn transparent as essence is absorbed. | Identical occlusion: both masks use the same core hydrogel delivery method, which is key to any long-term moisture benefit. |
| Collagen type | Ultra-low molecular weight collagen (as small as 243 Daltons). | Ultra-low molecular weight collagen. | Penetration advantage (claimed): Biodance publicly claims a smaller molecular size (243 Da), suggesting a slight edge in getting peptides into the upper epidermis. |
| Main hydrating agent | Oligo-hyaluronic acid (ultra-low molecular weight). | Oligo-hyaluronic acid (ultra-low molecular weight). | Identical efficacy: both use the most advanced, small-particle HA designed for deeper epidermal absorption. |
| Barrier-building ingredients | Galactomyces ferment filtrate, probiotics, niacinamide. | Galactomyces ferment filtrate, probiotics, niacinamide. | Identical long-term benefit: both formulas contain the same proven, gold-standard ingredients for skin brightening, barrier repair, and elasticity. |
| Specific clinical metrics | Publicly cited: 166% moisture increase after 150 hours. | No publicly cited metrics: marketing focuses on ingredients (collagen, niacinamide, ferments) and the hydrogel's visual transformation. | Key difference: Biodance offers specific, published (though proprietary) numbers, giving consumers a quantifiable reason to believe the mask's effects are long-lasting. |
How effective is hydrolysed collagen?
Hydrolysed collagen is a powerful moisturising agent, but it’s not a long-term solution.
It’s not a restorative product that rebuilds structural collagen deeper in the dermis. That’s because the collagen sits on the skin, rather than penetrating it.
Hydrolysed collagen actually only increases hydration for about two to four hours — the effect fades as the film breaks down.
By comparison, hyaluronic acid and ceramides work within the stratum corneum — the outer layer of the skin — to hold water and strengthen the lipid barrier. Their effects can last six to eight hours or longer, depending on concentration and delivery method.

Debunking claims
The Biodance Bio Collagen Mask specifically markets its formula as being superior in absorption due to the size of its key molecules:
Ultra-Low Molecular Weight Collagen: Biodance claims to use collagen peptides with a very small size (as low as 243 Daltons). The idea is that the smaller the molecule, the better it can penetrate the stratum corneum (the outermost layer of the skin). While topical collagen doesn't reach the deeper dermis to rebuild natural collagen, smaller peptides can theoretically penetrate the upper layers of the epidermis more effectively than larger ones, enhancing surface hydration and plumping.
Oligo-Hyaluronic Acid: Similarly, Biodance uses ultra-low molecular weight hyaluronic acid, which is designed to penetrate deeper into the epidermis compared to high molecular weight hyaluronic acid, providing moisture across multiple surface layers.
There is limited research about Quasi, but those masks also use the advanced, occlusive hydrogel technology that presses the essence against the skin for hours. This prolonged contact time greatly enhances the absorption of all its ingredients, which include similar high-efficacy components like niacinamide and ferments.
Biodance has a specific molecular advantage, but both masks deliver powerful ingredients through the common advantage of prolonged hydrogel application.
Mask adhesion and wear
Both use bio-cellulose or a similar material that is prized for its excellent adhesion and close fit. The mask starts thick and slowly dissolves into the skin over several hours (three or four hours, or overnight).
This unique process is highly effective at delivering intense moisture.
Lasting hydration
Based on their ingredient lists, both masks offer high levels of hydration and are effective at smoothing and calming the skin.
Biodance emphasises its precise low-molecular-weight ingredients, which the brand's own studies claim result in moisture effects that last for over 150 hours.
Quasi relies heavily on the proven benefits of its galactomyces and niacinamide blend for brightening and barrier strength, alongside its collagen.
Which mask is more effective?
Both the Biodance Bio Collagen Mask and the Official Quasi Bio Collagen Mask use high-quality, similar formulations and hydrogel technology.
The Biodance mask delivers excellent surface moisture and smoothing benefits through its collagen content, which provides a temporary plumping effect.
The Quasi mask, like Biodance, uses a blend of collagen, galactomyces ferment filtrate, and niacinamide to support hydration and the skin barrier.
Because both products share core barrier-repairing and hydrating ingredients, both masks are effective for intense surface hydration and barrier support during long wear.
Which one is better value?
Collagen face masks are not long-term fixes for aging skin, but that doesn’t mean they’re not a quality addition to your skincare routine. The hydration and dewy glow they provide is almost unparalleled, even if it is only a short-term solution.
Topical hyaluronic acid is also a short-term solution, but I wouldn’t stop using that.
At the end of the day, Quasi and Biodance are very similar.
The key differences are cost and marketing claims. Biodance has more scientific data to back claims, while Quasi only really has claims.
At the time of writing, Biodance cost $19 for four masks, while Quasi cost $21.99 for eight masks.
Personally, I preferred Quasi because the sheet mask itself was thicker and more durable than the Biodance mask. But that was just my experience.
My recommendation? Pick whichever one is on sale.
Which one is your favourite? Let me know in the comments below!
You Might Also Like…

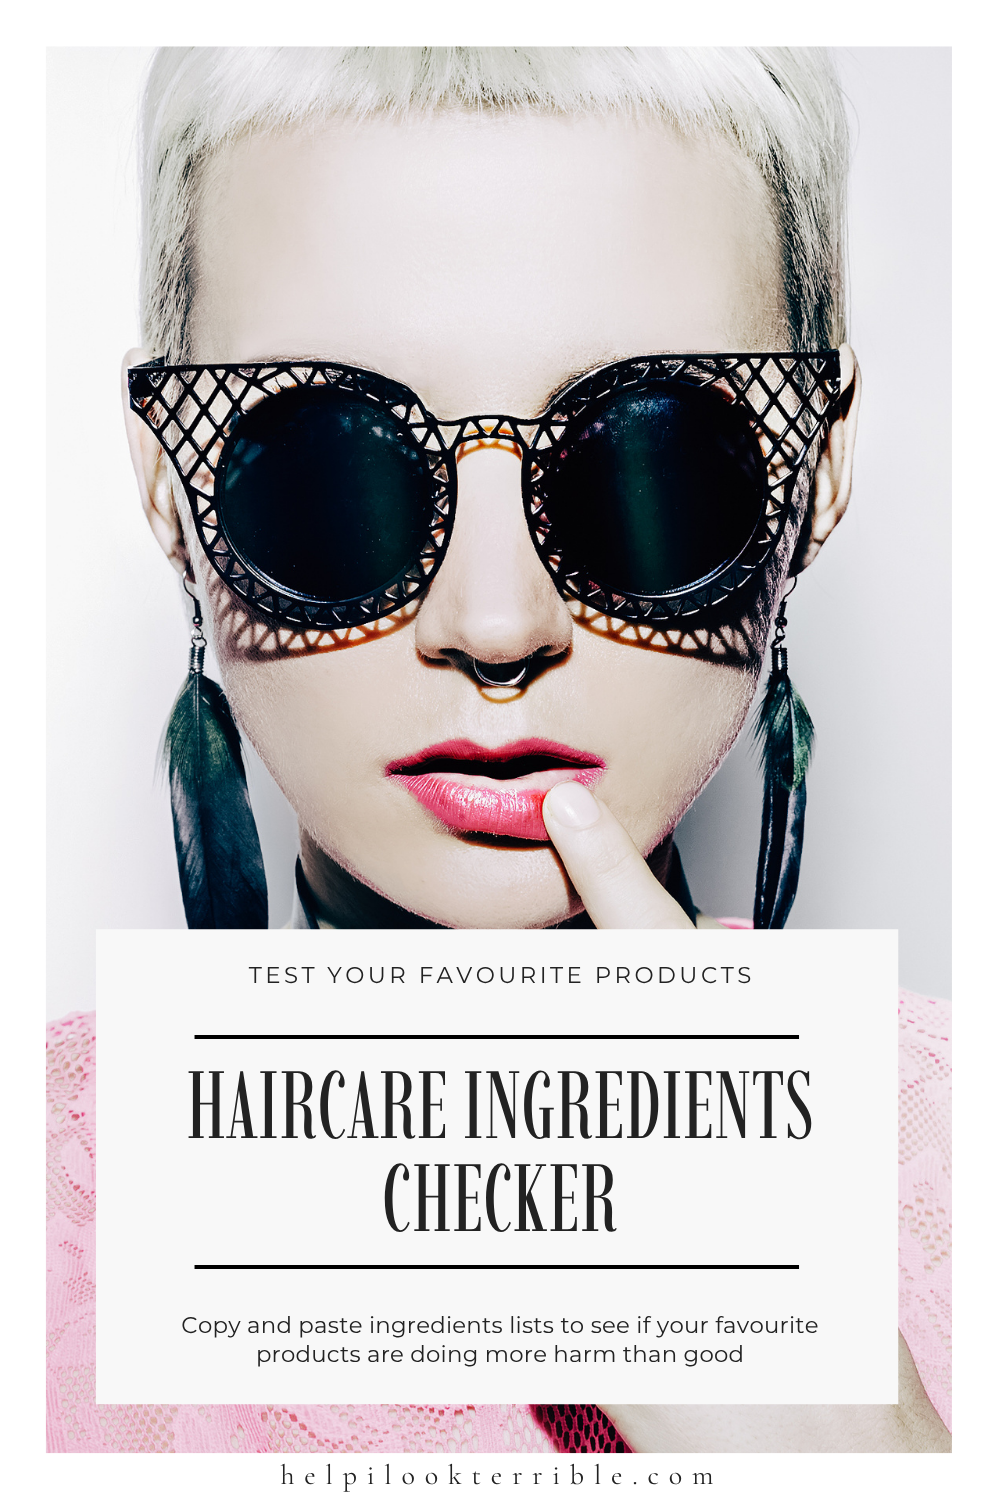
Haircare Ingredients Checker: Find out if your favourite products are doing more harm than good
Paste in any ingredient list and the ingredients analyser will identify ingredients that don’t belong in a modern, functional haircare routine.
Most haircare products contain damaging ingredients that will harm your hair and scalp over time.
It doesn’t matter how expensive they are, who promotes them, or how ‘clean’ they claim to be — the vast majority will cause long-term damage.
I know that’s tough to believe when there’s so much conflicting information out there about what’s healthy and what’s harmful in haircare. One source says silicones are safe, another says they’re damaging. A product is labelled sulfate-free, but still strips your hair.
It’s overwhelming, and it’s hard to know what information to trust.
Ingredient names are technical, marketing claims are vague, and even brands that position themselves as clean or gentle often use the same problematic ingredients as everyone else.
I spent years wondering why my hair reacted really well to products in the first instance, and then it was like the product stopped working. I thought I just hadn’t found the right products for my hair.
Through a lot of research, trial and error, I figured out the problem was the preservatives, alcohols, harsh sulfates, and synthetic fragrances in every product. I cut them out of my haircare routine, and my hair has never been healthier.
That’s where the ingredients checker comes in.
Paste in any ingredient list — these are usually found on online store product listings — and the tool will identify ingredients that don’t belong in a modern, functional haircare routine.
It will flag:
Banned or restricted preservatives
Silicones that don’t rinse out
Drying alcohols
Film-forming quats and polymers
Anything that interferes with long-term hair health
You can also read a bit more below about the ingredients I’ve blacklisted, and why.
Most hair products are made to feel good, not to improve hair health
Haircare marketing is built around instant results — softness, shine, volume. But the ingredients that create those effects don’t always support the health of your hair.
Many formulas rely on:
Coating agents that block hydration
Harsh cleansers that strip the scalp
Preservatives with toxicity concerns
Fillers and film-formers that accumulate over time
You can’t spot that from the front of the bottle. You have to read the ingredients and understand what they actually do.
Has your hair ever felt great with a new product the first time you used it, but worse with the same product over time? This is probably why.
Ingredients to avoid in hair products
Here are just a few common ingredients found in everyday shampoos, conditioners, and stylers — including expensive and ‘clean’ brands — that cause more harm than good.
DMDM Hydantoin
A preservative that works by releasing formaldehyde. This ingredient has been restricted or banned in multiple regions. It’s unnecessary and inappropriate in any rinse-off or leave-in product.
Behenoxy Dimethicone
A heavy silicone that coats the hair in a film that resists rinsing. It blocks moisture, traps buildup, and leaves hair looking dull and feeling dry — even when it’s technically “clean.”
Phenoxyethanol
Commonly used in modern products as a preservative, but often overused. It’s drying, especially with repeat exposure, and not ideal in rinse-off formulations where safer alternatives exist.
Sodium Lauryl Sulfoacetate (SLSa)
A strong foaming surfactant. Despite being plant-derived, it strips the hair and scalp of natural oils and increases porosity over time.
Polyquaternium-7
A synthetic film-former. It clings to the hair and builds up with repeated use. It doesn’t moisturise — it masks. Once it accumulates, your hair will stop responding to other products.
Cocamide DEA
A foam booster linked to the formation of nitrosamines — compounds with known carcinogenic potential. Banned or restricted in many countries.
SD Alcohol 40 / Isopropanol / Ethanol
These solvents evaporate quickly, but they also draw moisture out of the hair. Long-term use leads to brittleness and rough texture — especially in leave-ins and sprays.
These ingredients are everywhere
You’ll find them in:
Supermarket brands
Professional salon ranges
Natural and organic lines
Leave-ins, sprays, masks, serums, gels
And they’re not always easy to spot. Many show up under unfamiliar names or are buried in a long list of compounds that sound safe to use.
Let me know how you go!
Once you know what to look for, it’s much easier to spot harmful products and build a routine that actually works for you.
If you’re unsure, try it out for a month and let me know what happens!
Like It? Pin It!
You Might Also Like…

I ditched the curly girl method and my hair has never looked better: How to use sulfates and silicones properly
I tried to follow the curly girl method for years, even though it wasn’t working. When I changed my approach, my hair completely transformed. Here’s what actually helped my fine, curly hair.
I tried to follow the curly girl method for years, even though it wasn’t working. When I changed my approach, my hair completely transformed.
If you’ve been following the curly girl method but still feel like your hair never really gets clean, or if your products seem to stop working — you’re not alone. The same thing happened to me, and I had no idea why.
Like a lot of people with waves or curls, I found the curly girl method when my hair was damaged and I was desperate for a solution. I couldn’t believe there was a whole routine designed for hair like mine. I was SO excited — and at first, it worked.
I was growing out bleach at the time, so I started with sulfate-free shampoos and thicker conditioners that worked wonders on my ends. My hair had ringlets for the first time in a long time. Detangling didn’t take as long, and I was paying attention to the ingredients in my products for the first time.
But over time, it stopped working. My hair felt limp, sticky, overloaded, and never clean — no matter how much cleanser I used, or how closely I followed the rules. I thought I wasn’t doing it right.
Turns out, the method wasn’t right for my hair type.
I changed my approach, and my hair has never looked better.
I’m going to write a whole post about harmful ingredients, so watch this space. But for now, here’s what actually helped my fine, curl-sensitive, easily overloaded hair feel clean and balanced again.
Note: There are some product recommendations with affiliate links below. Clicking on them does not cost you anything, it just helps me keep the site going :)


When the curly girl method does work
There is nothing wrong with the curly girl method — it helps a lot of people, especially those with:
Thick hair.
High-porosity strands.
Dense curls or coils.
Hair that can absorb a lot of moisture and product.
For those hair types, moisture-rich routines, co-washing, and styling creams can work wonders. But it’s a different story if your hair is fine, low-density, or easily weighed down.
Why it didn’t work for me
My hair is fine with a mixed curl pattern, and is easily overloaded. I was following product recommendations from people with hair that looked like mine — but they could layer mousse, gel, leave-ins, and sulfate-free shampoos without any issue. I couldn’t.
Even when I used lightweight stylers, my hair felt coated. Limp at the roots, crunchy or sticky at the ends, and it never felt like it was actually clean.
The problem with sulfate-free shampoo
Sulfate-free cleansers seem like the obvious choice for fine or fragile hair. But in reality, they’re often packed with:
Conditioning agents (like polyquats or esters)
Humectants (like glycerin or sorbitol)
Plant mucilage (like aloe or flaxseed)
These ingredients can be great, in moderation. When you’re using them to clean your hair, they tend to layer, not lift. If your hair is fine or low porosity at the roots, like mine, they don’t rinse off easily.
Instead of removing buildup, they add to it.
That’s where sulfates came in.
Not all sulfates are created equal
I now use sulfates with every wash, but I’m very careful with what I use.
Once I introduced sulfate shampoos into my routine, everything changed. My hair finally felt clean again — soft, light, and responsive to stylers. I started using it every second wash, then every wash. I haven’t looked back.
But not all sulfates are the same.
What I avoid:
Sodium Lauryl Sulfate (SLS): too harsh, can strip the scalp and cuticle.
What I use:
Sodium Laureth Sulfate (SLES): milder but effective, helps remove natural oils and buildup.
Sodium Coco-Sulfate: stronger, but necessary when I’ve oiled my hair prior to washing.
Gentler surfactants, like Cocamidopropyl Betaine.
With the right shampoo, I can use curl creams, gels, oils, and wash them out properly when I need to.
-
Ethique Solid Clarifying Shampoo Bar
Contains sodium coco-sulfate for true clarifying — removes oils, gloss bars, and buildup.
Only essential oils, no damaging fragrances.
No damaging silicones or preservatives — clean, biodegradable, and non-coating.
NOT!CE Hair Co “The Stimulator” Thickening Shampoo Bar
Uses sodium coco-sulfate for strong, rinse-clean cleansing — ideal for fine or oily hair.
Naturally scented with peppermint and rosemary oils — no synthetic fragrance.
Free from film-formers and damaging preservatives — minimal, scalp-supporting formula.
5. Neal’s Yard Remedies - Invigorating Seaweed Shampoo
Contains sodium coco-sulfate for strong cleansing — ideal for removing oils, butters, and buildup.
No synthetic parfum — scented only with essential oils like peppermint, rosemary, and lemon.
Free from damaging silicones and preservatives — lightweight formula that won’t coat fine hair.
-
Zion Health Intense Repair Hair Mask
Lightweight formula with amodimethicone, a rinse-friendly silicone that smooths without buildup.
Naturally scented with essential oils like lavender, lemon, and ylang ylang — no synthetic fragrance.
Preserved with sodium benzoate and potassium sorbate, making it gentle on sensitive scalps.
Contains a blend of safe, lightweight silicones (including cyclopentasiloxane) for softness and detangling.
Fragrance-free and dermatologist-developed — ideal for sensitive, reactive skin.
Free from harsh preservatives.
Mild By Nature, Thickening Conditioner
Formulated with amodimethicone, a smart silicone that targets damaged areas without coating healthy strands.
Lightly scented with natural essential oils, with no synthetic fragrance.
Balanced with soothing botanical extracts and free from harmful preservatives.
What about silicones?
Silicones get a bad rap for coating the hair, but not all silicones are equal. Some are stubborn and cause build-up and dryness. Others are lightweight, rinse-off, and protective — especially for fine hair that tangles easily or reacts to weather.
The important thing is to make sure you’re washing it out with Sodium Laureth Sulfate every three or four days. If you leave it longer than that, your hair will probably become dry.
If you’re using products with silicone, your hair will not absorb any other products until you wash the silicone out. If you’re using a silicone conditioner, any curl cream or leave-in you use afterwards will not be able to get into the cuticle.
I still use silicones, but I’m careful with the types of silicone I use.
What I avoid:
Behenoxy Dimethicone
Cetyl Dimethicone
Stearyl Dimethicone
Trimethylsilylamodimethicone
These are harsh silicones that don’t rinse out easily.
What I use:
Dimethicone (rinse-off products) — adds slip, reduces friction.
Amodimethicone — deposits only where hair is damaged.
PEG-modified silicones (e.g. PEG-12 Dimethicone) — water-dispersible and low buildup.
If a silicone adds slip, reduces breakage, and rinses clean — I’m not going to rule it out just because it’s synthetic. I care more about function and outcome than sticking to blanket bans.
Key takeaway: it's not about following rules
For a long time, I felt like I was breaking the curly girl rules by using sulfates.
The curly hair community can be pretty intense. I was in Facebook groups that would remove posts that mentioned a product that was not curly hair-approved. Even if it was an accident, the entire post would be deleted. It was wild. Even now, I feel like the curl police will come after me for writing this post.
But in truth, the method just didn’t work for me. And I’m sure I’m not alone.
I’ve stopped following haircare rules written for someone else’s hair. I use what works. I read ingredient labels. I avoid what harms my hair, and I keep what helps it thrive — even if the ingredients are on the curly hair blacklist.
Do what works for you
Sulphates and silicones aren’t the enemy. They’re tools. And when used selectively, they solve real problems — especially for fine, buildup-prone, curl-sensitive hair.
I still avoid:
Harsh sulphates like SLS
Film-forming silicones that don’t rinse clean
Irritating preservatives and drying alcohols
But I’m no longer avoiding ingredients just because a rulebook said so. I use what works, based on how my hair responds.
Do you use sulfates and silicones? Let me know in the comments below!
Like It? Pin It!

You Might Also Like…

Hair Porosity Test: When the ‘cup test’ doesn’t work
Tried the hair porosity cup test and got confusing results? You’re not alone. The ‘cup test’ often doesn’t work — here’s why, how you can find your hair’s true porosity, and the best products for low and high hair porosity to build a routine that works.
Hair porosity test didn’t work for you? Don’t worry, it didn’t work for me either. I tried the ‘cup test’ over and over, without success. Here’s why, and what you can do insted.
Hair porosity is important because it determines how your hair absorbs and retains moisture.
It determines:
Which products work best for you.
How well your hair responds to hydration.
How long your styles last.
How prone your hair is to frizz, breakage, or buildup.
Basically, it’s key if you want to develop a routine that actually works for your hair type — especially for curly, dry, damaged, or colour-treated hair.
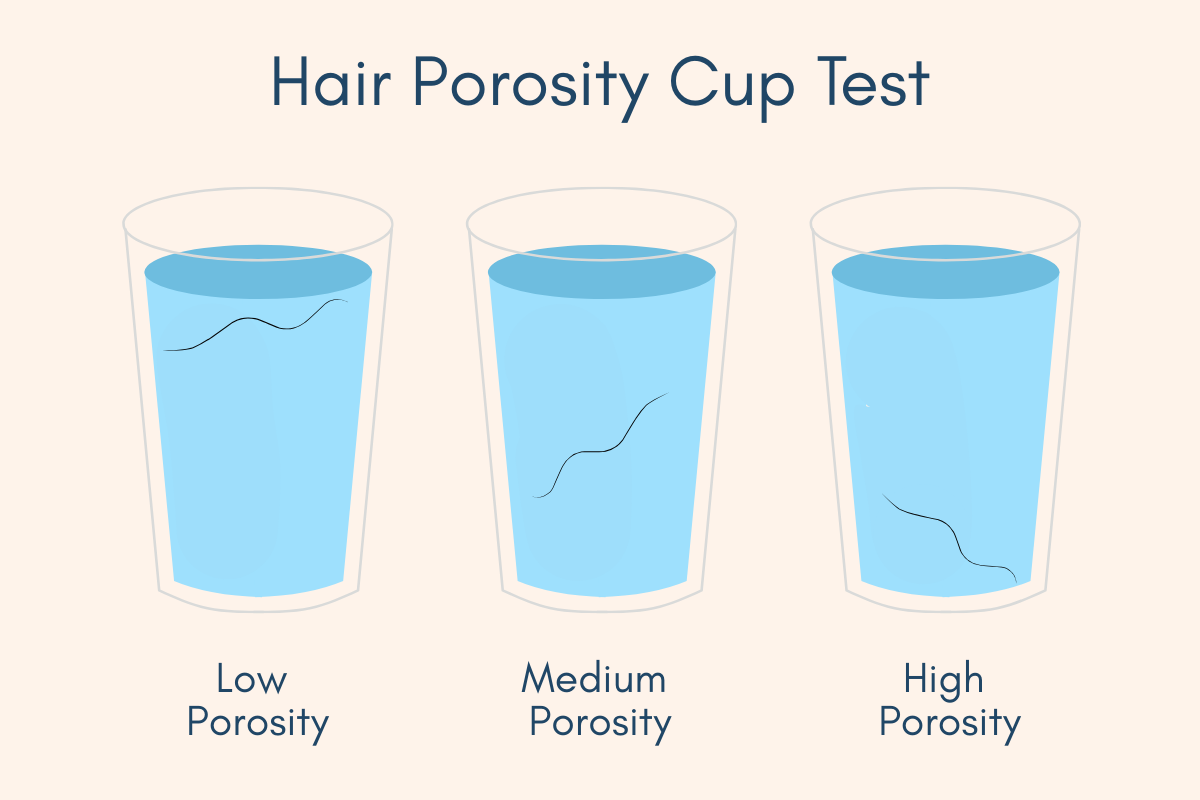
If you Google ‘hair porosity’, you’ll probably come across several videos and links to the cup test — drop a clean strand of hair into a glass of water. If it sinks, you have high porosity hair. If it floats, you have low porosity hair.
But that’s not necessarily correct. In my case, it was dead wrong.
Note: There are some product recommendations for different hair types in this post. I have not tested them all out because they won’t all work for my hair type, but I have checked the ingredients of each one to make sure they’re quality products. There are also some affiliate links below — clicking on them does not cost you anything extra, it just helps me keep the site running :)
What is hair porosity?
Porosity refers to how open or closed your hair’s cuticle layer is — that’s the outermost layer made of overlapping cells (like roof shingles).
Low porosity hair has tightly packed cuticles. Moisture takes longer to get in, but it also stays in longer.
High porosity hair has raised or damaged cuticles. It absorbs moisture quickly, but loses it just as fast.
Medium porosity falls somewhere in the middle — a balance between absorption and retention.
Hair porosity can also change. Cuticles can open with age, which means you might need to start using heavier products.
Damage from bleach and dye can also cause your hair to become high porosity — this can usually be reversed by growing the dye out and going back to natural hair, or using low-damage colour. It’s always best to ensure your hair is healthy and in good condition before you use colour.
What happened when I tried the cup test
I have fine hair that is quite dry at the ends, but hydrated closer to the root. Every time I tried the cup test, the strand floated on top of the water. Every. Single. Time. According to the cup test, that means I have low porosity hair that does not absort moisture easily.
Except I don’t have low porosity hair. It has never struggled to absorb moisture, but it does get overloaded with product easily.
I’ve tried the cup test a number of times over the years with long strands, short ones, dyed ones, even grey ones. I once washed a solo strand of hair and dried it to ensure the cuticles were not sealed when I dropped it ino the cup.
It didn’t matter what I did, the strand aways floated. The last time I tried it, I decided to break the surface tension of the water by poking the hair just under the surface. The strand became a bit waterlogged and didn’t reach the surface again. It stayed where I poked it, hovering just below the surface.
I knew the strand test was’t working for me, but I didn’t know why.

Low porosity hair - tighly packed cuticles, retains moisture.

Medium porosity hair - tends to stay hydrated with regular washing.

High porosity hair - dry appearance, needs heavy products.
The problem with the cup porosity test
It measures water density, not cuticle structure.
Whether the hair strand sinks or floats can be influenced by:
Whether the strand has product or oil residue.
The temperature and type of water.
Air bubbles clinging to the hair.
The thickness or length of the hair strand.
Clean, healthy hair can sometimes sink. Damaged hair can sometimes float. The results are too inconsistent to be useful.
In my case, my strands are too fine to do anything but float on the surface. Even if they were high porosity, my strands were never going to sink.
A better way to test hair porosity
You don’t need a glass of water to understand your hair. You just need to look at how it responds to moisture and product.
Wet feel test
After you wet your clean hair:
If water seems to sit on the surface, or beads, and takes a while to absorb, you may have low porosity hair.
If your hair drinks up water quickly but still feels dry soon after, it may be high porosity.
If it absorbs water easily but doesn’t feel overly dry or saturated, it’s probably medium porosity.
Drying time test
Pay attention to how long your hair takes to dry without any product:
Low porosity hair takes a long time to dry.
High porosity hair dries quickly, often unevenly.
Medium porosity dries relatively evenly, in a moderate amount of time.
Drying time is one of the easiest and most reliable ways to assess porosity at home.
Product absorption test
How your hair reacts to leave-ins, oils, or conditioners can also reveal clues:
Product sits on top or takes forever to absorb? Likely low porosity.
Product disappears quickly but doesn’t feel moisturised for long? Likely high porosity.
Holds styles well and reacts predictably to products? Likely medium porosity.
The stretch test
Take a wet strand and gently stretch it:
If it stretches and returns: balanced moisture and elasticity
If it stretches and breaks easily: often a sign of high porosity or damage
If it barely stretches and feels stiff: may be low porosity, protein overload, or dehydration
I worked out my hair is mostly medium porosity, but it turns into high porosity at the ends. I know that because the first 3/4 of the length reacts predictably to product and naturally remains pretty moisturised.
The ends can be wirey - they quickly absorb oils, unlike the rest of my hair, they dry much faster than the rest of my hair, and they lose moisture quickly.
-
No, it’s not a reliable method. It doesn’t reflect how your hair behaves or how your cuticle layer is structured.
-
Use real-world observations: how your hair dries, feels when wet, and absorbs product. These are much more accurate indicators of porosity.
-
Yes. Many people have mixed porosity — especially if parts of their hair are coloured, damaged, or exposed to more sun or heat than others.
What to do once you know your porosity
Once you’ve identified your hair’s porosity, you can tailor your routine to support it.
For low porosity hair
Use lightweight, water-based products.
Apply heat (like a warm towel or steamer) to help open the cuticle during deep conditioning.
Avoid heavy butters and oils that may sit on the surface.
Clarify gently every few weeks to prevent buildup.
For high porosity hair
Focus on moisture retention: rich conditioners and sealing oils.
Use protein-based treatments (in moderation) to help strengthen and fill cuticle gaps.
Try layering techniques like LOC (liquid, oil, cream) to lock in hydration.
Be gentle when detangling and avoid harsh heat or chemical treatments.
For medium porosity hair
Use a gentle shampoo and lightweight conditioner regularly.
Moisturise as needed, but avoid heavy layering unless your hair feels particularly dry.
Incorporate deep conditioning occasionally (every two to four weeks).
Use protein treatments only as needed — for example, after colouring, heat styling, or seasonal changes.
Watch for signs of buildup or imbalance, especially if your routine changes.
-
Lightweight hydration, low buildup, cuticle-friendly:
1. Flora & Curl – Organic Rose & Honey Leave-In Detangler
Lightweight, glycerin-balanced formula
Contains Aloe Vera Juice, Rose Flower Water, Camellia Oil
No heavy butters or waxes
2. Ethique – The Guardian Solid Conditioner Bar
Mild, eco-friendly conditioner bar
Behentrimonium Methosulfate + Cetearyl Alcohol base
Contains Coconut Oil and Cocoa Butter (use sparingly on fine textures)
3. Innersense – Sweet Spirit Leave-In Conditioner
Lightweight mist for moisture and slip
Aloe-based with natural essential oils
Fragrance from natural sources only
-
Balanced moisture, flexibility, and occasional strengthening:
1. Odele – Moisture Repair Conditioner
Salon-quality at drugstore price point
Contains amino acids, rice protein, jojoba oil
Free from silicones, sulfates, and synthetic fragrance
2. Innersense – Color Radiance Daily Conditioner
Perfect for medium porosity or colour-treated hair
Quinoa protein + shea + avocado oil (balanced, not heavy)
COSMOS-level clean, biodegradable
3. EVOLVh – UltraShine Moisture Conditioner
Balanced conditioner with sunflower seed oil and hydrolyzed quinoa
Helps retain hydration without weight
No harsh preservatives, no fragrance allergens
-
Deep moisture, protein support, strong sealing oils:
1. Bouclème – Intensive Moisture Treatment
Shea butter, marula oil, wheat protein
Designed for dry, porous curls
Rinses clean but leaves softness and strength
2. Innersense – Hydrating Hair Masque
Tamanu oil, flaxseed, quinoa protein
Weekly treatment for dry, processed, or porous hair
High slip, rich texture — apply with steam or warm towel
3. Alodia – Deep Conditioning Masque
Ayurvedic-inspired formula with coconut oil, avocado oil, and silk amino acids
Rich but non-waxy
Final thoughts
The float test for hair porosity is popular online, but it’s not reliable. While it seems like a quick fix, it often leads to confusion — and the wrong product choices.
Instead, observe your hair:
How long it takes to dry.
How it feels when wet.
How it reacts to products.
Those everyday cues are much more useful than watching a hair strand in a glass of water. By tuning into your hair’s real behavior, you’ll build a routine that actually works.
Did the cup test work for you, or do you have a different method? Let me know in the comments below!
Like it? Pin it!

You Might Also Like…

Wonderskin lip stain review
I’ve been wearing lipstick on special occasions for most of my adult life, but I’ve been avoiding it recently because it doesn’t last long enough. And then I tried the viral Wonderskin lip stain peel—the lip colour that goes on blue and somehow turns pink. Here’s what happened.
I’ve been wearing lipstick on special occasions for most of my adult life, but I’ve been avoiding it recently because it doesn’t last long enough. I tried Wonderskin lip stain peel, and I’m never going back.
Lipstick has come a long way in the last decade or so. We’ve gone from metal sticks of paint your grandmother probably had, to ‘kiss-proof’ gloss-style applicators that promise to last all night.
The ones that aren’t promoted as long-lasting smudge easily and require constant reapplication. Eating or drinking becomes a gamble—you’re left wondering what your mouth looks like afterward. I honestly don’t know why these formulas still exist. The ones that do last end up drying your lips out so badly that the colour is seriously patchy by the end of the night anyway.
The struggle is real.
I stopped using lipsticks altogether about a year ago, opting to reapply coloured gloss every so often instead because—while inconsistent and inconvenient—I knew it wouldn’t smudge, and it wouldn’t look terrible as the night went on.
Then I found Wonderskin—a lip stain that is blue on application, and somehow washes off to reveal a really beautiful shade of pink. It’s also cruelty-free. Here’s what happened.

Wonderskin Wonder Blading Lip Stain: A Review
As with almost every other viral product reviewed on this site, I came across Wonderskin on social media. The lip stain was viral. There were videos of women applying a metallic blue gel on their lips, and then peeling or washing it off to reveal blush hues underneath.
I looked further into it and a number of people said the colour lasts about two days, and it comes in about 25 colours— reds, browns, pinks, and neutral shades.
I had to give it a shot.
What happened
I was very tempted to go with a deep red to see if it really could replace my special occasion lipsticks, but I decided to go with a pink option so I wouldn’t have to wait for an event to try it out. Since I didn’t want to show up to work with bold red lips, I opted for a pink shade.
I bought the shade ‘whimsical’. It arrived the following afternoon and I tried it out immediately.
The packaging looks like a mascara tube, but with a gloss-style applicator. As advertised, the product itself is a deep shade of metallic blue.
I carefully coated my lips, trying to outline the shape properly with the lip gloss applicator. The product isn’t very thick and I found it difficult to get even coverage.
It was a bit like trying to paint with a dry brush—the colour went on unevenly, thin in some spots and heavy around the edges.
Nevertheless, I did what I could and left it to dry for 30-60 seconds. It dried very quickly. My lips felt a bit tight as it dried, almost prickly. Not in a really uncomfortable way, but I definitely noticed it and was keen to get it off.
Once it was dry to the touch, I used a damp tissue to gently rub off the blue layer. It came off pretty easily, but I did have to look in the mirror and scrub some areas a bit harder to ensure there was no blue left at all. The process took less than a minute.
The Result
The blue came off to reveal a deep shade of pink, just like the picture.
My lips still felt a bit dry and prickly, so I applied a thick layer of clear gloss and it looked great. Even on close inspection, I couldn’t see the uneven coverage I’d noticed during application—the colour looked smooth and consistent.
The first application was in the evening, so I had food and water and had another look at the coverage before going to bed. All looked good to me.
The next morning, I went to the gym, applied makeup and clear gloss. The colour had faded by this stage, but I didn’t mind too much.
It wasn’t until I was at work, under harsh fluorescent lights in the bathroom, that I really noticed where the product had reduced. This would have been around 10am, about 18 hours after application.
By that stage, the product was pretty thin around the inside edges of my lip, but it was still quite pigmented around the outside. There were also a few patchy spots near the edges where the colour had flaked off—like small gaps in the colour. I put this down to the original coverage issues.
The colour was basically all gone by the following morning.
I tried Wonderskin again a few days later and had the same result—great results on day one, visibly fading by day two.
Pros
The application process is fast, the product dries in about 30 seconds, and the blue washes off easily to reveal a deep and long-lasting colour underneath.
It works well under gloss, and you don’t have to worry about the stain smudging or having to reapply throughout the day. It could feasibly replace your regular lipstick.
The blue-to-pink application process is fun, different, and kind of theatrical.
Cons
It’s difficult to get even coverage because the product is relatively thin. This doesn’t really matter on initial application, but it does become noticeable if you want the colour to last longer than a day. You could add a second coat, but be prepared for a very dark result.
The thinner consistency also makes Wonderskin feel cheap, and it’s not a cheap product. Prices vary depending on the colour, and can range from $22 to $45 in the US. In Australia, prices for the same products range from $52 to $61. That’s a lot for the average person, for a tube of lip colour.
Verdict
A lip stain that lasts more than a day is impressive. The fact that some people say it can last up to two days is an added bonus.
I have continued to use Wonderskin in place of lipstick, applying it on the day of the event rather than the day before, and it works really well. I don’t have to worry about it smudging or the need to reapply. When I leave the house, I only have to bring a tube of gloss.
If it’s an event where there’s alcohol involved and I’m consuming more liquid than normal, the lip stain does fade faster—but that’s expected. It still lasts significantly longer than anything else I’ve used.
I’m still really impressed with the colour and looking forward to trying the red version.
Is Wonderskin’s lip peel off stain safe for sensitive skin?
While I mentioned that the product felt slightly dry and prickly on my lips, I looked into the ingredients—overall, it does appear to be safe for sensitive skin.
Alcohol-Free: The product is alcohol-free, which helps prevent the drying effects commonly associated with alcohol-based lip products.
Hydrating Ingredients: It contains hydrating components like glycerin and squalane, which are known to maintain moisture and support skin barrier health.
Free from Common Irritants: The formula is free from fragrances, essential oils, parabens, sulfates, and silicones, reducing the risk of irritation for sensitive skin.
Allergen Considerations: The product is 91 per cent top allergen-free and does not contain gluten, coconut, nickel, lanolin, or talc, making it suitable for individuals with specific sensitivities.
Is there another lip stain you like? Let me know in the comments below!
Like it? Pin it!

You Might Also Like…

How to use Ayurvedic hair tea: DIY hair growth serum recipe
Ayurvedic hair tea is a herbal rinse made with spices and herbs used in traditional Indian medicine. It reduces breakage, shedding, and scalp irritation—like a natural DIY hair growth serum for stronger, healthier hair. The best part? You’re going to make it yourself, and I’m gong to show you how.
Ayurvedic hair tea is a herbal rinse made with spices and herbs used in traditional Indian medicine. It reduces breakage, shedding, and scalp irritation—like a natural DIY hair growth serum for stronger, healthier hair.
If you’ve been around a while, you’ll know I’ve experimented with Lush henna, Rainbow henna, and natural hair dyes—they’re mainstream Ayurvedic remedies that allow you to dye your hair with no damage. I started incorporating range of Ayurvedic herbs for hair growth into my regular routines.
The result? It makes a huge difference to the overall quality and density of my hair.
Unlike synthetic hair treatments made in a lab, Ayurvedic treatments are a gentler, long-term approach to scalp health and stronger, denser hair.
The best part? You know exactly what goes into every batch because you’re making it yourself. And I’m going to show you how.
Before we crack on with the recipe, it’s important to understand this isn’t a quick fix—your hair troubles won’t vanish overnight. You’ll need time, patience, and consistency. But it’s worth it.
If you stick with it, you will see results.
Real talk: I’ve really struggled to stick with long-term routines. The way I see it, time is going to pass anyway—you may as well spend it doing something your future self will thank you for. It’s better than getting to the end of the year wondering what your hair could’ve looked like if you’d started earlier.
There are loads of ways to use Ayurvedic hair tea—it’ll eventually form the base for masks, shampoos, conditioners, oils, tonics, and more. Sign up to my newsletter for more info.
🌿 Ayurvedic Herbs For Hair Growth
The recipe is a fusion of Ayurvedic and western ingredients that work together to promote scalp health and hair growth.
-
A cornerstone of Ayurvedic hair care, amla is incredibly rich in vitamin C and antioxidants. It has traditionally been used to strengthen hair roots, support scalp health, and prevent premature greying. Amla enhances circulation to the scalp, stimulates growth, and adds a natural shine and softness to the hair.
-
Fenugreek seeds are loaded with protein, iron, and nicotinic acid, all essential nutrients for healthy hair. The seeds swell in water, releasing mucilage, which makes them an excellent conditioner. In Ayurveda, fenugreek is used to reduce hair fall, improve texture, and treat dandruff. It is especially helpful for dry, frizzy hair.
-
Though not a traditional Ayurvedic herb, lecithin can be found in modern Ayurvedic-inspired hair treatments. It's a natural emollient rich in fatty acids that nourishes and coats the hair, helping to retain moisture and improve softness. It's also used as an emulsifier in homemade oil and water blends.
-
Licorice root is a cooling and anti-inflammatory herb used in Ayurveda to calm the scalp and reduce itchiness or inflammation. It creates a healthy scalp environment, which supports better hair growth. It can also help soothe conditions like eczema or psoriasis of the scalp.
-
Known for both its flowers and leaves, hibiscus is used in Ayurvedic formulations to thicken hair, reduce shedding, and balance the scalp. Its naturally slippery texture adds hydration and makes detangling easier. It also helps maintain the hair's natural pigment, potentially delaying the onset of greys.
-
Cloves are antimicrobial and warming. In Ayurveda, they are sometimes used in hair oils to boost blood circulation to the scalp, potentially stimulating dormant follicles. They can also help purify the scalp and reduce dandruff.
🌼 Western Herbs
-
A powerful detoxifier, burdock root is traditionally used in Western herbalism to support liver and skin health. On the scalp, it's believed to reduce scalp buildup, treat itchiness, and support circulation. It also contains phytosterols and essential fatty acids that may nourish the hair follicle.
-
Horsetail contains silica, a mineral essential for strong, healthy hair. It's believed to improve hair strength, reduce breakage, and support faster growth. Used in both internal supplements and external rinses, horsetail also contains antioxidants that protect the hair follicle from damage.
-
Nettle is rich in iron, silica, and sulfur. It is thought to block DHT, a hormone associated with hair thinning. Nettle can be used in tea rinses or hair masks to stimulate growth, strengthen strands, and reduce excess oil production on the scalp.
-
Gentle and soothing, chamomile is used to reduce inflammation of the scalp, calm irritation, and condition the hair. It is particularly good for those with lighter hair tones for its brightening properties. It also provides mild conditioning and enhances shine.
-
These parts of the dandelion plant are nutrient-dense, containing vitamins A, C, and E, as well as iron and magnesium. Dandelion root helps detox the body and may support hormone balance, indirectly benefiting hair health. The leaves are often used in infusions to soothe and nourish the scalp.
-
Rosemary has strong circulation-boosting properties. It's one of the most studied herbs for hair growth and is sometimes compared to minoxidil for its ability to stimulate follicles over time. It's also antifungal and antibacterial, making it great for a flaky or inflamed scalp.
-
Incredibly mucilaginous, marshmallow root provides intense slip, making it ideal for detangling curly or textured hair. It softens the hair, soothes dry or itchy scalps, and hydrates parched strands. It's often used in herbal hair teas or infusions.
-
A non-herbal supplement, MSM (methylsulfonylmethane) is a sulfur compound found in some plants. It supports collagen and keratin production, potentially lengthening the hair's anagen (growth) phase. Often taken internally, it can also be added to topical treatments for strengthening purposes.
-
Cooling and invigorating, peppermint improves blood flow to the scalp and creates a tingling sensation that many associate with follicle stimulation. It's used to relieve scalp itchiness, improve hair density, and refresh the scalp.
-
Honey is a humectant, meaning it draws moisture from the air into the hair. Honey adds shine and softness while also having mild antimicrobial benefits. It forms the base of many DIY conditioners and hair masks.
Ayurvedic Hair Tea: Recipe
To make the hair tea, you’ll need:
Glass jar with a lid, 700ml to 1L capacity. If your jar is too large, your tea will be weaker;
Boiling water;
Dessert spoon or silicone spatula;
Large jug or bowl. I prefer a jug so I can tip the tea into another container without spillage;
Optional: Spray bottle (not fine mist).

All my Ayurveda herbs. Not a great picture, but you get the idea. I keep them in their original packets and store them in a cool, dark place to preserve potency.
Method
Boil some water using the kettle.
2. In a glass jar, add one tablespoon of all ingredients.
3. Fill the jar to the top with boiling water, stir to ensure all ingredients are saturated, and put the lid on tight. By this point it will look brown and unappetising, and it will smell quite strong. Trust the process.
4. Leave to infuse for at least eight hours, or overnight. Optionally, gently tip the jar every few hours to ensure the herbs are infusing.
5a. If using a sieve: Put a fine mesh sieve over a bowl or jug and tip the tea into the sieve, capturing the liquid in the bowl or jug. Using the back of a spoon or a silicone spatula, press the herbs down into the sieve to squeeze any excess tea into the bowl.
5b. If using cheesecloth: Cut a large square of cheesecloth and fold it in half to double the thickness. The square needs to be big enough so that it covers the inside of a bowl or jug. The aim is to strain as much of the herbs out of the tea as possible, so it’s important the tea can’t spill over the edges of the cloth and into the bowl.
Pour the tea into the cheesecloth slowly to avoid overflow. If it starts to spill, stop and wait for it to drain. If it’s too full to drain, grab each corner of the cloth using both hands and lift it slightly out of the bowl to allow the tea to drain. Get another bowl and repeat the process with the remaining tea. Once strained, grab all four corners of the cloth and squeeze the herbs into a ball to release excess tea into the bowl.
6. Pour the strained tea back into your glass jar, close the lid and refrigerate.
7. After an hour or two, you’ll see layer of powder settled at the bottom of the jar. Very carefully take the jar out of the fridge and pour the top layer of tea into a jug or bowl, making sure you stop before the powder layer. We don’t want the excess powder in our final product.

Hair tea, before the powders settle at the bottom of the jar.

Hair tea, just before straining. The clear liquid in the middle is what you want to keep.
8. Optional: If you want to make sure you get every scrap of tea, you can get a coffee plunger and press the remaining powder down into the jar to release the remaining liquid.
9. Rinse the leftover powder from the jar and pour your strained tea into a spray bottle or return it to the jar and seal it.
10. Optional: Scoop the leftover herbs into a ziplock bag and freeze for later use. I recommend pushing the air out and flattening the herbs in the bag so you can pull smaller pieces out easily, once frozen.
Recipe Notes
You don’t have to strain the tea as vigorously as described above, but I find it makes for a much cleaner application experience. For example, you can’t put chunky or heavily powdered tea into a spray bottle because it’ll clog the nozzle and you’ll never be able to use the bottle again. Trust me, I’ve tried.
Well-strained tea also means you don’t have to deal with excess powder on your scalp and in your hair. If you have very thick, curly, or dense hair, you might struggle to get the powder out.
If using a spray bottle, make sure it’s not fine mist—even if you strain all the powder out of the tea, you still might destroy the bottle.
One batch will last about two weeks if refrigerated when not in use. Alternately, you can pour the excess into soap molds, freeze them and defrost before use.
The smell of the hot tea is quite strong, but it decreases in intensity once properly strained. If you want, you can try adding a few drops of essential oil. I’d go with something earthy like rosemary, peppermint, or sandalwood. Anything too floral might not mix well.
To learn how to preserve your tea for up to a year, sign up to my newsletter and keep an eye out for updates.
How To Use Ayurvedic Hair Tea
There are so many ways you can incorporate hair tea into your routine. I use the raw tea on its own, without masks or oils, about once a week.
Overnight pre-poo treatment
I like to use hair tea as an overnight pre-poo treatment before wash day.
Before bed, use a root comb applicator bottle, a spray bottle, pipette (I use glass pipettes from empty skin serum bottles), or your hands, apply a thin layer of tea to your scalp. Make sure tea covers your entire scalp, without saturating it—you don’t want to go to sleep with a really wet head.
Dampen the rest of your hair, raking the tea through to ensure all strands are covered. Again, we don’t want your hair to be wet—just damp. From there, you can tie it up with a loose scrunchie, use a claw clip, silk bonnet, or microfibre towel.
I like to pin it in a top knot and plop with a microfibre towel. I then put another towel over my pillow to ensure the tea doesn’t soak through the towel on my head and into the bed—this is only for precaution, it has never soaked through the towel because I don’t saturate my hair.
In the morning, I rinse the tea out thoroughly, wash and condition as normal.
With other products
Another way to use the hair tea is by mixing it with your existing products to give them a nutrient boost. I would opt for leave-in treatments or hair masks to optimise the time the tea has to work its magic. You can absolutely mix it in with shampoo, but keep in mind shampoo is washed out almost immediately and reduces the amount of time the tea has to work.
A way to ensure the tea spends the maximum time on your head is to incorporate it in with your regular hair or scalp oil. You can also mix a bit in with a deep conditioner— leave it in for 10-20 mins before rinsing it out.
Refresh
Some people use hair tea when refreshing their hair, in place of water. The tea does not behave or feel like conditioner—there is no slip, and your hair won’t feel silky or smooth on application. It can actually make your hair feel a little crunchy.
My hair hates being refreshed in general—I have a lot of hair but it’s quite fine with medium porosity, so it doesn’t absorb products super well. But if you have thicker or higher porosity hair that likes to be refreshed, this might be a good option for you.
Ayurverdic Hair Tea Benefits
After the first few applications, I noticed:
My scalp felt noticeably calmer. My skin is prone to dryness and I have a few patches of mild psoriasis on my scalp. After use, my skin felt noticeably less irritated.
Less tanlges: My hair is sometimes notoriously difficult to detangle. Using Ayurvedic remedies has reduced the knots by about 90 per cent.
Less shedding. Not zero, but I noticed significantly less hair in my brush after the first two hair tea applications.
My roots felt a little fuller. I didn’t have loads of new hair overnight, but something about the overall texture felt denser.
No stickiness or buildup. It washed out well and didn’t interfere with styling.
Have you tried Ayurvedic hair tea? Let me know in the comments below!
Like it? Pin it!

You Might Also Like…

I tried three types of magnesium to stop sleep anxiety. Here’s what worked, and what didn’t
Magnesium has become a popular over-the-counter sleep aid, with research suggesting it calms the nervous system and helps with sleep regulation. But does it actually send you to sleep and help sleep and sleep anxiety? I tried three and found the best one.
Magnesium has become a popular over-the-counter sleep aid, with research suggesting it calms the nervous system and helps with sleep regulation. But does it actually send you to sleep and stop sleep anxiety?
I have struggled with sleep anxiety for years, which means I get very worried that I won’t be able to either fall asleep or stay asleep. Once I wake at night, it’s very difficult for me to get back to sleep—it can take about four hours for me to feel tired again, which ends up being half the night. My anxious brain fears this happening, to the point where I can’t sleep. It’s a horrible cycle.
Lack of sleep has a range of long-term health implications if not dealt with, but it also has a huge impact on your hair, skin, eyes — you name it. Your skin can’t glow and your hair can’t grow long and strong. For me, the skin under my eyes went dark, fine lines were more pronounced, and my overall energy was lacking and I couldn’t concentrate. Not only did I feel tired, I looked and sounded tired. And I was sick of it.
After years of taking melatonin supplements (more about that at the end of this post), my partner got a tub of magnesium and suggested I drink it before bed. Here’s what happened.
How magnesium impacts sleep
Higher levels of magnesium in the body can deliver longer sleep times and less tiredness during the day. Studies have also found that magnesium supplementation helped with falling asleep faster and protected against waking up earlier than intended. You can read more about that here.
But not all magnesium supplements are made equal.
Magnesium citrate is a magnesium salt of citric acid. It is largely used as a dietary supplement to provide magnesium, an essential mineral that plays a crucial role in many bodily functions. It can also support muscle function, nerve function, and overall energy production.
Glycinate is an amino acid. It has high bioavailability when combined with magnesium, meaning that the body can absorb and utilise it effectively. It also enhances the absorption of magnesium.
The supplements I tried were in powder form, they were flavoured without sugar, and came with scoop measurements. One scoop was dissolved into a glass of water and consumed before bed.
The brands and varieties listed below are Australian, but I have included links to brands iin tother countries hat effectively do the same thing.

Magnesium Citrate
The first supplement I took was Swisse High Strength Magnesium Powder, which is a magnesium citrate for muscle function, relieving muscle cramps and supporting energy production.
It helps with sleep indirectly because it raises your general magnesium levels—it’s not specially formulated to help you sleep better. In other words, it won’t send you to sleep, but it will promote muscle relaxation to help you have a deeper sleep when you go to bed.
This one did contain glycinate, but not a lot—it was mostly citrate. The total magnesium content per scoop is 300mg. I took it just before bed, but I didn’t expect much of a difference.
At the time, I was having trouble staying asleep.
I was waking up a lot at about 2.30 am and struggling to go back to sleep. It was awful. My sleep quality was better from the first night I took the supplement. I didn’t notice a massive difference, but I did feel more relaxed and less irritable.
On the nights I took it, it wasn’t as hard for me to get to sleep and stay asleep.

Magnesium Glycinate
We ran out of the citrate version and bought the glycinate version instead.
First, we had the Ethical Nutrients Mega Magnesium Night Powder. This was mango passionfruit flavoured and it worked much like the citrate version, though maybe slightly better. If there was a difference, it was small.
We then tried the Bioglan Active Magnesium PM Deep Sleep Powder. Not because we had read about it or anything, but because it was on the shelf in the store. It came in powder form and was citrus-flavoured.
I dissolved one scoop into a glass of water, drank it and went to bed. I had assumed I would have the same reaction to that one as I did with the citrate version—going to sleep would be slightly easier, but I didn’t think too much about it.
I think it changed my life.
The first night, I was tired within about 20 minutes and fell asleep with ease. I woke up to my alarm and felt as though I had been very deeply asleep. I wondered if it was a once-off, but it wasn’t. Every night I took it, I woke up in the morning feeling as though I had been deeply asleep.
It also made me tired, which meant getting to sleep was significantly easier. My sleep anxiety was almost non-existent on the nights when I took it. It felt as though I’d taken melatonin, but without the side effects.

Not all supplements are made equal…
It made sense that the citrate didn’t have a huge impact on sleep because it’s not specifically designed to help you sleep. What I couldn’t work out was why my reaction to the two products with glycinate was so different, until I looked at the dosage for each product.
The magnesium citrate dosage per scoop was 300mg. The Ethical Nutrients magnesium glycinate dosage per scoop was also 300mg. The Bioglan magnesium glycinate dosage per scoop was 350mg. An extra 50mg of glycinate seems to make a massive difference.
| Swisse High Strength | Bioglan Active PM | Ethical Nutrients Mega | |
|---|---|---|---|
| Main Benefit | Muscle function, energy, tiredness relief | Deep sleep, reduces time to fall asleep | Calm mind, relax muscles, support healthy sleep |
| Specific Sleep Support | Indirect (due to magnesium) | Yes (with California Poppy & Hops) | Yes (with Passionflower & Glycine) |
| Magnesium Form(s) | Magnesium Citrate, Magnesium Glycinate (300mg total Mg) | Magnesium Glycinate (350mg total Mg) | Magnesium Glycinate (300mg total Mg) |
| Additional Ingredients | Vitamin C, Zinc, Calcium | California Poppy, Hops | Passionflower, Glycine |
| Flavor | Orange | Citrus | Mango Passion |
| Sweeteners | Monk fruit, Stevia | Sucralose | Stevia |
| Recommended Timing | Any time of day | Evening, 1 hour before bed | Once daily before bed time |
Melatonin supplements
I discovered melatonin in 2017, and it was a game-changer. I couldn’t believe it took me until 2017 to find it, and that more people didn’t use it. Even if I was wide awake at 10 pm, when I wanted to be asleep, melatonin would fix that problem right up, and I’d be asleep within about 30 minutes of taking it. I thought it was magic, until I learned it wasn’t.
Melatonin is a hormone that your body naturally produces to regulate your sleep-wake cycle, or your circadian rhythm. This means melatonin in pill form is basically a hormone. There is limited research into long-term use of melatonin, but there are suggestions that it can impact your hormones overall, it can also have a negative effect on your circadian rhythms. You can also develop a tolerance to it, which means it eventually might not work for you at all.
That is what happened to me. I used to take 2.5mg, but eventually that didn’t do anything. I started taking 5gm and that was better but eventually faded. I took 7.5gm twice and decided I’d had enough. Taking that much hormone isn’t good for you.
Verdict
There’s no competition, magnesium glycinate is the best supplement for sleep. I slept deeply, I wasn’t groggy in the morning, it’s not a hormonal supplement, and there are no side effects.
Is there another method that works for you? Let me know in the comments below!
Like it? Pin it!

You might also like…

What happened when I tried Wrinkles Schminkles: A review
Wrinkles Schminkles is a line of anti-wrinkle silicone patches that claim to hydrate skin and reduce the appearance of fine lines and wrinkles by creating a microclimate between your skin and the silicone. I decided to give them a go. Here’s what happened.
Wrinkles Schminkles is a line of anti-wrinkle silicone patches that claim to hydrate skin and reduce the appearance of fine lines and wrinkles. But do they work?
Wrinkles Schminkles silicone patches claim to create a microclimate between your skin and the silicone, which apparently helps hydrate the skin from within and smooths out wrinkles while you sleep. The products are promoted as a chemical-free approach to fighting wrinkles, and they’re cruelty-free.
I was largely interested in these because I’m not loving my under-eye area at the moment. The skin is relatively smooth when I have a straight face, but wrinkles a fair bit when I smile. I don’t think that problem can be solved with any single product, it probably requires a laser at a specialist clinic, but a little reduction in the area was all I was looking for.
I kept reading that silicone patches for wrinkles work, so I decided to give it a shot.
For my under-eye situation, I decided to go with the self-dissolving microneedle patches, which are shaped to go under the eyes. They’re supposed to reduce wrinkles by delivering collagen, hyaluronic acid, peptides, and caffeine directly into the skin through 1800 microneedles per patch (for anyone afraid of needles, these are really tiny spikes, rather than actual needles, and they don’t hurt). I have had microneedling and it was great, what could go wrong with a DIY job?

Wrinkles Schminkles Review
I started with a box of four, which had a combined total of eight self-dissolving microneedle patches. They’re about the size of your thumb and can go under the eyes, around the mouth for smile lines, frown lines between the eyebrows, etc. They can really go anywhere with smaller lines. I wouldn’t use them for larger forehead lines, they’re not big enough. For that, you might want to look at the OG Wrinkles Schminkles silicone patches. They’re much bigger with no microneedles, and are supposed to smooth the skin out as you sleep.
What Happened
According to the instructions, you’re supposed to cleanse your face to the point where there’s no product on your face at all. Get every scrap of makeup, sunscreen and serum off. You want as much contact between the microneedles and your skin as possible, and this means no hyaluronic acid or moisturiser of any kind.
So that’s what I did. My face felt uncomfortably dry, but I knew it was temporary so I ignored it. I peeled one of the patches from its plastic sheet and tried not to touch the sticky outer edges too much. The microneedles are in the middle of the patch, so it’s important to align the frown line with the centre of the patch properly.
I tried to get the patch as close to my lower lash line as possible, because that’s really where the problematic lines are. To make sure I was sticking it on an even surface, I pulled skin down a bit so it was taut, and pressed the patch down while trying to avoid my eyelashes.
It was at that point that I learned you can go too close to the lash line. It felt tight and uncomfortable under my eye, and I’m pretty sure I did get a lash or two. I could feel the plastic tightening when I blinked. Begrudgingly, I lifted the patch off and stuck it down again slightly lower. This felt much better and I did the other eye without a problem.
As per the instructions, I pressed the microneedles on both patches into my skin for about ten seconds. There was no pain at all, it just felt a bit scratchy—kind of like sandpaper. Once that was done, I moisturised the rest of my face as normal and went to bed.
Result
I was excited to remove the patches the following morning. I pressed down on the patches to see if I could feel any residual prickliness, but I couldn’t which meant the microneedles really did dissolve. The adhesive was quite strong, and they were a bit uncomfortable to remove, but not painful. I could see marks under my eyes from where the patches had been. I couldn’t see pricks from microneedles or anything, just oval outlines where the adhesive was. I hoped they would go down relatively quickly. I ran my finger along where the microneedles had been and it was smooth, which means they definitely dissolved throughout the night.
I didn’t notice an immediate difference in the plumpness of my under-eye area.
I went to the gym, returned, rinsed my face, did my usual serum and moisturising, and did my makeup as usual—a light layer of foundation with a sponge and a thin coat of translucent powder to set it in place.
I smiled in the mirror, the lines were definitely still there and I couldn’t see any improvement. I wondered if it needed some time to improve, so I went about my day.
I got home in the evening, washed everything off my face and tried again. No reduction in lines. The same thing happened the following day.
Verdict
I have used up the box of four sets, if only because I already had them and figured I might as well use them. I had the same result every time, which was no result. At no point did I notice even a small difference.
It’s possible that the lines under my eyes were a bit much for the small patches, but there was nothing in the instructions to suggest that would be the case. The lines are also not really visible when I’m not smiling, so they’re not really deep. It could be a structural problem for me, meaning the area under my eyes could be too hollow and the skin therefore is pushed up when I smile, creating wrinkles. I honestly don’t know, but I guess that’s a possibility.
I’ve read a number of mixed reviews—some people swear by them, others say they made no difference. For those who had good experiences, they also mostly said the wrinkles come back after a few days.
For optimal results, the brand recommends using them twice a week. I paid AU$75 for four sets, which is about two weeks’ worth. US customers get four sets for $41, which is still a lot for a product that may not work for you. Using these twice a week is not sustainable for the average person. I wouldn’t get these again, I might try the reusable silicone patches next time.
Did Wrinkles Schminkles work for you? Let me know in the comments below!
Like it? Pin It!

You Might Also Like…

K18 vs Olaplex Review: Which bond builder is better?
K18 and Olaplex are powerful hair bond builders widely touted as the most effective on the market. Both promise to repair damaged hair, but they work with different active and in very different ways. So which one is better value? Here’s a detailed comparrison.
K18 and Olaplex are powerful hair bond builders widely touted as the most effective on the market. Both promise to repair damaged hair, but they work with different active and in very different ways. So which one is better value?
I’ve put both to the test, you can read the Olaplex review here and the K18 review here, but this is more of a side-by-side analysis so you can work out which one might be better for you.
What do bond builders actually do?
Olaplex No. 3 Hair Perfector is part of the larger Olaplex hair treatment range and works to temporarily repair disulphide bonds in the hair. These are the bonds that break when you bleach, dye, or heat-style your hair to death. Olaplex’s ingredient, Bis-Aminopropyl Diglycol Dimaleate, works on a molecular level to restore strength and structure.
K18 Leave-In Molecular Repair Hair Mask claims to go deeper than surface-level fixes. It uses a bioactive peptide, the K18Peptide, designed to reconnect broken keratin chains—essentially repairing hair from the inside out. It's marketed as a lasting, progressive treatment that apparently reverses damage in just four minutes.
Does K18 fix split ends?
The only thing that repairs split ends is scissors. Repairing a split end is a bit like tearing a blade of grass through the middle and trying to put it back together. It won’t work. However, you can nourish your hair properly to prevent split ends. This is where bond builders come in.
K18 helps strengthen and smooth hair, which can reduce the appearance of split ends—but it won’t glue them back together. For true split-end removal, a trim is still your best bet. That said, K18 can help prevent future splitting by making the hair stronger and less prone to breakage.
Does Olaplex fix split ends?
Similar story. Olaplex No. 3 Hair Perfector doesn’t fix split ends, but it helps improve the overall integrity of the hair. The bond-building action may reduce how often split ends occur, especially with regular use.
Does K18 help hair grow?
K18 doesn’t stimulate hair growth directly. What it does do is strengthen hair so it breaks less, meaning you keep more of the length you already have. If your ends tend to snap off, K18 might help you hold on to inches longer.
Does Olaplex help hair grow?
Same deal. Olaplex hair treatment isn’t a growth serum, but it can support length retention by reducing damage and breakage. Healthier hair equals less trimming and more visible growth over time.
Is K18 a protein treatment?
Not in the traditional sense. While K18 works similarly to protein treatments by reinforcing the hair structure, it doesn’t contain actual protein. Instead, it uses a patented peptide to mimic and repair keratin chains from within. It’s designed to avoid the stiffness that can come from traditional protein overload.
Is Olaplex a protein treatment?
Nope. Olaplex 3 Hair Perfector is not a protein treatment either. It works on broken disulphide bonds—different from keratin or protein bonds—so you can use it even if your hair is sensitive to protein-heavy formulas.
How to use K18 and Olaplex
Olaplex No. 3 Hair Perfector: Apply to damp, towel-dried hair before shampooing and conditioning. Leave it on for 10 minutes or longer, rinse, then follow with your regular wash routine. It’s CG-friendly and safe for all hair types.
K18: Shampoo, do not condition, towel-dry until damp, then apply 1–3 pumps of the mask from roots to ends. Wait four minutes, then style as usual. Do not not rinse. In all honesty, this was problematic for me.
Which one lasts longer?
Olaplex isn’t permanent, but the effects stick around longer than one wash. With consistent use, it builds on itself and really helps improve the health of your hair over time.
K18 markets itself as a long-term fix that fixes your hair from the inside out, particularly with regular use.
Price breakdown
Olaplex No. 3 (100ml): Around $30–$40.
K18 Leave-In Mask (50ml): Roughly $75, with a 5ml trial size around $16.
When I tested them both out, I needed to use more Olaplex to properly detangle my hair and get a brush through it, but not a huge amount. With the comparatively lower cost, that’s justified.
You’re not supposed to use a huge amount of K18, but I found it incredibly difficult to use on hair that was not conditioned. To try and get a brush through it, I needed to use more product. For the price, I didn’t think the amount I had to use was justified.
K18 v Olaplex: A Comparison
| Feature | Olaplex No. 3 | K18 Leave-In Mask |
|---|---|---|
| Best for | Bleached, dyed, heat-damaged hair | Bleached, chemically treated, or heat damaged hair |
| Application | Rinse-out treatment | Leave-in treatment |
| Slippage | High slip, detangles easily | No slippage |
| Key Ingredient | Bis-Aminopropyl Diglycol Dimaleate | K18Peptide (bioactive peptide) |
| How long does it take to work? | 3-10 minutes, rinse out | 4 minutes, leave in |
| Where is it made? | USA | USA |
| Split ends? | Helps prevent, doesn't fix | Helps prevent, doesn't fix |
| Hair growth? | Helps retain length | Helps retain length |
| Protein treatment? | No | Not technically, but similar effect |
| Price | $30–$40 | $75-$120 |
| Bottle Size | 100ml | 50ml-100ml |
My experience
Olaplex No. 3: This one made my hair feel smoother, shinier, and way easier to detangle after the first try. It didn’t magically heal my hair overnight, but after a few weeks of using it every other wash, I noticed less breakage and frizz. My hair held moisture longer and didn’t feel like straw by day four. There was also significantly less hair in the brush.
K18: This did not start off well. The first time I tried it, I followed the instructions exactly—no conditioner, damp hair, four-minute wait. My curls were flat, dry, and felt like hay. Detangling was awful. Three days later, I had to wash again because my hair was so matted.
I gave it another go a few months later—this time after conditioner, applied to soaking wet hair. And honestly, that worked better. My hair felt good that day. But the more I used K18, the more I noticed my hair getting dry and brittle again. You can read more about that in my K18 review.
Verdict
If I had to pick between K18 and Olaplex, Olaplex easily wins. It’s more affordable, the bottle is larger, it detangles your hair, and works with your regular hair care routine. It actually made my hair feel healthier. K18 might work wonders for some, especially those with extreme chemical damage, but for me it wasn’t worth the hassle or the price.
But everyone’s hair is different. Some people swear by K18. If you’re curious, I’d say start with the sample size.
Have you tried a different bond builder? Let me know in the comments below!
Like it? Pin it!
You Might Also Like…

K18 hair mask review: Does it actually work?
K18 leave-in molecular repair mask has been touted as the holy grail of bond builders, repairing your hair from the inside out. But does it work? Here’s my honest review.
K18 leave-in molecular repair mask has been touted as the holy grail of bond builders, repairing your hair from the inside out. But does it work?
Unlike many other bond builders on the market that apparently repair the outside of each strand, the K18 leave-in mask is supposed to be best for internal hair care. Basically, it’s meant to reach right through to the keratin bonds and heal them, giving you healthier and more resilient hair.
I was after a bond repair product because I have curly hair tangles very easily and I wanted to know if the issue stemmed from inside the hair strand. I read a lot of positive reviews, mostly from people with bleached hair and visible damage. I was spending about half an hour detangling my hair with conditioner every wash day and I was pretty desperate to fix that problem (here’s how I actually fixed the problem).
According to the K18 hair product website, your hair will be ‘like new’. It’s also meant to be for all hair types and works its magic in just four minutes.
I was sceptical, but I love a popular product and a bold claim so I decided to give it a crack. Here’s what happened.

K18 hair mask review
The first thing I noticed about K18 bond repair mask was how expensive it was, particularly when I didn’t know if it would work or not. I bought a 5ml sample size tube which still costs about AU$16, but I figured it was better than buying a full-price 50ml bottle for $120. Since I only had a small amount, I didn’t have much to experiment with so I followed the instructions carefully.
According to the instructions, you’re supposed to wash your hair with shampoo but don’t condition it. Towel dry hair until it’s damp and rake one pump of the K18 treatment through your hair, adding more as needed, working from the roots to the ends. Let it sit for four minutes, style hair as normal.
For someone with curly hair that tangles easily and relies on conditioner alone to detangle, the prospect of not conditioning my hair after shampooing was frightening. Nevertheless, I gritted my teeth and got on with it.
What happened
As expected, my hair was nice and tangled after using shampoo. I briefly tried to detangle with my fingers but gave up quickly, hoping K18 would solve those problems. My anxiety levels increased again as I towel-dried unconditioned and matted hair.
My hair was damp by the time I picked up the tube of K18. There was no drip at all. I squeezed a bit onto my hand and started trying to rake it through. The product is white, thick and feels a lot like a conditioning mask to touch.
Sadly, it did not behave like a conditioner.
I immediately started applying it to the ends of my hair, where the largest knots were, slowly trying to detangle with my fingers while trying to imagine the shiny, lush locks I’d have once this painful process was over. I ended up using a tangle teaser to get them out properly, before working the rest of the product up the strand.
I’m not going to lie, it was tough.
The product has very little slip, which essentially means it won’t properly detangle hair. This process took quite a long time. I did eventually manage to get a brush through it, making sure each strand was coated. My damp hair felt brittle with the product in it, but I hoped that would fade away as it dried.
By the time I was done, I’d used most of the 5ml tube. I didn’t use any other product and left it to air dry.
The result
I would actually call this a disaster.
My hair felt like hay. It was crisp, brittle and flat. There was no curl definition at all—there was barely a wave. My hair hated the lack of conditioner and it really hated being detangled with virtually no assistance from a product with high slippage.
Sometimes, when my hair becomes brittle after using a high-protein treatment, it softens throughout the day. I wondered if that would happen with K18. It did not. Nor did it soften the next day. By day three, it was matted and looked terrible and I had to wash it again. I used conditioner this time, without K18, and everything went back to normal.
Usually, my hair becomes brittle when I use a product with too much protein. I did some research and found K18 is not a protein treatment. It has no protein at all, so that can’t have been the problem.
I noticed no improvement in my hair after using K18.
The second attempt
After the disaster, I left the tube of K18 in the bathroom and didn’t look at it again for months. It wasn’t until I went to the hairdresser that I decided to give it another go.
The hairdresser used K18 on my hair, but he applied it after conditioner and on very wet hair. I asked why he did that because the packet explicitly says to use K18 on unconditioned hair. He confirmed you are technically only supposed to use it on unconditioned hair, but he also said it doesn’t really matter—the product works whether you condition it or not, but it might be a bit less effective if you’ve conditioned and rinsed your hair. When he was done cutting my hair, it did feel amazing. There was no dryness at all, like there was after my own attempt with K18.
I was floored and decided to give it another go.
I washed my hair, conditioned and detangled, as normal. This time, I didn’t towel dry my hair. I applied K18 pretty soon after getting out of the shower. It was easy to apply this time and I brushed it from root to end with ease. I let it drip dry. My hair felt great. I decided to give it a proper go with a full-size bottle.
Over the following months, I used K18 every five to six washes, as stated on the packet. At the start, it was hard to tell if my hair only felt good because of the conditioner, rather than because the K18 was repairing my hair. After a few months of use, I was convinced that was the case. The last few times I used it after rinsing out the conditioner, my hair started feeling brittle again.
It continued to feel brittle until I stopped using K18.
The verdict
I still use K18 about once every six months, largely to use up the rest of the bottle. If I use it more frequently than that, my hair feels brittle all over again.
According to the K18 website, brittle hair after use can mean there’s product buildup on the hair which stops the K18 from penetrating the strand. To fix that problem, they recommend using the K18 clarifying shampoo…because of course they do. I used a sulphate-heavy shampoo to remove buildup and it made no difference.
I know this product works for a lot of people, and I was pretty sad that it didn’t work for me. Of course, that doesn’t mean it won’t work for you. As I mentioned, people with bleached and dye-damaged hair have reported huge success with K18. The product clearly works, but like a lot of things, it’s highly dependent on the individual.
Want me to review something else? Let me know in the comments below!
Like it? Pin it!

You Might Also Like…

Is Audible worth it? How I got 25 free books
Learn how I signed up for Audible and got 25 free audiobooks, even after cancelling my membership. I listened to 17 free books last year alone, worth more than $800, without renewing my subscription. Here’s how you can do it too.
I consumed 17 books last year. That’s an increase of 15 books compared to the previous year, and I managed to do it with Audible, and they were free. It was transformative. If you’ve ever found yourself wishing you had more time to read, this post is for you.
In years gone by, I could never find the time to read books because I work at a computer all day and the last thing I wanted to do when I got home was read. My eyes needed a break. I probably consumed the equivalent of a book or two per week at work, but reading for work is very different from reading for enjoyment—purely from a place of personal interest. I held off using Audible for a while because I found the idea of someone reading to me weird, and I didn’t like the subscription model. I have so many books at home that I haven’t read…why would I pay for another?
Three years later, I know exactly why. Because I can pay about $7-14.95 per month to have someone narrate almost any book to me while I do things that I traditionally probably couldn’t do while reading.
Walking to the train station? Listen to a book. Cooking dinner? Listen to a book. Doing the dishes? Listen to a book. Running in the rain? Listen to a book. You get the idea. I managed to fit in 15 audiobooks while doing mundane tasks like walking, commuting and cooking, and I gained a world of knowledge at the same time.
(Note: this post is not sponsored, my love for Audible is genuine. There are some affiliate links, clicking on them is of no extra cost to you, it just helps keep my site running :)
How to get free books on Audible
Get an Audible Premium Plus membership that gives you free credits. This is explained below.
I downloaded Audible with a 30-day free trial, listened to the first book in The Wheel Of Time series while I recovered from wisdom tooth removal, and then I forgot about it altogether. I didn’t like the book at all (sincere apologies to those who love it, I really tried) so I didn’t feel the need to race back to Audible and listen to the next 13 novels in the series.
I’m not sure how long I had the subscription for before I cancelled it, or what the deal I signed up for was, but it must have been a good deal and I must have been on it for a while because I suddenly had about 25 free audiobooks to claim. Some Audible plans come with monthly credits that allow you to buy any book in the catalogue, regardless of the cost. At some stage, I’ve realised I was paying for Audible and cancelled the plan, but I kept getting emails telling me I had unused credits.
When I downloaded the Audible app again and checked my account, I realised I had 25 unused credits. I didn’t want to sign up for Audible again, but that didn’t seem to matter—I could buy 25 audiobooks, free of charge, without signing up to a plan.
Of course I did initially pay for the subscription but, if you’re not on a subscription plan, audiobooks do generally cost the same amount as paperback books because there’s a whole production process involved—there’s a professional voice actor or narrator, they’re often recorded in studios with sound mixers, and sometimes there’s background music.
I’ve managed to listen to more than $1000 worth of audiobooks with credits alone, and I definitely didn’t spend anywhere near that on my subscription.
Audible free trial and membership
Audible will give you 30 days free, or $0.99 per month for three months. During that period, you can listen to however many books you like. Plans start at $7.95 per month after the free trial.
From there, you have options.
Audible Plus: $7.95/month means you can listen all you want to thousands of titles.
Audible Premium Plus: $14.95/month includes thousands of titles plus one credit per month for any premium selection title.
Audible Premium Plus Annual: $149.50/year includes thousands of titles plus 12 credits a year for any premium selection titles.
Any book you actually buy, with a credit or cash, is yours to keep. You can’t keep books that are downloaded with your subscription benefits.
You can probably do some math here to work out what the best value is for your lifestyle and how often you’ll use it. I listen for a little over an hour per day, so the $7.95 plan works for me. I don’t need to keep them once I’ve listened to them, so I don’t mind that I might lose access to them if I cancel my membership. A friend of mine listens all day while she works, so the annual subscription is worthwhile for her.
I do think the 12 credits in the annual plan is a great deal because it gives you 12 free audiobooks per year. If you get this plan through Google Play or App Store, these credits will not expire, even if you cancel your Audible membership.
A common question is whether Audible is included with Amazon Prime. Sadly, it is not—it’s a separate subscription.
Do Audible credits expire?
It depends on your plan, and how you signed up for Audible. Some plans have credit limits that expire once the billing period rolls over. But if you get them through the app, they will not expire even if you cancel your subscription.
Pictured below: Some of the books I got free, using credits. I highly recommend them all. They’re mine to keep because they were purchased using credits.


How does Audible work?
Audible is really easy to use. Download the app, sign in with your Amazon account and get a free trial. Search for a title you want, download it, and you’re good to go.
I find audiobooks download quickly on my phone using wifi, and you can start listening even before it finishes downloading. You can also choose to buy an audiobook with credits.
What I loved, and what I didn’t
Through this Audible journey, I learned I don’t like listening to fiction. I much prefer reading it. After The Wheel Of Time, I tried Dune, and I even tried something completely different by Margaret Atwood. But no. I don’t know if fiction is too slow in audiobook form, but it’s not for me.
What I love listening to is non-fiction. I largely listen to biographies by people who have lived very different lives to me—Unfollow, Wavewalker, Sociopath, and What My Bones Know were all excellent. They were read by the authors, which I prefer because their tone is crystal clear—you know exactly how they speak, and the tone of all the characters in their lives. Louis Theroux and Jennette McCurdy were especially good at this. Sometimes you also get extras in an audiobook—Louis Theroux had a whole section at the end of Gotta Get Theroux This that isn’t in the readable version.
I feel as though I’ve gained valuable knowledge about the power of religion, trauma, mental health, and travel that I wouldn’t have otherwise had. If I had those physical books on my shelf, I know I wouldn’t have finished them.
Audiobooks are as beneficial as reading
The act of listening to an audiobook is not the same as the act of reading, but it’s still the absorption of information and it activates similar brain regions to reading. It can improve cognitive processing, and language comprehension.
Researchers analysed brain scans and found that stories stimulate the same cognitive and emotional areas, regardless of the way they’re delivered. Whether you’re reading print books or audiobooks, you’re still absorbing information effectively (as per The Journal of Neuroscience).
Personally, reading books is important to me because I aim learn, rather than to improve my comprehension skills. If you want to improve your reading skills or your attention span, picking up a physical book might be the way to go. I recommend Kindle for that—you can have 500 books in your pocket at all times, and they are significantly cheaper than physical books. It’s amazing.
No matter how you decide to consume books, being open to new information is never a bad idea.
Is there a product or service you want me to try out? Let me know in the comments below!
Like it? Pin it!

You Might Also Like…

How to get thicker hair and increase density with one lifestyle change
Is it possible to get thicker hair, naturally? Yes, and you don’t need any hair thickening products to make it work. This method is designed to give you thicker hair, permanently.
Is it possible to get thicker hair, naturally? Yes, and you don’t even need hair thickening products to make it work.
There are so many products promising to give you thick hair—shampoos, conditioners, ointments, laser treatments, red lights—you name it. Some of them probably work, some of them probably don’t, but these are like band-aids to the problem.
None of them will solve your hair problems forever because they don’t address the underlying issue. And that’s what we want, right? We want to thicken hair strands and increase hair density for glossier, hydrated, and fast-growing locks, and we want to maintain it forever.
I’m going to tell you what I did to solve this problem.
Please note, this can work for men and women but male pattern baldness is a separate issue with very different treatment options. I recommend seeing a specialist to address that particular concern.
Before
I used to spend 30 minutes in the shower detangling my hair with my fingers and a tangle teaser. For half an hour every wash day, and I’d pull clumps of hair out of my brush. I washed my hair every three or so days, and not because it was greasy, because it was so tangled that it looked awful. If I left it longer than that between washes, the detangling process could take 40 minutes.
It was exhausting and disheartening to see so much in my brush every time. I wanted long hair, but I couldn’t maintain it—the ends were like barbed wire, brittle and split, and I could only use really thick conditioners that were actually too heavy for my fine hair, but my hair wouldn’t detangle with anything lighter. The result was over-conditioned hair that was flat, but somehow very tangled after a few days.
How I fixed thin, brittle, tangled hair
I ate loads more protein.
When I say loads, I mean about 60g more protein in one day than I had been eating.
That’s literally it, that’s the big secret. Your hair is basically just protein, so it needs a source of protein to grow properly.
I upped my protein intake so much that my body initially had no idea what hit it. I went from about 30g of protein a day to more than 80g. It was a big change, my stomach felt weird, and I felt so full I didn’t know if I’d ever be hungry again.
That initial shock to the system lasted a week or two, but after that I felt great.
I started back at the gym after a break and, due to increased protein levels, I managed to avoid muscle pain. I slept better and I had more energy. It was about a month before I really noticed a difference in my hair.
For the first few weeks, I kept using thick protein-filled conditioners, because that’s what I assumed my hair would always need. But after a while, my hair started to reject them. I’d wash my hair and let it air dry, and it felt sticky and brittle. It was horrible, I didn’t understand what was going on.
Until one day. I was sick of trying all my different protein-infused masks, so I grabbed a small bottle of conditioner I once swiped from a hotel room and slathered it on.
My hair instantly detangled—the whole conditioning and detangling process took about five minutes. I let it air dry, like I normally would, and almost cried at the result. It was shiny, glossy, and it felt so thick and full. I realised I probably didn’t need the thick conditioning masks anymore. My hair suddenly had enough protein to grow properly and detangle itself, putting more on resulted in protein overload.
I went from losing piles of hair to hardly any at all, and my conditioning and detangling routine went from 30 minutes down to five. All it took was adding more protein to my diet.

After
I’m still figuring out the best ways to incorporate more protein into my diet—90g is a lot for someone who doesn’t eat meat. My hair isn’t as thick as it was when I was really going for the protein, but it hasn’t lost it either. I still spend less than ten minutes conditioning and detangling my hair. Sometimes I use protein masks, but rarely. Most of the time, I can get away with lighter and more generic products that don’t have strengthening or lengthening properties. If I’m really in a bind and I’m away from home, I can use hotel conditioner and my hair is easy to detangle and looks great.
I was also able to stop using leave in conditioners and curl creams altogether. My hair started curling great on its own.
How much protein should you eat?
I am not a doctor or a health care professional of any kind. Before you make health and lifestyle changes, you should always speak to a professional. This is what worked for me :)
The protein recommendation is 2g per 1kg of lean body mass.
To figure this out, weigh yourself first thing in the morning, before you eat anything. Determine your body weight percentage and reduce your weight by your body fat. There are a few ways to determine your body fat percentage—either use the charts below, or you can take your measurements and use a calculator like this one.


If you weigh 60kg and your body fat is 25 per cent, the equation would be: 60 x 0.25 = 15.
60 -15 = . Your lean body mass would be 45kg.
If you need 2g of protein per kg of lean body mass, the final equation would be: 45 x 2 = 90.
So, someone who weighs 60kg with 25 per cent body fat would need to eat about 90g of protein per day.
How to increase your protein intake
Protein intake is very individual and will depend on your specific circumstance. Vegans will probably find they have to eat a lot more food in general to meet the protein requirements, but it’s still very attainable no matter what your diet is.
Personally, I had no idea my protein levels were so low and I found it difficult to incorporate so much more into my diet. When I went to the supermarket, I found a lot of yogurts and cereals and fortified with protein. I also incorporated dehydrated vegetable proteins into meals and generally started paying more attention to the nutrition charts on food packaging.
It took about a month to see real results, but I was completely blown away once I realised it was working.
Have you tried this out, or do you swear by another method? Let me know in the comments below!
Like it? Pin it!

You might also like…

Quasi Bio-Collagen Mask Review
It feels like every skincare product on the market at the moment is promising to refine my pores and give me dewy glass skin. But do they work? I tried the Official Quasi Bio-Collagen Mask to find out. Here’s what happened.
It feels like every skincare product on the market at the moment is promising to give you glass skin. But do they work? I tried the Official Quasi Bio-Collagen Mask to find out. Here’s what happened.
Bio-collagen face masks seem to be everywhere, specifically the kind that you leave on for hours at a time. You can even sleep in them. I’ve seen so many videos of women putting white sheets on their faces, apparently going to bed, and in the morning peeling the mask off to reveal shiny, bouncy and glowing skin underneath. As the mask dries overnight, it turns from hospital white to transparent. That’s how you know it works, so they say.
I was skeptical because collagen isn’t easily absorbed through the skin so the impact of any collagen face mask is always going to be temporary. But that’s the case with most products — they all require consistent reapplication, so that wasn’t a deal breaker for me. The ads feature women of all ages, not just people in their 20s with great skin already. They’re also cruelty-free. I was in.
Note: This post is not sponsored, but there are a few affiliate links. Clicking them will not cost you anything extra, but it will help me keep the site going :)
Quasi Bio-Collagen Face Mask: A Review
There are a few different collagen face mask brands that claim to do the same thing. I went with Quasi because the ads were literally on my Instagram feed for months, and I don’t follow them. They had stacks of user videos and good reviews that seemed legit. I do plan on trying a few other brands, but I had to pick one to start with, and it was Quasi.
According to the website, these masks reduce pores, reduce fine lines and wrinkles, and give you plump, firm and glowing skin. Key ingredients include galactomyces, which is a fermented essence that is absorbed by the skin while brightening and firming. Oligo hyaluronic acid is absorbed very easily by the skin due to its low molecular weight, providing intense moisturisation. Low-molecular-weight collagen helps minimise pores and increase elasticity, and niacinamide which helps build keratin to maintain skin health.
What happened
I bought four packs of four in the sales after Christmas. Apparently, the masks should be used weekly, so that’s what I planned to do.
I washed all the makeup off my face, using micellar water to make sure there was nothing left. I didn’t apply anything else to my face. The mask was thick, white and jelly-like. It comes in a few pieces so you can tailor it to fit. There are two oval cut-outs where the eye holes are, so I put them directly under my lower lash lines to ensure my under-eye area would get collagen as well. I then placed one half of the mask over my chin and lower cheeks, and the other half on my forehead, cheekbones, and eyes. A have a small face, there was a fair bit of overlap in the middle, it didn’t seem to matter.
It went on very smoothly. I used my new Gua Sha to smooth it all down and make sure there were no air bubbles. It didn’t fall off and didn’t feel as though it was going to. It did feel damp and I wondered how it would go in bed. I waited up for about 45 minutes before going to bed. It dried a bit, but it was still dampish to touch.
Sleeping with a face mask on
Sleeping in a face mask was weird. I didn’t love it and I wouldn’t recommend it. I kept feeling as though it was going to stain the sheets (it didn’t) or come off in my sleep (it didn’t), and I woke at one point and felt very aware that it was on my face. It must have been about 4am when I decided I’d had enough. It had been on for six hours at that point, more than enough time, so I peeled it off and went back to sleep.
I had some regrets because I didn’t have that big reveal moment in the ads, where you peel it off and your skin looks amazing. But I remembered one of Quasi’s many ads that shows a woman washing her face immediately after taking her mask off to prove the dewy glass-like texture was her skin, rather than product residue from the mask. For those reasons, I figured my skin should still look like that in three hours when my alarm went off.
The result
My face did not look dewy the next day and I think that was to do with going back to sleep with my face on sheets, but I was pretty happy with the results anyway. My skin looked firm and brighter and make-up went on very easily. It did feel as though my skin had a boost of something and there was a healthy glow about it. My skin felt smoother for a few days, though I’m not sure how noticeable that was to anyone but me.
I used it again a week later, but this time I kept it on all night and peeled it off slowly in the morning. As promised, the mask had turned from hospital white to transparent. It looked like a completely different product by the time it came off. It didn’t pull on my skin, and while it was stuck to my face, it peeled off easily.
There was more of a dewyness to my skin after the second one, but it didn’t look much different to the night I pulled it off at 4am. A bit shinier, maybe.
Pros
My skin did look noticeably firmer and my fine lines were less visible, and the results seemed to last right up until I did another mask. My skin wasn’t irritated at all and my pores looked clearer and smaller. I think it cleared sebum from my pores, and I think it would continue to do that over the course of weeks with continual use, which is a pretty good result because sebum is difficult to remove without professional help.
Cons
The masks are expensive. It’s hard to say how expensive because they always seem to have huge deals. As I write this, the site says two packs (eight masks) cost AU$160 but at the moment there’s 50% off so it costs $80. Certain packs come with free gifts, like Gua Sha sets, $20 gift cards, and mystery gifts. These deals change constantly. Either way, $80 for four face masks is still a lot. The results are only temporary, but the masks are cheaper than weekly facials at a salon.
I also really didn’t like wearing the mask to bed. I tried putting one on at about 7pm, hoping it would be done by 10pm when I went to bed. It wasn’t. I think they probably need about four hours to dry completely.
Verdict
I would get this again. The results were not exactly like the ads, my skin wasn’t instantly transformed, but I also had realistic expectations. I wanted a reduction in fine lines and for my skin to appear firmer and smoother, with a glow, and that’s what happened. I was really impressed with the way it seemed to remove sebum and minimised pores. I look forward to seeing how this changes my skin over a few months.
Have you tried Quasi, or another brand of bio collagen face mask? Let me know in the comments below!
Like it? Pin it!

You might also like…

Bondi Boost HG Shampoo Review: Does It Really Work?
I bought Bondi Boost HG Shampoo on a whim one day, on my lunch break. It was kind of expensive and promised to clean my hair and help it grow faster at the same time. But does it really work and it worth the price tag?
I have been using Bondi Boost HG Shampoo for years. It’s a bit on the expensive side but I find myself going back to it time and time again. This is why.
I bought Bondi Boost HG (hair growth) shampoo on a whim one day, on my lunch break, because I saw a pharmacy and couldn’t find a reason not to get it. I had been wanting to try it for a while but kept putting it off because the bottles are kind of pricey for the size. That day at the pharmacy, I caved. It was a moment of weakness, but I’m actually really glad I did.
I have fine hair that errs on the side of dry, but my hair usually also needs a product that foams. Without that, my scalp just doesn’t feel clean and my hair doesn’t sit right on my head. Honestly, day two hair starts looking like day four hair. It’s a real pain. So I’m cautious about what products I use.
The issue with that is, a lot of shampoo that lathers has sulphate in it. And we don’t like that because it strips your hair of natural oils. We’re after hydrated curls and waves and a fresh scalp. Bondi Boost shampoo is good because, not only is it vegan and cruelty-free, it’s sulphate-free but somehow it actually foams and cleans your hair without drying out your hair completely.
That’s a win, in my books.
Part of the selling point for this product is that it promotes hair growth. That’s not why I bought it, but it’s a bonus if it works.

Before
Before I started with Bondi Boost, I was mostly using Shea Moisture Castor Oil shampoo, which was great but my hair gets sick of products quite quickly, so I need a few on rotation. If I keep using the same one, my hair ends up looking knotty and generally terrible. So I like to try new ones.
My hair was getting really tired of Shea Moisture (which is nothing on the brand, I love their products) so Bondi Boost seemed to be a good alternative to test out.
Review
The instructions say to use a small amount on wet hair, lather and rinse, so that’s what’s I did. The first thing I noticed was that the product is almost transparent and smells like overwhelmingly peppermint — a unique choice for shampoo, but I rolled with it.
As per the directions on the bottle, I rubbed a small amount between my fingers and worked it into my scalp only. It lathered immediately. A little went a long way.
I used a bit more for the back of my scalp, made sure it was properly dispersed — it was really easy to work into my scalp — then rinsed it out. It came out easily and I didn’t notice any residue leftover. My hair felt clean, but not squeaky clean, and smelled mildly of peppermint.
I followed up with conditioner, but that’s for another review. Watch this space!
Result
My hair felt clean, my scalp felt cleansed, and my hair sat pretty well on my head. That is to say, it didn’t feel oily or part in weird places like it does on day four, for example. It didn’t tangle more easily than usual, and it didn’t create extra frizz. My hair looked hydrated and voluminous.
My hair also didn’t get sick of Bondi Boost for a while. I would actually say it took a few weeks before my hair decided it had enough, which is a pretty good run.
It’s now a permanent feature in my rotation of shampoos, and I find myself going back to it time and time again. I feel like it really cleans my scalp in a way a lot of natural shampoos don’t — they often leave residue, or an oily sheen because they don’t have sulphate, so Bondi Boost is a good reset and removes build-up.
One thing I will say is that it can make my hair feel quite dry if I use it for too long. It doesn’t have sulphate, but whatever else they put in it to make it lather the way it does is a little drying. Having said that, I do rotate shampoos so it’s not a huge problem for me.
Verdict
On the whole, Bondi Boost is pretty expensive. At $34 for 250ml, it’s a lot for the average person to drop on a single product. However, a little does go a long way and I had my bottle for months before it ran out. I have repurchased this one, and I’ll probably do it again once my current one runs out.
I did not notice more hair growth. That’s honestly not why I bought it so I wasn’t paying too much attention to that, but I would have noticed if my hair grew faster than usual and it didn’t.
Have you tried Bondi Boost? Let me know in the comments below!
Like it? Pin it!

You Might Also Like…

Does K Republiq Glass Skin Really Work: A Review
As with a lot of products on this site, I came across K Republic Glass Skin on social media and decided I had to try it out. I’m always so curious to see if new products and fads work — at the moment, it feels like every second ad on Instagram is for a new product promising to give me Korean-style glass skin. Does it really work? This is what happened.
Does K Republiq Glass Skin actually reduce the size of your pores and create a smooth complexion? I tried it out so you don’t have to.
As with a lot of products on this site, I came across K Republic Glass Skin on social media and decided I had to try it out. I’m always so curious to see if new products and fads work — at the moment, it feels like every second ad on Instagram is for a new product promising to give me Korean-style glass skin.
I decided to splash out on K Republiq because the products were created with extreme hydration in mind, which is what ultimately gives you that glass-like look. It’s basically advertised as a glass skin routine. The ingredients list is packed with polyglutamic acid which holds ten times more moisture in your skin than hyaluronic acid.
Bakuchiol helps reduce fine lines without drying your skin like retinol, niacinamide helps smooth pores, and vitamin C and squalene help illuminate and plump the skin. I was basically using all these products anyway, but now they’d be concentrated in single product line.
The ads feature women age 20 to 60 with pretty convincing before and after photos. Usually, models for these products are in their 20s with flawless skin, which doesn’t really show how well the products work for everyone. I’m in my 30s, which isn’t old, but my skin isn’t like it was in my 20s. I’m pasty pale, I live in a hot climate, I am very photosensitive, I have sun damage, mild rosacea, and fine lines. The product is marketed for people of for all ages and apparently it’s ten times more moisturising than hyaluronic acid.


K Republiq Glass Skin: A Review
I bought a kit with three pieces: Glass Skin Glazing Essence, Glass Skin Serum and Glass Skin Finishing Glaze.
Shipping was super fast and I had my kit within about three days. It also came with a free Gua Sha. I was happy to find the bottles were large and full to the top with product. They’re pink, bulky and hard to lose. The essence is a spray, the serum is a pump bottle, and the glaze is in an airless pump vacuum bottle — you push the lid down and product comes out the top.
I was going out one the evening I got the package so immediately washed my makeup off so I could use my new products underneath. Deep down, I was kind of hoping my skin would immediately transform into youthful radiance like it seemed to in the ads. Obviously that didn’t happen, but I think it did look a bit shinier…sort of glass-like, you could say.
According to the website, you’re supposed to spritz your face with essence and let it sink in before using about two pumps of the finishing glaze. My skin did feel a bit smoother with the glaze — it felt kind of tight on my face, but not in an uncomfortable way. Make up went smoothly over the top.
I was ready for the night routine when I got home. I washed the make up off, used the essence and a pump of the serum. The serum was pearly-white and went on very easily with my fingers. It dried pretty quickly before I used the glaze. Again, the glaze had the tight-ish feeling on my skin.
What happened
I repeated this routine for weeks, replacing all my products — hyaluronic acid, niacinamide, lactic acid, retinol, and agrilene — with K Republiq. I used the essence and glaze morning and night, adding the serum only in the evening. My skin felt noticeably smoother on the first day and the feeling never went away. Months later, my skin still feels really smooth.
By the end of the month, I was running low and decided to make the most of Black Friday sales. This time, I bought two kits which included the Magic Balm.
The mask is a very thick, pearly pink wax-like product that is very thick and melts in your fingers. I put way too much on the first time. A little goes a long way, it even says that on the packaging, but I can’t stress that enough — a little goes a long way. I put it on at night instead of the glaze, because it’s way too thick to go under makeup, and my skin is super smooth by morning.
Pros
Three products replace about seven, the products are packed with moisturizing and hydrating ingredients, and they’re vegan. When I asked my partner if the difference was visible, he said it did. My pores were smaller, mild redness had lessened, and it had a dewy glow about it. My skin didn’t get sick of it, I didn’t develop an allergy or intolerance to it, and I have noticed fine lines aren’t as visible.
Cons
The products are expensive. They’re large bottles that last a while, and you can also get some pretty decent deals on the site, but it’s still significantly more than The Ordinary, which costs about $12 a bottle. I initially paid $99 for the Glass Skin Glazing Essence, the Glass Skin Serum and the Glass Skin Finishing Glaze. I didn’t have to get the pack of three, but the finishing glaze on its own costs about $79, so it was better value to get the pack. I also decided the only way to find out whether the products really worked was to buy the whole routine. I went back about a month later to check out the Black Friday specials and the price was jacked to $119…go figure.
One thing I really didn’t like was the airless pump vacuum bottle the glaze comes in — it pumps well the first few times and then it’s impossible to get anything out of it. The jar does unscrew really easily so you can get every last bit of product out, but you shouldn’t have to do that. The pump function is as much to do with ease as it to do with portion control. The jar instructs you to use two pumps morning and night, and that’s not possible when the pump function doesn’t work. It’s a small problem, but worth mentioning.
Verdict
Krebuliq products really do work and I bought them again. Do I have flawless and glass-like skin? No. Do I still feel the need to wear makeup when I leave the house? Yes. It did not completely even out my skin tone, nor did it fix rosacea. I do not look like the women in the ads, even the ones who are twice my age. But it did help with my skin problems and I do feel as though it’s good for my skin. It looks healthy and vibrant, and it feels great.
Want me to review something else? Let me know in the comments below!
Like it? Pin it!

You Might Also Like…

Hairstory New Wash Review: Is it worth the hype?
New Wash promises to replace all your normal products — it cleanses, conditions, and works as a styler. It’s also formulated without detergents or foams which can damage your hair. It’s eco-friendly and cruelty-free. But does it work? Read on for my in-depth review.
Wondering whether to splash out and try New Wash by Hairstory? I tried it out so you don’t have to. Here’s what happened.
I’ve become a bit of a sucker for Instagram ads. Some are ridiculous. With others…I feel seen. So when I saw a woman on Instagram with very long and curly hair talking about how New Wash was the best thing she’s ever tried, I watched it until the end.
She said her whole family had swapped out shampoos, conditioners, and styling products for this all-in-one miracle. Of course it’s an ad so I took it with a few grains of salt, but there were thousands of really good, genuine reviews. I had to check it out.
My concern with every new product is that my hair will hate it, or my hair will feel amazing after the first wash and then decide it hates it from the second wash onward. It’s a constant battle, but I’ll always try something new hoping it’ll be my new holy grail. Cue: New Wash.
I was hesitant to give it a crack because, at $70 for an 8oz package — which the smallest size available — it’s really expensive. I subscribed to get the cost down by 10%, and because it came with free shipping and a free silicone scalp massager which I had never used before.
It seemed like a good deal, all things considered. For that price, I wanted phenomenal results.

New Wash: A Review
According to the New Wash website, it’s not a co-wash because it has cleansing properties, but it has the consistency of a conditioner and you use it like you would co-wash. It’s supposed to replace all your normal products — it cleanses, conditions, and works as a styler. It’s also formulated without detergents or foams which can damage your hair. It’s eco-friendly and cruelty-free.
There are three versions — ‘original’ for all hair types, ‘rich’ for dry hair, and ‘deep’ for oily hair. I have a lot of hair but it’s very fine, wavy on top with coils at the bottom, and about forearm-length. It’s prone to dryness at the ends and tangles easily. I use a hair mask as my regular conditioner, but I can’t use products that are too conditioning because my hair gets over-conditioned and falls flat there’s no volume at all. That’s one of the reasons I don’t use co-washes, another is that I find they don’t cleanse my hair properly at the root and my hair feels oily and doesn’t fall right beyond day one.
For all those reasons, I was a bit skeptical about New Wash and really wanted to make sure I tried to right version. I had thought I might go with ‘original’ because any deeper conditioner at the roots could mean my hair was over-moisturised and flat. On the flip side, my hair could end up a dry mess if ‘original’ wasn’t conditioning enough. The struggle was real. Luckily, there was a very helpful quiz on the Hairstory website which helped me work out that I should probably get ‘rich’.
(Ingredients: Rich, deep, original)
Wash
New Wash comes in a bag, rather than a bottle, and smells like lavender. The product is thick and white and the instructions say to use as much of it as you would normally use of shampoo and conditioner combined. So that’s what I did.
As someone who doesn’t use co-wash, it felt pretty strange putting this thick product all over my scalp and raking it down my hair — it felt counterintuitive, really, but I stuck with it. I focused on my scalp to begin with and used the silicone scalp massager to make sure my head was cleansed. I then used a bit more product and applied it to the length, as I would with conditioner.
I was able to detangle my hair with relative ease with my fingers, before I finished it off with a brush. I then scrunched the product into my hair, like I normally would, but that step didn’t feel necessary. My hair was completely saturated with product — to the point where I probably used too much product. It felt quite heavy in my hair — a bit stiff, even, and I hoped that would go away once it was all washed out.
Some of the reviews I read suggested the product was quite difficult to wash out, and even the instructions on the packaging said to wash it out really, really well. So that’s what I did. I used the scalp massager to make sure it was all off my head, before I used my hards to really squeeze it out of my hair. Personally, I didn’t find it difficult to wash out.
Styling
I would normally apply a styling cream immediately after washing my hair, but I wanted to see if — like the woman in the ad — I could get away without additional products. She insisted that New Wash meant her hair was in perfect coils every morning. I was very skeptical, but gave it a shot.
I flipped my soaking-wet hair upside-down, as normal, and gently ran a comb through it to detangle. It was a bit harder without additional product in it for more slip, but I managed. I scrunched it and plopped with a microfibre towel. My hair still had the heavy and stiff texture that it had before I washed the product out.
I took the towel off about ten minutes later, shook my hair a bit and parted it like I normally would (I realise not everyone parts their hair after washing it, but mine doesn’t sit right if I don’t). The ease with which I can part my hair after washing is usually a pretty good indicator of how cleansed my hair is. If it’s not cleansed properly, it’s pretty difficult to part and clumps together. If it’s properly clean, this doesn’t happen and it separates at the part very easily. I didn’t find parting my hair difficult after New Wash. I scrunched my hair again, it still felt a bit heavy but I ignored it and got on with my day.
drying
My hair usually takes a few hours to air dry completely. I found plopping as usual after New Wash didn’t completely get the drip out of my hair, it really held on to the water, so my shoulders were a bit damp by the time I got to work. I find that can happen with thicker products. The smell of lavender was also quite strong when my hair was wet, but it disappeared once dry.
It probably took an extra hour to dry completely, which I didn’t really mind.
Result
The first time round, I was pretty happy with the result. That stiff and heavy feeling did disappear once my hair dried, which was a relief. My hair felt soft and mousturised, my scalp felt clean, and my hair still had volume. I wasn’t sure what to expect in the volume department so I was pretty impressed with that.
What I didn’t like was that my hair looked a bit frizzy at the ends, which I put down to not using a styling product. As a whole, I would say my hair did look a bit curlier than usual, and I think it held its curl for a bit longer than usual — into the next day. It looked okay on day two and three, but nothing amazing. It looked as I would normally expect day two and three hair to look, with a bit more curl on day two. For a product that replaced shampoo and conditioner, I was relatively pleased.

Second and third wash
This is where things went downhill. Sometimes, my hair likes a product one day and hates it the next. This is basically what happened with New Wash.
For the second go, I used less product than I did the first time and my hair detangled as easily as it had before. It still had that stiff feeling, but I knew it would go away so I wasn’t concerned. I did add a curl cream this time, and that really helped stop the frizz at the ends. My hair looked fine on day one, but it wouldn’t sit right on my scalp the following day, or the day after that. It felt a bit heavy, it lost some of its curls and waves and looked quite flat by the time I had to wash it again.
Nevertheless, I persisted and used New Wash again for a third time. Attempt three was a bit of a disaster. I repeated the process, using styling cream, and my hair did not like it. My hair wouldn’t sit on my scalp properly — it wouldn’t sit right along the crown in the way oily hair doesn’t sit right, but my hair wasn’t oily at all in this instance. The curls fell flat by day two and no amount of zhooshing would fix the way it sat on my scalp. The ends were tangled like steel wool and the knots started quite high up. Basically, I had to wash it again on day two because it looked and felt terrible. I washed it with shampoo and my usual Shea Moisture conditioner and the problem went away.
Verdict
I didn’t try it again after attempt three because I don’t want that to happen again. I probably will use it here and there, but only because I don’t want to waste it, and not on consecutive washes. Just because this did not work for me in the end, doesn’t mean it won’t work for you — it does have thousands of great reviews. My hair is very temperamental and I think that is partly to blame.
However, what I really struggle to understand is the cost.
Without the 10% subscription discount, the 8oz package costs AU$69, the 20oz package costs $155, and the 32oz package costs $236. I imagine it’s priced that way because it’s supposed to replace two other products — maybe that’s the amount you’d spend on shampoo, conditioner and stylers combined. But if the cost works out to be the same, what’s the point in replacing three products with one? Unless, of course, New Wash really worked for you and the results were significantly better than the products you would normally use.
I just feel, for that price, you’d want it to work miracles on your hair, walk the dog and do the dishes. If you had long and thick hair that required a lot of product, you’d spend a fortune.
I should say, there is is a $20 trial kit that I couldn’t access because I’m in Australia. I tested out a few countries on the website, including New Zealand, Canada, the UK, and various places in Europe and it appears this very affordable trial kit is only available for US customers…even though Hairstory ships to 34 other countries. If the trial was available to me, I definitely would have chosen it rather than a full-size package.
Have you tried New Wash? Let me know in the comments below!
like it? pin it!

You might also like…
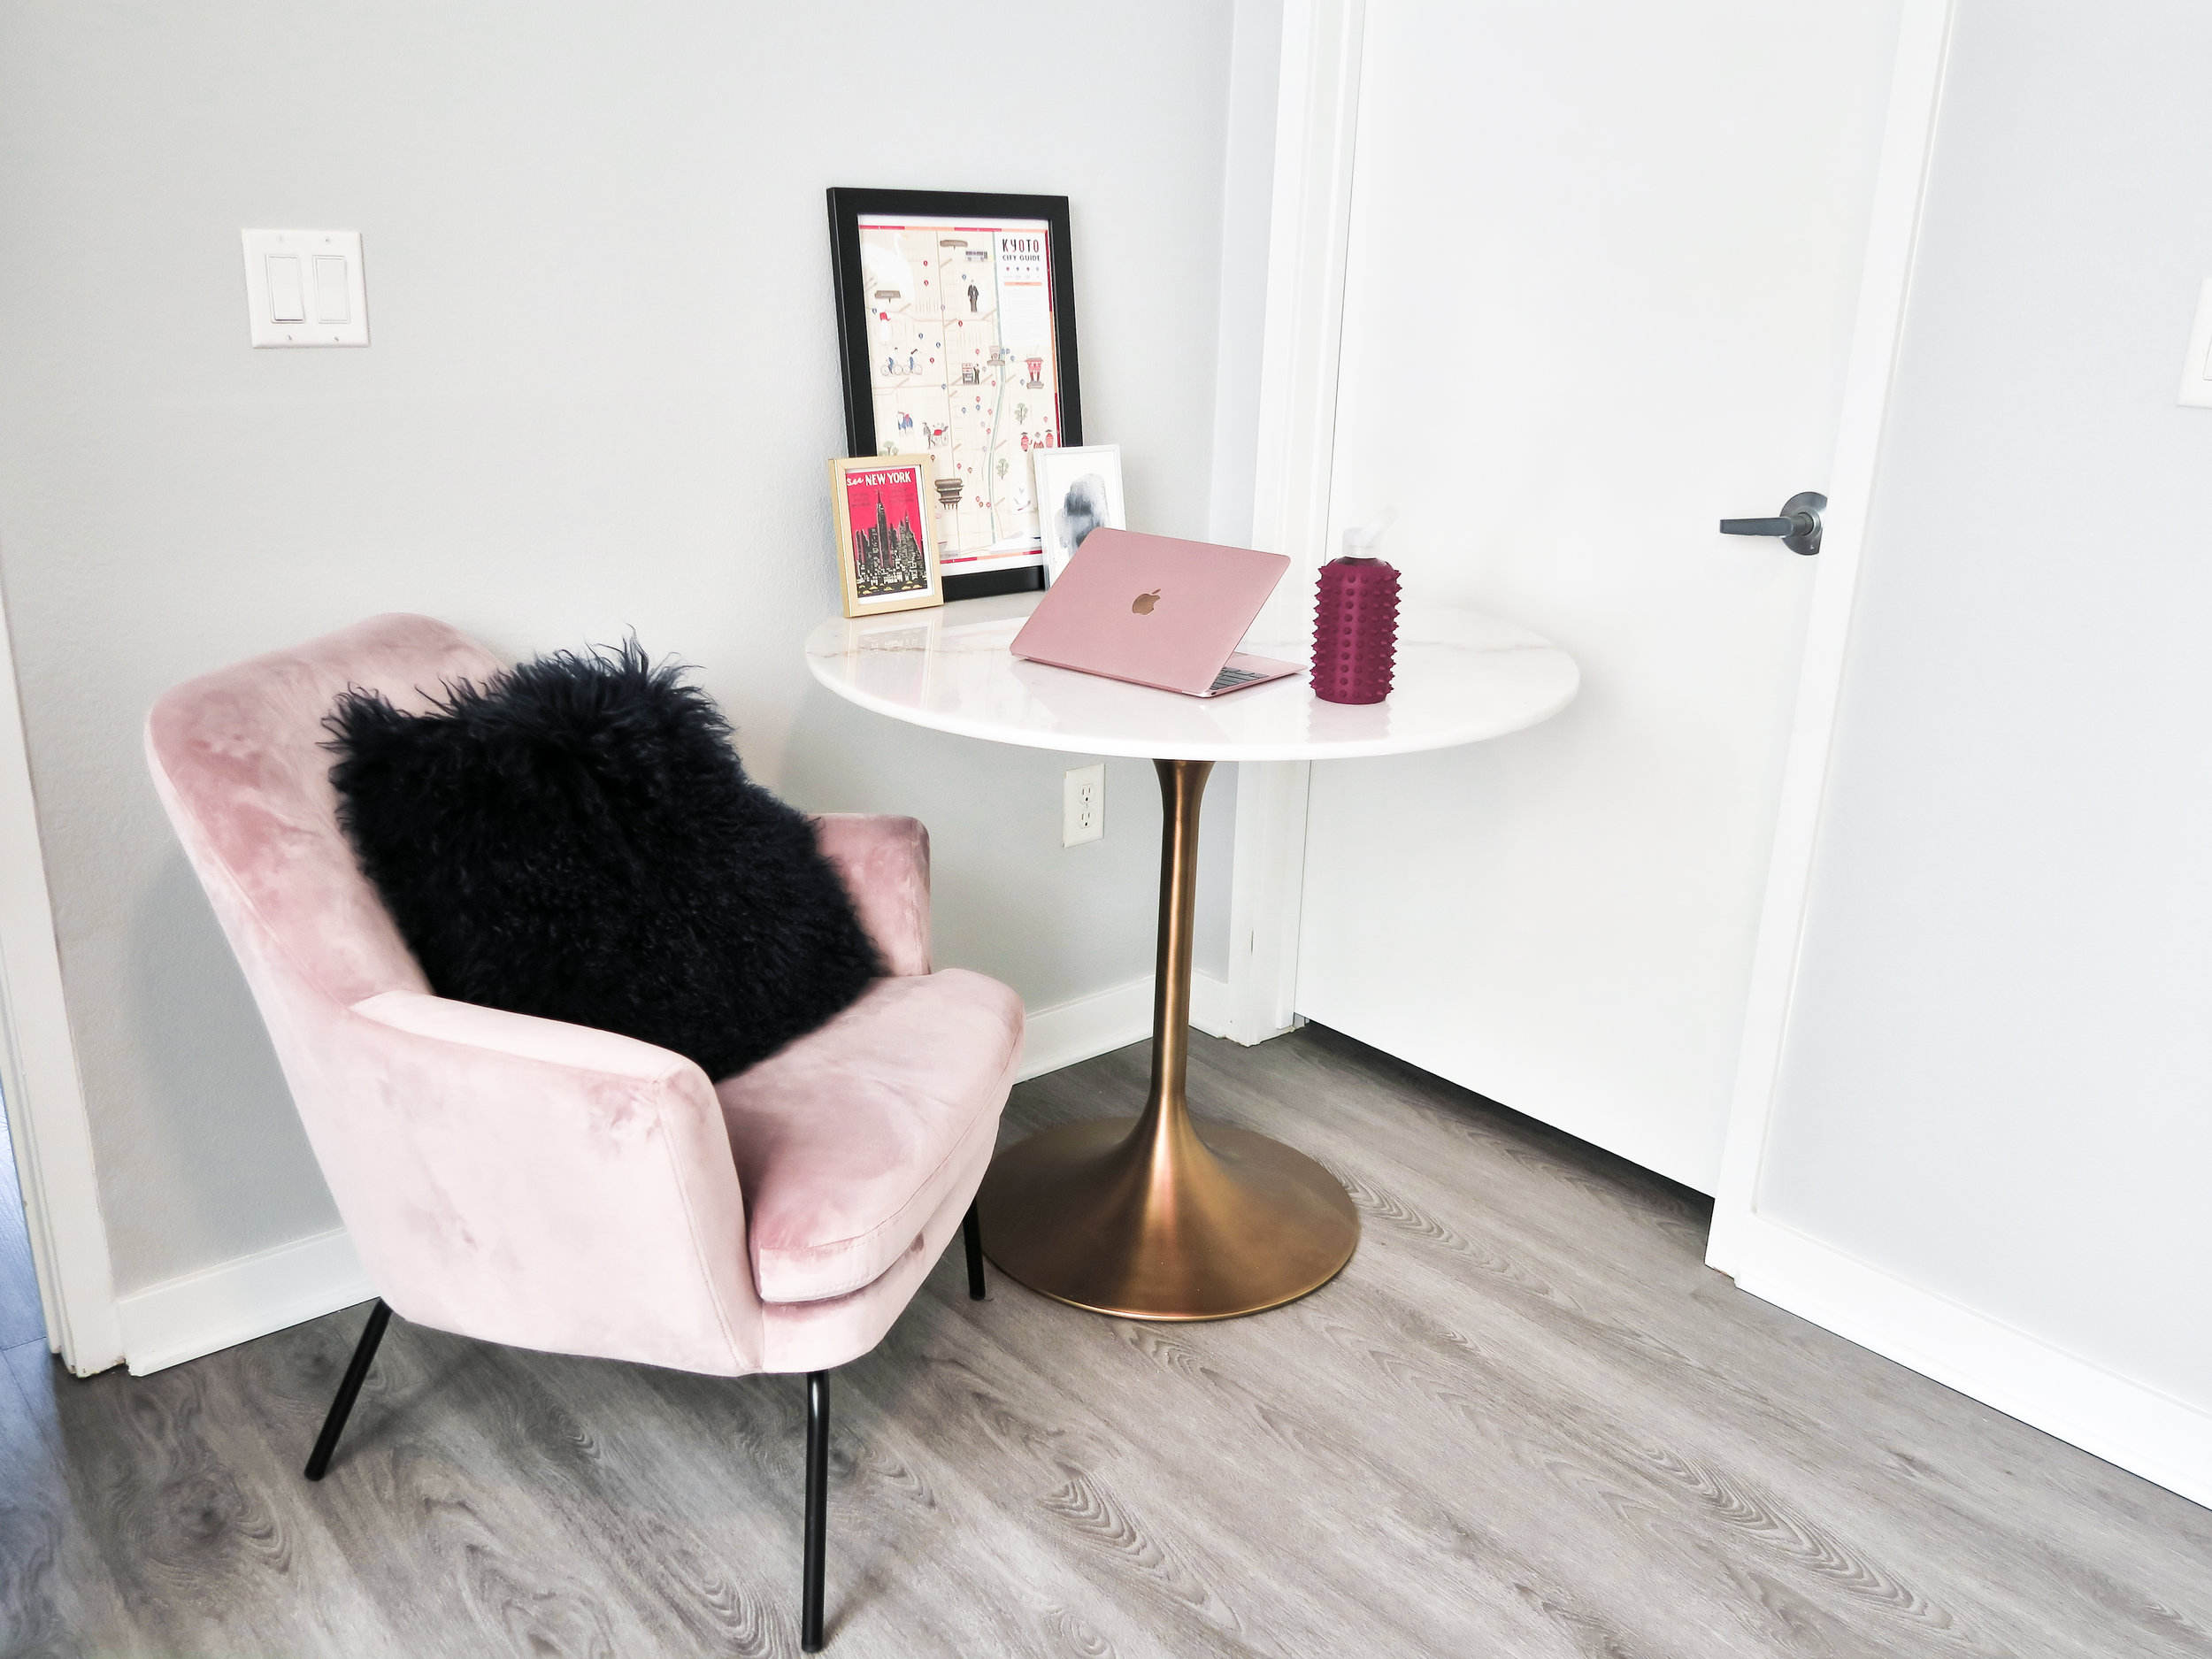
Are Bkr Water Bottles Worth It?
Looking for a durable and reusable glass water bottle that won’t leak? A Bkr water bottle is the answer. I have had my pink Bkr bottle for about five years now, which means I got it before it became a designer bottle. Yes, you read that correctly - ‘designer’ water receptacle. But having had one for so long, I can absolutely see why they became so popular.
Looking for a durable and reusable glass water bottle that won’t leak? A Bkr water bottle is the answer.
I have had my pink Bkr bottle for about five years now, which means I got it before it became a designer bottle. Yes, you read that correctly - ‘designer’ water receptacle. But having had one for so long, I can absolutely see why they became so popular. They don’t leak or break, the mouthpiece is the size a mouthpiece should be and not one of those ridiculously large ones that slosh water all over your face, and they look great. If anything happened to mine, I would literally spent the cash to get another. Here’s why.
The lid is a revelation
The lid screws on tight in one rotation. One rotation! And it doesn’t leak, ever. I have had so many water bottles leak in my bag it’s ridiculous, so the fact that this doesn’t leak and screws up really easily is a big plus for me. It’s also designed to be carried with a ring, so you could tie it to your bag if you wanted, or just loop it around your finger and off you go.
A weird design feature Bkr came up with within the last five years is a lid that fits a (vegan) lip balm in it. Of course, it specifically fits the Bkr Water Balm which, at $35, is more expensive than the lid itself, but I guess it would look nifty with the balm clipped in.
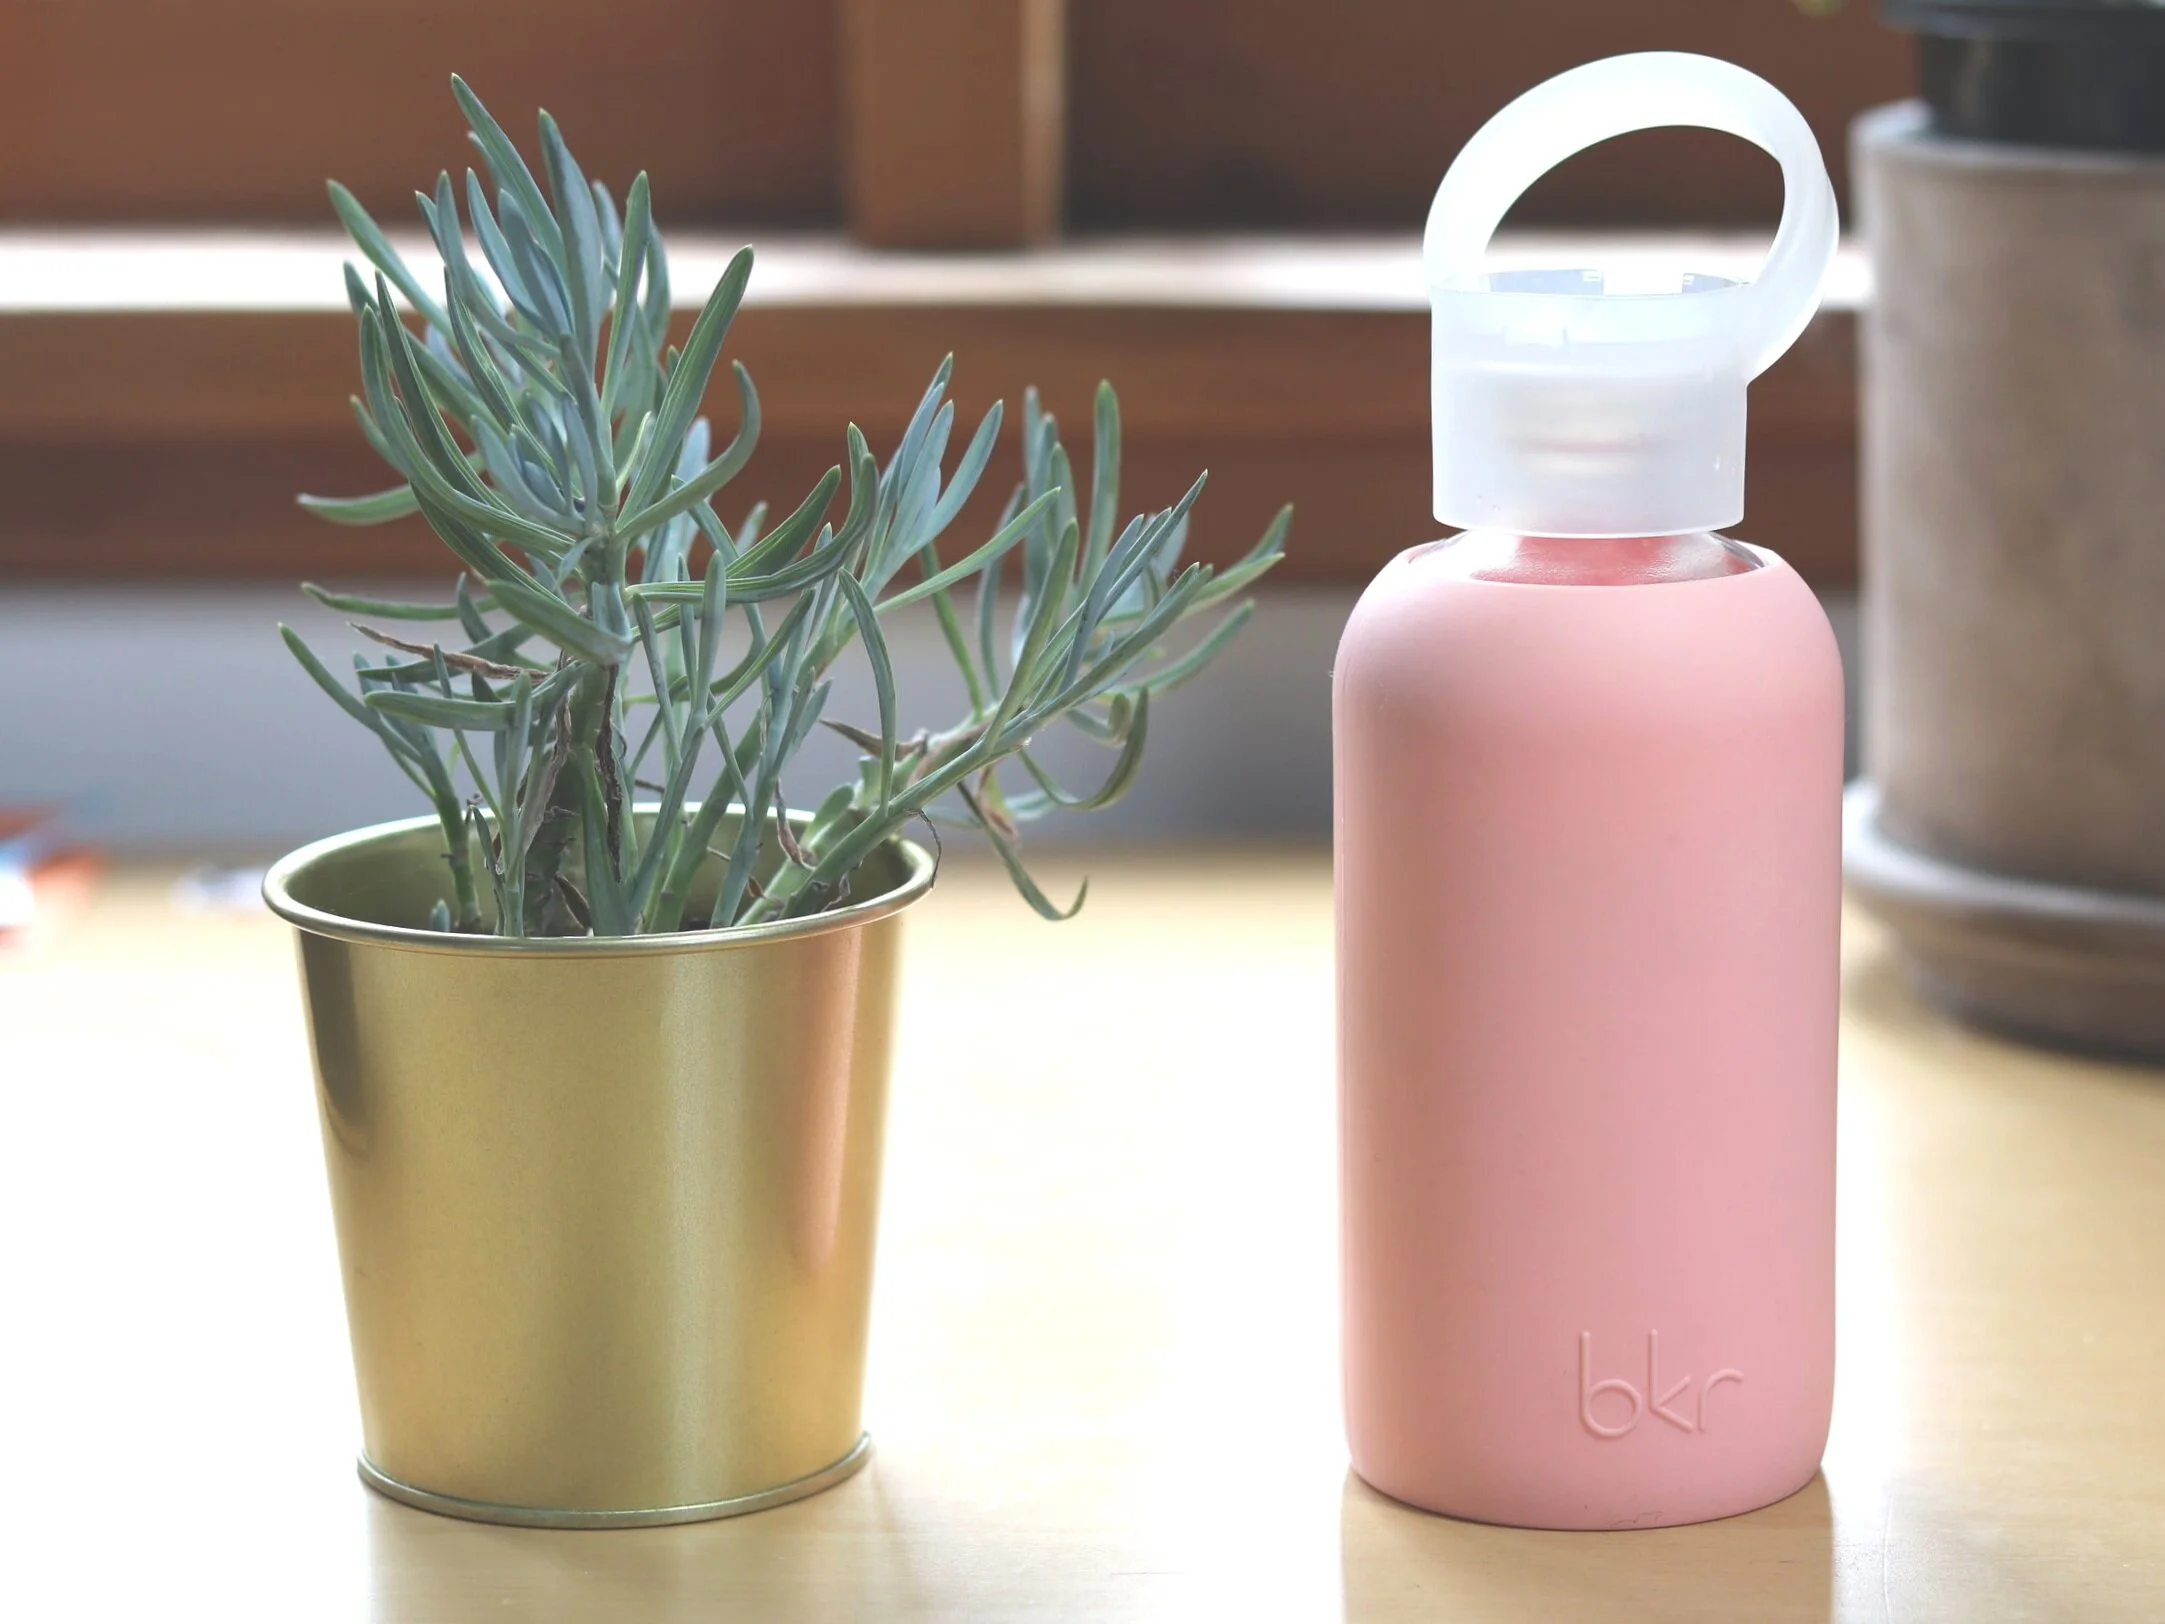
It (probably) won’t break
The bottle is smooth grass wrapped in a silicone cover that’s reinforced at the bottom, which adds a layer of protection if you’re a bit clumsy like me and drop things.
I have dropped mine a couple of times, but the worst was when it fell top-down and the lid cracked where the loop is. That’s not a design flaw - I don’t think anything could have survived that. The lid is made of quite a thick plastic and is not easy to break. It still functioned normally and I was able to close it without any trouble, but the glass has remained unbroken. You can buy replacement lids separately, so that is what I did.
Handy Sizes
Bkr comes in three sizes - one litre, 500ml and 250ml. I have the smaller one because I don’t carry around huge bags and I like to be able to slip it in a handbag while traipse to the supermarket or around the world, but there are definitely times where I’ve seen the benefits of a larger one, like when I’m working out.
Having said that, the litre bottle would probably be quite heavy. The bottle is made of glass, which adds to the weight, so keep that in mind when choosing.

Easy Cleaning
A few reviews say the Bkr bottle is hard to clean, but I’ve never really found that - you can put the whole thing in the dishwasher, or take the silicone slip off and wash that separately. The only thing to watch out for is don’t take the small silicone ring wedged inside the lid out - it’s what stops the bottle from leaking. I took it out once to clean it thinking I was being thorough, and it never really fit back in properly and it was a pain, and I’m kind of glad the lid broke so I could get a new one. That was not a design fault, that was just me taking things apart when I shouldn’t have.
Change the colour to match your outfit
The coloured silicone sleeves are also sold separately and are interchangeable, so you get a different colour for every day of the week. Not strictly essential, but a pretty cool feature nonetheless that makes this brand stand out. You can also get different kinds of sleeves, like spiky ones and smooth ones in different colours to suit your vibe.

Water tastes better from glass
I know that sounds subjective, but it’s true - the water tastes fresher and cleaner than out of a plastic bottle. Once you start drinking from glass, it’s really hard to go back to plastic. Chemicals from plastics also leak into your water bottle over time, which means you’re ingesting a hell of a lot more than water at the end of the day, which is kind of terrifying when you think about it. Whether you get a Bkr bottle or not, plastic bottles should be a thing of the past.

vegan and cruelty-free
It seems odd for a water bottle to be vegan, but animal products make their way into the strangest things so it’s definitely worth noting. I make an effort to promote companies that are clean and ethical, and Bkr definitely fits that category - even the lip balm is vegan. Winner!
Cons
The one con I can think of is that you can’t fit ice into the bottle. That’s not a huge problem for me but, from what I understand, people from the US love having ice in their drinks and, unless you have an ice tray that makes tiny cubes, the Bkr bottle doesn’t cater for that. You would think ice would be more of a deal in hot Australia, buuuuut it’s not ¯\_(ツ)_/¯
What’s your favourite glass bottle? Let me know in the comments below!
Like it? Pin it!

You might also like…
AFFILIATES
I use affiliate links and advertising on this site, which just means that if you buy a product through a link on this site, I'll get a small commission (not all links are affiliate links). This is because all the content I provide here is free, and I want to keep it that way :)